Making a character from the cartoon “Kitten Woof”
Watching a cartoon before class will help to interest a 3-4 year old child in the creative process.
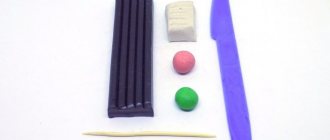
Select material for sculpting:
- plasticine in the required proportions, which should be warmed up and kneaded before starting work;
- plastic stack;
- match;
- wooden board or paper to protect the table surface.
We make a cat named Woof from plasticine with our hands:
- Roll out an oval from light brown or red material. Carefully flatten the workpiece.
- We form a cake from the darker material. We connect parts of different colors.
- For the muzzle we make a ball from dark material. We trim the edges of the figure and smooth out the joints.
- On the sharp part of the muzzle we sculpt the kitten’s nose and form triangular ears. Attach to the head.
- We sculpt the eyes in a light brown shade, making the middle out of black material. Add blue details and white droplets for highlights. We attach the eyes in the right place.
- From a light brown material we fashion something like a cushion for the kitten to sit on. Flatten one side to form a flat surface. We sharpen the second one to attach it to the head.
- We draw fingers on the figure’s paws. Forming the cat's tail.
- We connect the body to the head using a match. We attach the tail made earlier.
More interesting: How to make a mouse from plasticine - step-by-step instructions for children
A cartoon kitten made of plasticine will appeal to children and adults. The toy has a place in the collection of crafts.
One balloon kitten
If you are considering the topic of plasticine crafts for children and are looking for something simple but beautiful, then the next cat is for you. This character is funny, well-fed and very cute.
Making such a fat cat is very simple, for this:
- Preparing plasticine for work. Choose any shade you like. Heat the material and roll it into a ball. The main figure can be any size. Do you want to get the most well-fed cat? Make a very large ball.
(Step 1) - Additionally, roll a few more balls. We form ovals from the obtained parts. We attach it to the body. Pay attention to the photo of the cat; the hind legs should be slightly larger than the front ones.
(Step 2) - We complement the main figure with a tail. The presentability of our fat man will depend on the length. Roll out the worm, attach it to the ball and wrap the end. Entrust this work to your child, because these plasticine crafts for children are very simple.
(Step 3) - Forming the ears. Roll two small balls or one large one and flatten the workpiece. Cut out the triangles. Carefully attach the finished triangles to the ball and slightly turn the ears at the end inward for volume.
We figured out how to mold the base of a cat from plasticine; it needs to be supplemented with small elements so that a certain facial expression appears.
Follow these steps:
- We continue to work with the main color. Let's make two peas. They will become cheeks. We attach them to the muzzle and carefully smooth them out.
- To make the cat have the same facial expression as in the photo, make a third ball and place it below the cheeks.
- Let's make a nose. Choose a color. Of course, pink will look cutest. Roll the ball and secure it in place.
- Now you need to make the eyes. Wash your hands before handling them, because you will have to work with white. Dirty hands may leave marks on the material.
- Roll out two white peas. We attach the pupils to them; it is not necessary to use plasticine as the pupil, you can place beads of the color you need here.
- We can't leave our furry pet without a mustache. To make them you can use white thread or fishing line. Gently insert the mustache into your cheeks.
- We complete the creation of the cat. Use small white triangles to make fangs for the cat. Draw the animal’s fingers, holes on its nose and cheeks.
Look, we learned how to mold a well-fed cat from plasticine! This toy is ideal for any children. If you want to keep this plump cat company, you can choose a friend for him from the article on how to make animals from plasticine.
On the topic: methodological developments, presentations and notes
State budgetary preschool educational institution kindergarten No. 81 of a general developmental type with priority implementation of activities for the cognitive and speech development of children in Vyborg paradise.
Improve your ability to sculpt a cat using a combined method.
notes on the productive activity of modeling.
Summary of a modeling lesson in the middle group.
The purpose of the GCD: To identify children’s skills in sculpting a four-legged animal - a cat. Program content: Educational: To identify children’s skills in using sculpting techniques: rolling up plastic.
Notes on modeling for the middle group.
Goal: to teach how to sculpt an image of a house in bas-relief. Objectives: Educational: To consolidate the ability to sculpt columns from plasticine and make a house out of them; To form generalized ideas about the house.
Source
Preview:
Summary of GCD for modeling in the middle group “Kitten”.
Teach children to sculpt a four-legged animal - a cat.
Reinforce sculpting techniques: rolling plasticine between palms; practice using pinching and pulling techniques; consolidate the ability to connect parts, pressing them tightly against each other, and smoothing seams; continue to introduce children to the properties of plasticine (soft, pliable, able to take any shape). Continue learning how to work with a plasticine stack.
Cultivate accuracy when working with plasticine. Cause a positive emotional response to the overall result.
Vocabulary work: stack, plasticine soft, pliable, multi-colored.
Preliminary work: conversations with children about pets, looking at illustrations, reading fiction and educational literature, riddles, didactic games: “Who lives where?”, “Where is whose cub?”, “Find out by description.”
Materials: plasticine on boards (for each child) and separately on plates, stacks, oilcloths, boards, modeling support diagram with the image of a kitten, magnetic board, multi-colored balls.
Let's say "Hello!" each other.
Hi all!" and “Good afternoon!”;
Q: Guys, look, guests have come to us. Let's say hello to them.
Q: Guys, come to me, please. Look what we have on the table?
Q: What kind of pet do you think likes to play with balls?
Q: Look how many glomeruli there are, are they the same? What color and shape are they?
D: red, yellow, etc. multi-colored, round.
Q: Guys, there are balls, but there is no one to play with them. What can we do?
Q: Let's make kittens so they can play with them.
Q: And in order for your ears to listen to me carefully, and your eyes to see what I’m going to show, let’s play with you.
Wash your cheeks with your paw (act in accordance with the text)
Right eye left eye
Let's sculpt a cat
A cat can be molded in two main ways - from a single piece of plasticine or from separate parts. The figurine can be in different positions (sitting, lying, standing) - it all depends on the imagination of the creator. The simplest cat figurine is made from three pieces of plasticine (torso, tail and head).
To create such a craft, you need to prepare plasticine (black, orange, white, brown or another color), stacks and a modeling board.
First you need to divide the block of plasticine into three different parts: the largest part (about 2/3 of the block) will go to the body, a small piece to the tail, and the rest to the head.
You can see step by step how to mold a cat using the photo instructions below:
Using the same principle, a figurine of a stretching cat is made. To do this you need to do the following:
- Roll a small thick sausage from plasticine of the selected color;
- Make cuts on both sides with a stack;
- Bend the workpiece as shown in the photo:
- Roll a large ball for the head and two small ones for the cheeks;
- Assemble the face by gluing the cheeks and nose;
- Make eyes from white and green plasticine, form triangular ears from two small pieces, roll black plasticine into a sausage for the mustache;
- Add eyes, ears and mustache to the head;
- Attach with a match or glue the head to the body;
- Roll the sausage, bend it and attach it to the back of the figure in the form of a tail.
Related article: Do-it-yourself chair for a doll from a plastic bottle according to a master class
The cat is ready!
A simple but beautiful cat can be sculpted in a sitting position. For this you will need:
- plasticine in brown, white, red, green and blue colors;
- wire;
- matches;
- stacks;
- scissors.
Progress:
- Make a ball from a small piece of brown plasticine;
- To create eyes, roll paired balls of different sizes from white, green and black plasticine;
- Make eyes and glue them to the ball;
- For the cheeks, nose and mouth, make red and white balls;
- Completely assemble the muzzle;
- Make triangular ears from small pieces of plasticine and attach them to the head;
- Cut the insulated wire into six pieces to create a mustache (if you use bare wire, you need to wrap each piece with a small amount of plasticine);
- Stick a mustache into the muzzle (three on each side);
- Roll a cone out of most of the brown plasticine and press down on top and bottom;
- Roll up blanks for paws: balls and droplets;
- Glue the legs to the body: balls in front, droplets on the sides;
- Treat the paws with a stack to make fingers;
- Roll a small sausage from a piece of brown plasticine, bend it and attach it to the body;
- Using a match, connect the head and body;
- Make a white shirtfront: roll a piece of plasticine into a droplet and flatten it;
- Glue the shirtfront to the chest, and also decorate the tip of the tail with white plasticine;
- Make multi-colored balls for the cat: roll a small ball and a long rope, wrap the rope around the ball;
- Set up a composition of a cat and glomeruli.
You can assemble a cat figurine from several parts using matches or toothpicks. To do this, you need to perform the following steps step by step:
- Divide the plasticine block into three equal parts;
- Roll one part into a ball;
- Separate a small piece from the other part (it is needed for the tail), make a sausage, and roll the remaining part into a ball (head);
- Divide the last part into six equal pieces and roll them into balls;
Related article: Twisting: patterns for beginners with photos of flowers from one ball
- Make a thick sausage (body) from a large ball;
- Roll four identical sausages (legs) from small balls, divide the remaining balls and make ears, cheeks and nose out of them;
- Attach the tail to the body (cover);
- Glue the cheeks, ears and nose to the head;
- Attach the paws and head to the body using matches (toothpicks);
- Make eyes from white and black plasticine cakes.
The cat is ready!
The paws do not need to be pierced with matches, but simply glued to the body. Then you can bend your front paw as if a cat is washing itself.
From a single piece of plasticine you can make a cat in a small hat. To do this, you need to make blanks: mold a cat’s body from a cylindrical piece of plasticine, roll up a tail, make eyes, cheeks, a nose, paws, a hat and a mustache. Then put everything together.
Fans of the popular doll will need instructions on how to make a cat from Monster High.
You can also make a dog - Watzita.
