Article Summary of GCD application in the senior group. Author: Yulia Sergeevna Gladkova
Author: Yulia Sergeevna Gladkova The abstract was developed with the aim of creating an image of a village street in a collective application, as well as enriching children’s knowledge about Moscow.
Used in an open lesson to show parents.
Brief description of the plot:
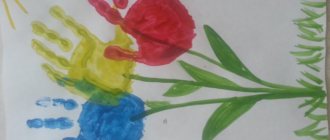
The fairy-tale character Carlson, having visited the Russian capital Moscow, flies to our native village to find a new home. He wants to live on a very beautiful roof, and the guys are invited to become architects and make Carlson's dream come true.
Children get acquainted with some buildings in Moscow and the profession of an architect.
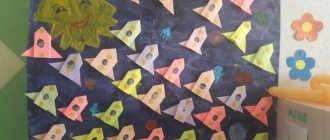
Author: Yulia Sergeevna Gladkova Abstract of OD in the senior group Artistic creativity (application) Educator Gladkova Yu.S. Topic: Houses on our street Goal: creating an image of a village street in a collective application; enriching knowledge about Moscow - the capital of our Motherland Objectives: - learn to convey the image of a village street in applique - clarify ideas about the size of objects - practice cutting techniques in a straight line and along an oblique line - consolidate the ability to carefully use scissors, a brush, glue - develop the ability to work collectively , enjoy the results of your work - expand children’s knowledge about Moscow - introduce them to the professions of a builder and architect. Progress of the lesson: - Guys, a guest has arrived! The teacher shows Carlson - Do you recognize him? Where does he live? (On the roof) -Carlson told me an amazing story! It turns out that he just flew in from Moscow! -Do you know that this is Moscow? (Capital of Russia) -He visited the roofs of many famous buildings in Moscow. Here are just a few of them. Photos of the Bolshoi Theater, Borodino Panorama, and the Kremlin are hung. Children examine the features of architecture, their differences from each other and from ordinary houses -Who do you think created such beauty? (Architects, builders) - Guys, our guest seems sad. I think I know the reason. After all, Carlson loves to live on roofs, he has seen such beautiful buildings, he probably wants to live on the roof of some beautiful house, right? Carlson nods. - let's build Carlson a whole street of beautiful houses with comfortable roofs. You will all now turn into architects and builders! Physical Education Minute: -Shall we transform? Then repeat the movements after me: - We are cheerful guys, we love to run and play. We want to grow up quickly to become builders! We will build houses with windows and roofs, We will glorify Mothers for centuries, you will hear about us! -And now, dear builders, choose the material for your houses, think about what they will be like - large or small, high or low, how many floors and what kind of roof (the location of windows and doors is specified). And get to work. (Together with the children, we find a place in the overall composition of each individual application) - Carlson really liked your houses, he will live on all the roofs in turn! Who were you today? (builders, architects) -Carlson tells you: Thank you, guys! and is waiting for you to visit. And now it’s time for him to go to the roof. Goodbye! comments powered by HyperComments
Summary of a lesson on appliqué for children of older mixed age groups. "Volume snowflakes"
Summary of a lesson on appliqué for children of older mixed age groups.
"Volume snowflakes"
Additional education teacher T.N. Sulgina.
Target:
create conditions for the applicative image of “Volume Snowflakes” with older children.
Objectives: Educational:
Continue to introduce children to the appliqué technique.
Learn to create an image of “Volume snowflakes”, making a composition of several parts, fastening them together. Continue to introduce children to seasonal natural phenomena. Developmental:
Develop fine motor skills while working with paper.
Educational:
To cultivate a love for inanimate nature, the ability to see beauty in the environment.
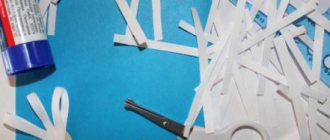
Materials and equipment:
2 pieces of A4 paper for each child, brushes, PVA glue, napkins, scissors, pencil.
Preliminary work:
drawing snowflakes, watching snowflakes while walking, reading poems about snowflakes.
Progress of the lesson:
1. Organizational part
Calm music sounds. The Snow Queen (teacher) enters. Queen: Hello, guys! Children greet the queen. Queen: How beautiful it is here, almost like in my kingdom. It's always winter in my country, and beautiful snowflakes are always flying in the air. They spin and dance. Now I’m visiting you and I really miss my snowflakes. (The Queen becomes sad) Guys, let’s work together to make a magical country like mine here?! And I will help you with this. The children express their desire to help the queen. Queen: Today I will show you how to make a three-dimensional snowflake. First you need to get your fingers ready for work!
Finger gymnastics “Snowflakes”
I stand and catch snowflakes in my palm (Rhythmic strikes with the fingers of the left hand, starting with the index finger, on the palm of the right hand.)
I love winter, and snow, and snowflakes (Rhythmic strikes with the fingers of the right hand, starting with the index, on the palm of the left hand.)
But where are the snowflakes? (When asked, clench your fists)
There is water in the palm, (to answer - unclench.)
Where have the snowflakes gone? Where? (For the first question, clench your fists, for the second, unclench your fists.)
The fragile pieces of ice-rays melted. (Small shaking with relaxed palms.)
As you can see, my palms are hot.
2. Practical part
Queen: Guys, let’s remember what a snowflake looks like (shows the finished “Volume Snowflake”). Look how beautiful and big it is, what beautiful and elegant rays it has. Queen: So, to create such a three-dimensional snowflake, you must first prepare 2 sheets of paper of the desired shape, and then assemble our three-dimensional snowflake from them, like a construction set.
We take a sheet of paper, fold it in such a way as to make a square (I show the finished drawing visually on the easel), cut off the excess part. Fold the resulting square in half, corner to corner. What geometric figure did you get? That's right, a triangle! On our triangle with you, we use a pencil to mark these checkmarks, take scissors, cut our checkmarks on the triangle. Now we unfold the workpiece, the workpiece is almost ready, all that remains is to glue the middle petals into the middle. That's almost the entire skeret of a three-dimensional snowflake.
Physical exercise "Snowflakes-ballerinas"
Children run in a circle and spin with the words: To the music of the blizzard, friends are spinning, snowflakes are spinning - Winter ballerinas. Tired of spinning (children crouch). They sat down on the ground and listened to the music of the Winter Blizzard. They only rested for a moment - And again the wind made them spin (children spin) in a cheerful ballet.
We've had a little rest, now let's continue. Please make the same blank from the second piece of paper (do it).
Guys, our snowflake is almost ready, let’s glue two of our blanks together in half, just watch carefully, the petal should have its own house so that the snowflake is not rare. It should turn out fluffy.
When our snowflakes are dry, all that remains is to tie a ribbon to decorate the room with our snowflakes.
3. Summary of the lesson
Queen: Well, we got a lot of snowflakes! Look at them. What are they? Children's answers (beautiful, similar to the Kolelev snowflake, not quite similar, etc.) Thank you guys, now I feel like I’m at home, among many snowflakes! Goodbye! (leaves)