List of dance movements used in working with preschoolers
Municipal autonomous preschool
educational institution of Beloyarsky district
“Kindergarten of a combined type “Snegirek”, Beloyarsky”
Toolkit
List of dance movements used in working with preschoolers
Compiled by: additional teacher
education 1st qualification category
Beloyarsky
2015
Explanatory note
One of the richest and most effective means of aesthetic education for preschool children is choreography.
Dance is a set of expressive and organized movements, subordinated to a general rhythm, embodied in a completed composition. It is important to teach a child to understand the language of dance and use it for self-expression.
This manual is devoted to one of the components of dance - vocabulary, that is, movements.
The purpose of this manual is to help music directors, educators and teachers of choreographic studios (clubs) in organizing choreographic work in children's educational institutions.
The manual is a methodological support for programs on rhythm, choreography, and musical education and contains a description of a variety of dance movements, basic positions of arms and legs, and positions in pairs. The teacher is given the opportunity to select and vary movements according to the degree of complexity, taking into account the age characteristics, perception abilities and preparedness of the children.
I hope that the material in the methodological guide “List of dance movements used in working with preschool children” will help preschool teachers to make their work more competent, interesting and entertaining.
Starting leg positions
The basic stance is heels together, toes apart. For older children, the toes of the feet are turned as far as possible to the sides (in choreography - 1st position), for younger children - at an angle of 450 (“house”).
“Narrow path” - heels and toes together, feet parallel (for all age groups) in choreography - 6th position.
“Wide path” - feet shoulder-width apart, parallel.
Sit on your knees - lowering yourself low, sit on both knees. Knees pressed firmly to the floor.
While in any of the positions described above, the legs should be kept straight, the gluteal muscles tense, the back straight, the stomach tucked, the weight of the body should be evenly distributed on both feet, resting on the toes. There is no need to require full eversion of the foot in positions from preschoolers. It is enough if the toes are turned at right angles.
Initial hand positions
Below - arms are lowered along the body.
In front - arms extended at chest level (parallel to the floor).
At the top - arms are raised as high as possible above the head. At a younger age, the height of the arms is arbitrary.
To the sides - shoulders and arms form one straight line.
Hands can be open - palms up (“towards the sun”).
Hands can be closed - palms down (looking at the floor).
“Belt” - palms on the waist, thumbs behind, the rest in front. Shoulders and elbows are slightly laid back.
“Fists on the side” - the fingers are slightly clenched into fists, which are placed on the waist with the back side inward.
“Shelf” - arms bent at the elbows, folded in front of the chest. The right hand rests on the left hand (the hand of the right hand lies on the elbow of the left and vice versa).
“Matryoshka” - hands (shelf), the index finger of the right (left) hand makes a “dimple" on the cheek of the same name. The left (right) palm supports the elbow of the other hand and is slightly moved forward (in weight).
“Skirt” - with the thumb, index and middle fingers (pinch) of both hands, take the edges of the skirt and spread your arms to the sides - up.
“Apron” - grab the front of the skirt with a pinch from both sides and lift it up.
Behind the back - hands are connected behind the back just below the waist. The back of the palm of the left hand lies in the right palm. The fingers are slightly clenched, the shoulders and elbows are pulled back.
Hand positions in pairs
•Children stand nearby (look in one direction):
“Arrow” - hands are connected in the “Forward” position; the name of the “arrow” changes depending on the angle: narrow, wide.
“Collars” - hands are connected in the “Up” position. The girl's palm is placed underneath the palm of the boy's closed hand.
“Weave” - hands are connected crosswise.
“Bow” - the same, but the elbows are rounded and raised forward - up, the arms are not tense.
“Sleigh” - the boy stands in front of the girl with his back to her and gives her both hands back. The girl stands facing the boy's back and takes his hands.
• Children stand with their shoulders of the same name together (looking in different directions):
“Lamb” - the arms of the same name are connected crosswise at the elbows, the hand is clenched into a fist. Free hands in any of the listed positions.
“Spinner” - hands of the same name are connected in the “Up” position.
Spin like a spinner - joining your hands in the “Spinner” position, move as if catching up with each other in place.
“Star” (three or more children) – stand behind each other, joining hands of the same name in the “Up” position.
Spin like a star - joining your hands in the “Star” position, move as if catching up with each other in place.
“Double belt” - if the children stand with their left shoulders facing each other, then with their left hands they clasp the partner’s waist from the front and vice versa. You can change the shoulders for each musical phrase.
•Children stand facing each other:
“Boat” - hands are joined in the “sideways” position. They are open at chest level.
“Collars” (narrow) - arms connected at the top, (wide) - to the sides - up.
Hand movements
“Breeze” - smooth cross movements of the arms above the head. The work involves the shoulder, forearm, and hand.
“Ribbons” - alternate smooth movements of the right and left hands up and down in front of you.
“Wings” - smooth flapping movements with arms spread to the sides. It should be remembered that when raising the arms, the hands are lowered, and when lowering the “wing” arms, the elbows are slightly bent, the hands are expressively raised up.
“Singing hands” - from the “To the sides” position, with a soft movement of the hands, they move towards each other, as if collecting elastic air in front of them. The arms are also moved plastically to the sides. The body helps express the movement by leaning forward slightly and then bending back slightly.
“Motor” - arms bent at the elbows in front of the chest, palms spinning around one another. Fast or slow.
Claps
“Ladushki” - clapping the palms in front or behind (behind the back is performed with free, not tense, arms bent at the elbows, moving towards each other.
“Pancakes” - on “one” - strike with the right palm on the left, on “two” - vice versa (the hands are relaxed, staccato), with a turn of the hand.
The claps can be loud or quiet, depending on the dynamics of the musical image.
“Scymbals” - younger age - “shake off your palms”, older age - the palms of both hands imitate the sliding movements of orchestral cymbals: the right hand swings from top to bottom, the left hand moves from bottom to top.
“Tambourine” - the left palm is the supporting one (like the lid of a tambourine, the fingers of the right hand hit it. Change the supporting hand. The blow is strong.
“Bells” - active claps overhead. The movement is bright, with a large scope of arms slightly bent at the elbows. This movement requires complete freedom of the upper shoulder girdle.
“Bells” - small claps with the straight fingers of one hand on the palm of the other. The blows are light and quiet. The arms can be bent at the elbows, straightened or raised to the side (to the right or left). There are possible options for “bells” that sound near the right ear or near the left.
“Catching mosquitoes” - light, ringing claps with straight palms to the right, to the left of the body, above and below with arms bent at the elbows.
Claps in pairs:
“Wall” - the palms of the hands bent at the elbows (in front) go towards the partner’s hands. The clap is performed in the middle of the distance between the children.
“Big tambourine” - one of the partners alternately holds open their palms with their elbows bent or arms extended forward, and the other hits them with their palms.
“Cross” - the technique is the same as in “Tambourine”, only the partners’ hands move crosswise (right with right and vice versa).
Types of step
Calm walking (walk) - the step begins with the toe of the extended right (left) leg, the toe is turned to the side. The amplitude and length of the step are small. Hand movement is arbitrary (can be in any position).
Step on the entire foot (stomping) - performed with very little forward movement: the knees are slightly bent, the body is straight, the legs are placed on the entire foot with a slight stomp, they are almost not lifted from the floor, but they are not shuffled either. The child moves as if “on wheels”; hands can be placed on the belt with fists.
Round dance step - this type of step is used in round dances. It differs from a simple step in its great smoothness and determination. Good posture and a raised head give the movement an aspirational character. The movement is associated with music of a leisurely, calm nature.
Added round dance step (without changing the supporting leg) - for “one” - a small step from the toe of the right (left) foot, for “two” - the toe of the other leg is placed against the heel of the supporting leg, etc.
Added round dance step (with alternate change of supporting leg) - rhythmic step pattern: 2 eighths, a quarter. On “one” - a long step from the toe of the right (left) foot, and on “and” - placing the left (right) toe to the heel of the supporting leg. On “two” - step in place from the right (left) foot. On the next beat, move from the other foot.
Quadrille step - on "one" - a step with the right (left) foot, on "two" - a light sliding kick with the heel of the other foot next to the supporting one. After the heel strike, the non-support leg extends forward, starting the next step. This step can be performed with a slight half-squat on the count of two.
High step - the leg does not move forward, but bends at the knee and rises up at an angle of 90 degrees. the toe is pulled down as far as possible or the foot is parallel to the floor) “iron”. This is a step in place or moving forward (in the form of a cockerel, horse).
Step with a stamp in place - for “one time” they take a step in place with the left foot next to the right; on “two” - stomping with the right foot in front of the left, without transferring the weight of the body to it. Then on “one” step in the place of the right one, placing it next to the left one; on “two” - left foot in front of right; everything repeats itself from the beginning. The emphasis constantly falls on the stomp (on “two”).
Variable step - performed for 2 measures in a two-beat measure or 1 measure in a four-beat measure. The step is based on a round dance step. On “one” and “two” of the 1st measure - long alternating steps from the toe of the right (left) foot. On “one” and “two” of the 2nd measure - three short alternating steps from the toe of the other foot. There is a pause on “and”. The next step begins with the toe of the left foot.
Side step - one step - to the right (left), one step - the left (right) foot is placed on the supporting leg. Toes together or apart, depending on the starting position (“narrow path” or main stance)
Side fall - one step - a side step from the toe of the right (left) foot, the knee bends (like a small squat). On “two” - the toe of the other leg is placed against the supporting heel from behind, at the same time the knee of the right (left) leg is straightened. The “falling” element can be performed in place at a “point” or with a rotation around its axis (“clock”).
• Step on toes:
A spring step is a “spring” with movement along the entire foot.
A sneaking step is a “spring” with advancement on the pads and low half-toes (the image of a doll, ballerina, etc.). The movement is performed only in the preparatory group.
Side step ("cross") - one step - step to the side from the right (left) foot. On “two” - the left (right) leg is placed crosswise in front of it.
A circular step back and forth (“pigtail”) is a round dance step, only the legs are placed not at an angle of 450 to the right or left, but crosswise in front of the right or left. When moving this step back, the left foot is placed behind the right and vice versa.
Mincing step (“floating”) is a smooth round dance step moving forward (backward) on the toes. When performing it, only the leg lifts are bent. Performed at an older age.
Jumping
• On one leg:
“Point” - starting position of the legs - basic stance, arms in any position. After the push, land at the same point, placing your foot first on the toe, then on the entire foot. The other leg (non-supporting) is bent at the knee and laid back. Change the supporting leg.
“Clock” - the technique is the same, only the jump is performed with a rotation around its axis. The supporting leg rotates evenly (like a clock hand) in a circle. For 8 jumps, the child must make a full rotation - 360 degrees.
On “one, two” - left shoulder forward,
On “three, four” - with your back,
At “five, six” - with the right shoulder,
At “seven, eight” - with your face.
“Ladder” - the technique is the same as in the “point”, but moving forward or backward by a certain number of jumps (ladder steps).
“Fence” - a side jump to the right (on the right) or to the left (on the left leg). There are as many jumps as there are boards in the fence.
“Sun” - the technique is the same as in the “point”, only moving along a circle of any diameter (“around the sun”).
• On two legs:
“Jump” - alternately jumping on the right and left legs.
The amplitude of the jump depends on the nature of the music. It can be performed in place, moving forward or backward, as well as rotating around its axis (“clockwise”).
“Jumping with kicking the legs back” - “one time” - a “point” jump with the supporting leg, at the same time the non-supporting leg bends at the knee and is thrown back, heel up. The non-support leg can be supported by
weight or placed on the back of the toe. To “two” – change of supporting leg.
“Funny legs” (jumps with legs thrown forward) - the right and left legs are often thrown forward alternately, as if boasting to the audience. The toe of the foot is pointed down towards the floor. Arms to the sides, palms facing forward with the inside.
“Rocking chair” - starting position - legs together. Then the right leg is brought forward a little and, as it were, pushes the left leg back, then it is brought forward again, and the left one returns to its place. The movement is repeated continuously.
“Scissors” - for “one” - push, spread your legs to the sides and land in the “Wide path” position. On “two” - push and cross your legs at the “point” in front (right foot in front of the left and vice versa when repeating).
“Cross” - on “one” - pushing and crossing the legs at the “point” (right leg in front), on “two” - the same thing, only the left leg is in front.
“Broom” is the same as “rocking chair”, only with a change of legs.
“Side gallop” is the same as a side step, only on a jump.
“Gallop forward” - the technique is the same, only moving forward, not to the side. At “one” - a push and the right (left) leg is carried forward, landing from the toe. The toe of the other foot is placed behind the heel of the supporting leg. On “two” - repetition.
“Rope” - one time - jump - “point” on the left (right) leg, at the same time the other leg is placed behind and the toe is brought forward with a sliding movement on the floor. On “two” - everything is repeated on the right (left) leg. This jump can be performed either in place or moving forward.
Movements
Starting position for all options (unless otherwise specified): legs in the main stance, arms in any position.
“Small swing” - children stand holding hands and lightly swinging them from side to side.
“Big swing” - the same thing, only you swing your arms strongly from side to side.
“Spring” - standing still, squat easily, often, continuously. At the same time, the knees are slightly spread to the sides. The back is straight.
“Tap” - standing on your left foot, rhythmically stomp your right foot.
“Three stamps” - (starting position - “Narrow path”) - step in place with the right foot, then the left and again the right, slightly stamping. Repeated from the left leg. The movement is performed ri - the technique is the same, only for “one, and” - stomping with the right (left) foot, and for “two, and” - with the left (right) foot.
“Squatting” - the technique is the same, only “one” means squatting, “two” means returning to the starting position. The amplitude depends on the age of the children. Full squats are performed only in the preparatory group.
In this case, the heels of the feet are lifted off the floor, and the knees are spread apart, the back is straight and strong.
“Half squat” - performed in combination with a “point” - the heel or toe of the right (left) foot at a distance of a small step forward.
“Half squat with body rotation” - do a half squat, turning the body to the right (left) 90 degrees. Turning your body straight, take the starting position.
"Picker":
1st option: the right leg is placed back on the toe, then brought forward to the heel and in place - three stomps.
2nd option: bend the right (left) leg at the knee and place it to the side on the toe, facing outward (heel up); At the same time, slightly bend the knee of your left (right) leg. Extending your right (left) leg straight, place it on your heel. Do a triple stomp, starting with the right (left) foot.
“Vest” - a half-squat for “one time” with a clap of “ladka” with your arms bent at the elbows in front and above. On “two” - straighten up and place your right (left) foot at the “point” in front of the right on the heel. At the same time, extend your arms diagonally: the right one to the side and down, the left to the side and up. On the 2nd beat, do the same on the other foot.
“Samovar” - for “one” - half squat and clap hands with bent elbows in front of the chest. On “two” - straighten up, extend your left hand to the side and up, with your right hand - slap the inside of the shin of your left leg, bent at the knee and raised up at an angle of 900.
“Herringbone” - starting position: legs - “narrow path”, arms - “shelf”, “belt”, etc. For “one” - turn your feet (lifting your toes off the floor) to the right at an angle of 45 degrees. on “two” - the same heels. The movement can be performed both on straight legs and on a “spring”. The back is straight.
“Big accordion” - legs together. On “one” - spreading the toes out to the sides, on “two” – spreading the heels, on “three” – spreading the toes again, and on “four” – spreading the heels. Then return to the starting position in the same order.
“Topotushki” - starting position - legs together, slightly crouched, hands clenched into fists on the belt. Often take turns stomping your feet in place.
“Lever” - feet on the “narrow path”. At “one” - the right arm bends at the elbow and reaches up with the hand, bending at the knee, the first leg rises. On “and” - to the starting position. Everything is on a spring.
“Turn around yourself” (circling) - standing facing the audience, begin to move to the right. It’s easy to turn on your toes around yourself and stop in the starting position.
“Comb” - children stand in a checkerboard pattern. At a distance from each other, facing in the same direction.
“Play with a handkerchief” - holding the handkerchief (folded diagonally) by two corners in front of you at chest level, alternately lifting one or the other corner of the handkerchief.
Bibliography
* “Music in kindergarten.” N. Vetlugina, I. Dzerzhinskaya, L. Komissarova. Moscow, 1989
* “Rhythmic mosaic” St. Petersburg 2000.
* “Top-top heels” by I. Kaplunov, I. Novoskoltsev, I. Alekseev, a manual for music. leaders St. Petersburg 2000
* “Dance rhythm for children” St. Petersburg 2004-2008.
* Illustrated methodological magazine for music directors “Musical Director” 2004-2012.
Get text
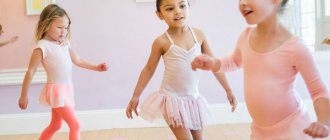
Setting goals correctly
You need to decide in advance why exactly you are sending your child to dance. On the one hand, you can limit yourself to general physical and aesthetic development, and on the other hand, you can aim for serious achievements in the form of victories at city, regional and even international competitions. A child’s passion for dancing may well develop into a full-fledged professional career; the main thing is not to discourage the child from doing what he loves. In this regard, it is important to choose a competent trainer; not only the quality of training, but also the correct motivation depends on him. A good teacher knows exactly not only how to get the best results from students, but also how to interest them. In addition, after a trial lesson, he will be able to draw conclusions about the child’s potential in the chosen dance direction.
We are waiting for the result
You should not listen to teachers who promise to make your child almost a star in just a few lessons. Even the most powerful creative potential is limited by physiology, so progress will be gradual. As a result of regular training in the dance section, the child will learn to control his body, develop a muscular corset, and become resistant to physical activity. In addition, in dance, children will learn to throw out energy and emotions, to realize themselves.
Other important skills that develop gradually include persistence and determination. Almost all children go through an adaptation stage, when the novelty of sensations disappears and interest in activities disappears. It is important to overcome this stage, since the child must understand that results in any endeavor can only be achieved through hard work.