Adults often remember physics and chemistry lessons at school as their least favorite subjects. Incomprehensible formulas and boring experiments can really discourage interest in natural sciences, but it is possible to instill in a child a love of physics and chemistry if you organize experiments for children at home in advance. Such activities clearly demonstrate the laws of physics and chemistry, are fascinating, and understandable even to people far from scientific experiments.
You can conduct home experiments with a child starting from the age when children are able to realize that the results of the experiment were obtained not thanks to magic, but thanks to the laws of nature - approximately at five or six years old, but not earlier than at four years old. And, of course, when conducting experiments, an adult must be nearby and follow safety rules that will help avoid possible injuries to both children and parents.
Safety regulations
But if you plan to conduct more complex experiments, for example, using matches, a gas burner, or chemical reagents, be sure to follow the safety rules:
- put on both yourself and your child the necessary protective equipment: gloves, mask, gown, goggles;
- Tell your child that you should never lean too close to potentially dangerous reagents or fire, and always follow this rule yourself - such precautions will help avoid burns and other injuries;
- cover the table or other work surface with material that will protect the furniture from damage.
The most interesting experiences and experiments
The most interesting experiments for children of any age are quite simple to perform, and they require a minimum of available tools, which can be found in almost every home. For example, a child will probably be interested in participating in the creation of a volcanic eruption, making a multi-colored milk river, seeing the unusual interaction of raisins and corn, and inflating a balloon using an ordinary bottle.
Volcanic eruption - experiment with vinegar and lye
For children from seven years old.
A good experience to introduce a child to the structure of a volcano.
What you will need:
- vinegar;
- two tablespoons of baking soda;
- two containers - for example, flasks, jars or glasses.
Step-by-step instruction:
- Fill about half the container with vinegar.
- Pour baking soda into another container.
- Pour vinegar into a container of baking soda until the foaming soda shoots upward, reminiscent of a volcanic eruption.
- For greater entertainment, you can make a volcano out of plasticine around a container of soda, and add food coloring to the vinegar - this will make the eruption colorful.
Video instruction:
Volcanic eruption with hydrogen peroxide
For children from seven years old.
A good experience to introduce a child to the structure of a volcano.
What you will need:
- 2 glasses (one with clean water, the other empty);
- glass rod or spoon for stirring liquids;
- liquid soap;
- potassium permanganate (mangarnet);
- hydrogen peroxide.
Step-by-step instruction:
- Pour 3-4 granules of potassium permanganate into a tall glass.
- Add 150 ml water and stir.
- Add 1 tablespoon of liquid soap and stir again.
- Add 200 ml of hydrogen peroxide to start a real volcanic eruption!
Video instruction:
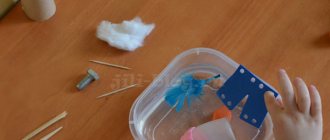
Colorful milk river
For children from four years old.
An experiment with a spectacular milk river delights children of any age - the colored patterns on the milk look like an artist’s masterpiece.
What you will need:
- medium depth plate;
- milk;
- food colorings;
- cotton buds;
- dishwashing detergent or liquid soap.
Step-by-step instruction:
- Pour milk to the middle of the plate.
- Add some dyes of different colors.
- Invite your child to touch the milk with a cotton swab - at first nothing will happen.
- Now soak a cotton swab in dish soap and touch the swab to the milk again.
- Watch the most beautiful milk “pictures” appear.
How to make multi-colored milk - video tutorial:
Journey of Raisins and Corn
For children aged four years and older.
With this experiment, you can demonstrate how smaller particles are “stronger” than larger objects.
What you will need:
- a handful of raisins;
- a handful of corn kernels;
- any clear soda;
- flask or plastic bottle.
Step-by-step instruction:
- Pour the soda into a flask or bottle.
- First you need to pour raisins into the container, let the child watch the movement of the raisins.
- Add corn kernels to the container and watch how the gas bubbles seem to push the corn and raisins to the surface, and when the bubbles burst, the corn and raisins smoothly flow down.
Video instruction:
A balloon that inflates itself
For children from seven years old.
The balloon experiment scientifically substantiates the fact that air can be released in closed containers. For a child's understanding, the experiment is quite simple - it can be shown to a preschool child, provided that an adult does all the work.
What you will need:
- 1 liter plastic bottle;
- soda;
- vinegar;
- teaspoon or funnel;
- one or more balloons.
Step-by-step instruction:
- Pour baking soda into the ball using a spoon or funnel until the ball is about one-third full.
- Fill a quarter of the bottle with vinegar.
- Place the balloon on the neck of the bottle - the soda will begin to pour into the bottle and the balloon will inflate.
How to conduct an experiment with a balloon that inflates itself:
Experiment with soda and phenolphthalein
For children 10 years and older.
The child will become familiar with the concept of “catalyst”.
What you will need:
- phenolphthalein;
- soda ash;
- water;
- cardboard or thick white paper;
- scissors;
- glass mixing glass;
- glass tube or spoon with a long handle.
Step-by-step instruction:
- First cut out figures, such as apples, from thick paper.
- Spray thick paper with phenolphthalein solution.
- Prepare a soda solution: 1-2 tsp. per 100 g of water. Stir.
- Spray the resulting solution onto thick paper until it changes color!
Video instruction:
Effervescent bath bomb
The child will learn how to make a sizzling bath ball, popular among children, with his own hands.
All ingredients are safe for skin.
What you will need:
- baking soda;
- citric acid (3 sachets);
- glass bowl;
- liquid soap;
- spoon;
- food coloring (if available);
- small plastic bomb molds (in the shape of a ball).
Step-by-step instruction:
- Place 3 tablespoons of baking soda in a bowl.
- Add 3 sachets of citric acid.
- Add 1-2 teaspoons of liquid soap to the bowl with the contents and mix everything with a spoon.
- Divide the resulting mass into 2 equal parts.
- Add a different color of food coloring (3 drops) to each part. Mix with gloved hands until the mixture is completely colored.
- Create colorful bath bombs. Place the mixture into plastic molds in the form of a ball.
- Leave the mixture in the mold for 2 hours.
Video instruction:
Card index of games-experiments
Card index of games - experiments
in the senior group
Compiled by: Terentyeva
Natalya Alexandrovna
GO Krasnoturinsk 2022
Target:
To promote the formation and development of children’s cognitive interests through experimental activities.
Tasks:
- Develop the ability to examine objects and phenomena from different angles,
identify dependencies.
- To help children accumulate specific ideas about objects and their properties.
- Develop mental operations, the ability to put forward hypotheses, and draw conclusions.
- Encourage children to be active in order to resolve a problem situation.
- Promote the development of independence and activity.
- It is natural for children to form elementary scientific ideas.
- Develop your own cognitive experience in a generalized form using visual aids (symbols, conditional substitutes).
- Expand the prospects for the development of children’s search and cognitive activity by including them in thinking, modeling and transformative actions.
- Support children's initiative, intelligence, inquisitiveness, criticality, and independence.
- Create conditions for experimental activities.
- Develop the ability to compare, analyze, generalize, establish cause-and-effect relationships, and draw conclusions.
- Promote the development of mental processes (attention, memory, thinking).
- Activate children's speech and expand their vocabulary.
- Continue to develop dialogic and monologue speech.
Grape submarine
Take a glass of fresh sparkling water or lemonade and drop a grape into it. It is slightly heavier than water and will sink to the bottom. But gas bubbles, like small balloons, will immediately begin to land on it.
Soon there will be so many of them that the grape will float up. But on the surface the bubbles will burst and the gas will fly away. The heavy grape will sink to the bottom again. Here it will again become covered with gas bubbles and float up again. This will continue several times until the water runs out. This principle is how a real boat floats up and rises. And fish have a swim bladder. When she needs to submerge, the muscles contract, squeezing the bubble. Its volume decreases, the fish goes down. But you need to get up - the muscles relax, the bubble dissolves. It increases and the fish floats up.
Egg submarine
Take 3 cans: two half-liter and one liter. Fill one jar with clean water and place a raw egg in it. It will drown. Pour a strong solution of table salt into the second jar (2 tablespoons per 0.5 liters of water). Place the second egg there and it will float. This is explained by the fact that salt water is heavier, which is why it is easier to swim in the sea than in a river.
Now place an egg at the bottom of a liter jar. By gradually adding water from both small jars in turn, you can get a solution in which the egg will neither float nor sink. It will remain suspended in the middle of the solution. When the experiment is completed, you can show the trick. By adding salt water, you will ensure that the egg floats. Adding fresh water will cause the egg to sink. Externally, salt and fresh water are no different from each other, and it will look amazing.
How to get a coin out of water without getting your hands wet?
How to get away with it?
Place a coin in the bottom of a plate and fill it with water. How to take it out without getting your hands wet? The plate must not be tilted. Fold a small piece of newspaper into a ball, set it on fire, throw it into a half-liter jar and immediately place it with the hole down in the water next to the coin. The fire will go out. The heated air will come out of the can, and due to the difference in atmospheric pressure inside the can, water will be drawn into the can. Now you can take the coin without getting your hands wet.
Lotus flowers
Cut out flowers with long petals from colored paper. Using a pencil, curl the petals towards the center. Now lower the multi-colored lotuses into the water poured into the basin. Literally before your eyes, flower petals will begin to bloom. This happens because the paper gets wet, gradually becomes heavier and the petals open.
Natural magnifying glass
If you need to see a small creature, such as a spider, mosquito or fly, it is very easy to do.
Place the insect in a three-liter jar. Cover the top of the neck with cling film, but do not pull it, but, on the contrary, push it through so that a small container is formed. Now tie the film with a rope or elastic band, and pour water into the recess. You will get a wonderful magnifying glass through which you can perfectly see the smallest details.
The same effect can be achieved if you look at an object through a jar of water, securing it to the back wall of the jar with transparent tape.
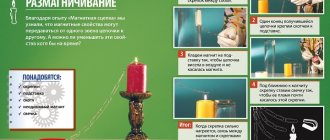
Water candlestick
Take a short stearin candle and a glass of water. Weight the lower end of the candle with a heated nail (if the nail is cold, the candle will crumble) so that only the wick and the very edge of the candle remain above the surface.
The glass of water in which this candle floats will act as a candlestick. Light the wick and the candle will burn for quite a long time. It seems that it is about to burn down to the water and go out. But this won't happen. The candle will burn out almost to the very end. And besides, a candle in such a candlestick will never cause a fire. The wick will be extinguished with water.
How to get water for drinking?
Dig a hole in the ground about 25 cm deep and 50 cm in diameter. Place an empty plastic container or wide bowl in the center of the hole, and place fresh green grass and leaves around it. Cover the hole with clean plastic wrap and fill the edges with soil to prevent air from escaping from the hole. Place a pebble in the center of the film and lightly press the film over the empty container. The water collecting device is ready.
Leave your design until the evening. Now carefully shake off the soil from the film so that it does not fall into the container (bowl), and look: there is clean water in the bowl. Where did she come from? Explain to your child that under the influence of the sun's heat, the grass and leaves began to decompose, releasing heat. Warm air always rises. It settles in the form of evaporation on the cold film and condenses on it in the form of water droplets. This water flowed into your container; remember, you slightly pressed the film and put the stone there. Now all you have to do is come up with an interesting story about travelers who went to distant countries and forgot to take water with them, and begin an exciting journey.
Wonderful matches
You will need 5 matches. Break them in the middle, bend them at a right angle and place them on a saucer. Place a few drops of water on the folds of the matches. Watch. Gradually the matches will begin to straighten out and form a star.
The reason for this phenomenon, called capillarity, is that wood fibers absorb moisture. It creeps further and further through the capillaries. The tree swells, and its surviving fibers “get fat”, and they can no longer bend much and begin to straighten out.
The head of the wash basins. Making a washbasin is easy
Babies have one peculiarity: they always get dirty when there is even the slightest opportunity. And taking a child home to wash all day is quite troublesome, and besides, children don’t always want to leave the street. Solving this issue is very simple. Make a simple washbasin with your child.
To do this, you need to take a plastic bottle and make a hole on its side surface about 5 cm from the bottom with an awl or nail. The work is finished, the washbasin is ready. Plug the hole with your finger, fill it to the top with water and close the lid. By unscrewing it slightly, you will get a trickle of water; by screwing it, you will “close the tap” of your washbasin.
Where did the ink go? Transformations
Add ink or ink to a bottle of water until the solution is pale blue. Place a tablet of crushed activated carbon there. Close the neck with your finger and shake the mixture. It will brighten before our eyes. The fact is that coal absorbs dye molecules on its surface and it is no longer visible.
Making a cloud
Pour hot water into a three-liter jar (about 2.5 cm). Place a few ice cubes on a baking sheet and place it on top of the jar. The air inside the jar will begin to cool as it rises. The water vapor it contains will condense to form a cloud.
This experiment simulates the process of cloud formation as warm air cools. Where does rain come from? It turns out that the drops, having heated up on the ground, rise upward. There they get cold, and they huddle together, forming clouds. When they meet together, they increase in size, become heavy and fall to the ground as rain.
I don't believe my hands
Prepare three bowls of water: one with cold water, one with room temperature, and the third with hot water. Ask your child to place one hand in a bowl of cold water and the other in a bowl of hot water. After a few minutes, have him immerse both hands in room temperature water. Ask if she seems hot or cold to him. Why is there a difference in how your hands feel? Can you always trust your hands?
Water suction
Place the flower in water tinted with any paint. Observe how the color of the flower changes. Explain that the stem has conducting tubes through which water rises to the flower and colors it. This phenomenon of water absorption is called osmosis.
Vaults and tunnels
Glue a tube out of thin paper, slightly larger in diameter than a pencil. Insert a pencil into it. Then carefully fill the pencil tube with sand so that the ends of the tube protrude out. Pull out the pencil and you will see that the tube remains uncrumpled. Grains of sand form protective arches. Insects trapped in sand emerge from under the thick layer unharmed.
Equal share for everyone
Take a regular hanger, two identical containers (these can also be large or medium-sized disposable cups and even aluminum drink cans, although the top of the cans must be cut off). In the upper part of the container on the side, opposite each other, make two holes, insert any rope into them and attach to a hanger, which you hang, for example, on the back of a chair. Balance containers. Now pour berries, candies, or cookies into these improvised scales, and then the children won’t argue about who got the most goodies.
"Good boy and Vanka-Vstanka"
Obedient and naughty egg
First, try placing a whole raw egg on the blunt or sharp end. Then start the experiment. Poke two holes the size of a match head in the ends of the egg and blow out the contents. Rinse the inside thoroughly. Let the shell dry thoroughly from the inside for one to two days. After this, cover the hole with plaster, glue with chalk or whitewash so that it becomes invisible.
Fill the shell about one-quarter full of clean, dry sand. Seal the second hole in the same way as the first. The obedient egg is ready. Now, in order to put it in any position, just shake the egg slightly, holding it in the position that it should take. The grains of sand will move, and the placed egg will maintain balance. To make a “vanka-vstanka” (tumbler), instead of sand, you need to throw 30-40 pieces of the smallest pellets and pieces of stearin from a candle into the egg. Then put the egg on one end and heat it up. The stearin will melt, and when it hardens, the pellets will stick together and stick them to the shell. Mask the holes in the shell.
It will be impossible to lay the tumbler down. An obedient egg will stand on the table, on the edge of a glass, and on the handle of a knife. If your child wants, let him paint both eggs or glue funny faces on them.
Boiled or raw?
If there are two eggs on the table, one of which is raw and the other is boiled, how can you determine this? Of course, every housewife will do this with ease, but show this experience to a child - he will be interested.
Of course, he is unlikely to connect this phenomenon with the center of gravity. Explain to him that a boiled egg has a constant center of gravity, so it rotates. And in a raw egg, the internal liquid mass acts as a kind of brake, so the raw egg cannot spin.
“Stop, hands up!”
Take a small plastic jar for medicine, vitamins, etc. Pour some water into it, put any effervescent tablet and close it with a lid (non-screw).
Place it on the table, turning it upside down, and wait. The gas released during the chemical reaction of the tablet and water will push the bottle out, a “rumble” will be heard and the bottle will be thrown up.
"Magic Mirrors" or 1? 3? 5?
Place two mirrors at an angle greater than 90°. Place one apple in the corner.
This is where the real miracle begins, but only just begins. There are three apples. And if you gradually decrease the angle between the mirrors, the number of apples begins to increase. In other words, the smaller the angle of approach of the mirrors, the more objects will be reflected.
Ask your child if it is possible to make 3, 5, 7 from one apple without using cutting objects. What will he answer you? Now perform the experiment described above.
How to scrub green grass off your knee?
Take fresh leaves of any green plant, put them in a thin-walled glass and pour in a small amount of vodka. Place the glass in a pan of hot water (in a water bath), but not directly on the bottom, but on some kind of wooden circle. When the water in the saucepan has cooled, use tweezers to remove the leaves from the glass. They will become discolored, and the vodka will turn emerald green, as chlorophyll, the green dye of plants, has been released from the leaves. It helps plants “feed” on solar energy.
This experience will be useful in life. For example, if a child accidentally stains his knees or hands with grass, you can wipe them off with alcohol or cologne.
Where did the smell go?
Take the corn pops, put them in a jar that has previously had a drop of cologne in it, and close it with a tight lid. After 10 minutes, opening the lid, you will not feel the smell: it was absorbed by the porous substance of the corn sticks. This absorption of color or odor is called adsorption.
What is elasticity?
Take a small rubber ball in one hand and a plasticine ball of the same size in the other. Throw them onto the floor from the same height. How did the ball and ball behave, what changes happened to them after the fall? Why doesn't the plasticine bounce, but the ball does - maybe because it's round, or because it's red, or because it's rubber?
Invite your child to be the ball. Touch the baby's head with your hand, and let him sit down a little, bending his knees, and when you remove your hand, let the child straighten his legs and jump. Let the baby bounce like a ball. Then explain to the child that the same thing happens to the ball as to him: he bends his knees, and the ball is pressed in a little, when it falls to the floor, he straightens his knees and jumps, and what was pressed in the ball is straightened. The ball is elastic.
But a plasticine or wooden ball is not elastic. Tell your child: “I will touch your head with my hand, but you don’t bend your knees, you won’t be elastic.” Touch the child’s head, but don’t let him bounce like a wooden ball. If you don't bend your knees, then it's impossible to jump. You can’t straighten knees that aren’t bent. A wooden ball, when it falls on the floor, is not pressed in, which means it does not straighten out, which is why it does not bounce. It's not elastic.
The concept of electric charges
Inflate a small balloon. Rub the ball on wool or fur, or even better, on your hair, and you will see how the ball begins to stick to literally every object in the room: to the closet, to the wall, and most importantly, to the child.
This is explained by the fact that all objects have a certain electrical charge. As a result of contact between two different materials, electrical discharges separate.
Dancing foil
Cut aluminum foil (the shiny wrapper from chocolate or candy) into very narrow, long strips. Run the comb through your hair and then bring it close to the sections.
The stripes will begin to “dance”. This attracts positive and negative electrical charges to each other. Hanging on your head, or is it possible to hang on your head? Make a light top out of cardboard by placing it on a thin stick. Sharpen the lower end of the stick, and insert a tailor's pin (with a metal, not a plastic head) deeper into the upper end so that only the head is visible.
Let the top “dance” on the table, and bring a magnet to it from above. The top will jump and the pinhead will stick to the magnet, but, interestingly, it will not stop, but will rotate, “hanging on its head.”
Secret letter
Let the child make a drawing or inscription on a blank sheet of white paper using milk, lemon juice or table vinegar. Then heat a sheet of paper (preferably over a device without an open flame) and you will see how the invisible turns into visible. The improvised ink will boil, the letters will darken, and the secret letter can be read.
In the footsteps of Sherlock Holmes
Mix stove soot with talcum powder. Have the child breathe on a finger and press it to a piece of white paper. Sprinkle this area with the prepared black mixture.
Shake the sheet of paper until the mixture well covers the area where your finger was applied. Pour the remaining powder back into the jar. There will be a clear fingerprint on the sheet. This is explained by the fact that we always have some fat from the subcutaneous glands on our skin. Everything we touch leaves an imperceptible mark. And the mixture we made sticks well to fat. Thanks to black soot, it makes the print visible.
It's more fun together
Cut a circle out of thick cardboard around the rim of the tea cup. On one side, in the left half of the circle, draw a figure of a boy, and on the other side, a figure of a girl, which should be located upside down in relation to the boy. Make a small hole on the left and right of the cardboard, insert the elastic bands in loops.
Now stretch the elastic bands in different directions. The cardboard circle will spin quickly, the pictures from different sides will align, and you will see two figures standing next to each other.
The secret jam thief. Or maybe it's Carlson?
Chop the pencil lead with a knife. Let the child rub the prepared powder on his finger. Now you need to press your finger to a piece of tape, and stick the tape to a white sheet of paper - the imprint of your baby’s finger pattern will be visible on it. Now we will find out whose fingerprints were left on the jam jar. Or maybe it was Carlson who flew in?
Unusual drawing
Give your child a piece of clean, light, plain fabric (white, blue, pink, light green). Tear petals from different colors: yellow, orange, red, blue, light blue, as well as green leaves of different shades. Just remember that some plants are poisonous, such as aconite. Sprinkle this mixture onto a cloth placed on a cutting board. You can either spontaneously sprinkle petals and leaves or build a planned composition. Cover it with plastic wrap, secure the sides with buttons and roll it all out with a rolling pin or tap the fabric with a hammer. Shake off the used “paints”, stretch the fabric over thin plywood and insert it into the frame. The masterpiece of the young talent is ready! It turned out to be a wonderful gift for mom and grandma.
Drowning, not drowning
Place objects of various weights into a bath of water. (Pushes out lighter objects) Lotus flowers. We make a flower out of paper, twist the petals to the center, lower them into water, the flowers bloom. (The paper gets wet, becomes heavier and the petals open)
Wonderful matches
Break the matches in the middle, drop a few drops of water onto the folds of the matches, gradually the matches straighten out (wood fibers absorb moisture and cannot bend much and begin to straighten)
Drop ball
We take flour and spray from a spray bottle, we get droplet balls (the dust particles around themselves collect small drops of water, form one large drop, forming clouds).
Is it possible to glue paper with water?
We take two sheets of paper and move them one way and the other in the other direction. We wet the sheets with water, press lightly, squeeze out excess water, try to move the sheets - they don’t move (Water has a gluing effect).
What does water smell like?
Give three glasses of water with sugar, salt, clean. Add a solution of valerian to one of them. There is a smell (Water begins to smell of the substances that are put in it). Does water have taste?
Give children a taste of drinking water, then salty and sweet. (Water takes on the taste of the substance that is added to it)
Where did the ink go? Transformation
Ink was dropped into a glass of water, and an activated carbon tablet was placed there, and the water became lighter before our eyes. Coal absorbs dye molecules on its surface)
What do birds build nests from?
Purpose: To identify some features of the lifestyle of birds in the spring.
Material: Threads, shreds, cotton wool, pieces of fur, thin twigs, sticks, pebbles.
Progress: Look at the nest in the tree. Find out what the bird needs to build it. Bring out a wide variety of material. Place it near the nest. Over the course of several days, observe what material is useful to the bird. What other birds will fly after him? The result is made up of ready-made images and materials.
Water cycle in nature
Materials: large plastic jar, smaller jar and plastic wrap.
Procedure: Pour some water into the vessel and place it in the sun, covering it with film. The sun will heat the water, it will begin to evaporate and, rising, condense on the cool film, and then drip into the jar.
Rainbow effect
We split visible sunlight into individual colors—reproducing the rainbow effect.
Materials: The necessary condition is a clear sunny day. A bowl of water, a sheet of white cardboard and a small mirror.
Procedure: Place a bowl of water in the sunniest place. Place a small mirror in the water, resting it against the edge of the bowl. Turn the mirror at an angle so that sunlight falls on it. Then, moving the cardboard in front of the bowl, find the position where the reflected “rainbow” appeared on it.
Ice melting in water
Purpose: Show the relationship between quantity and quality from size.
Procedure: Place a large and small “ice floe” in a bowl of water. Ask the children which one will melt faster. Listen to hypotheses.
Conclusion: The larger the ice floe, the slower it melts, and vice versa.
Solar laboratory
Goal: Show what color objects (dark or light) heat up faster in the sun.
Procedure: Place sheets of paper of different colors on the window in the sun (among which there should be sheets of white and black). Let them bask in the sun. Ask the children to touch these sheets. Which leaf will be the hottest? Which is the coldest?
Conclusion: Dark sheets of paper heated up more. Dark-colored objects trap heat from the sun, while light-colored objects reflect it. That's why dirty snow melts faster than clean snow!
colorful plants
Purpose: Show sap flow in the stem of a plant. Materials: 2 yogurt jars, water, ink or food coloring, plant (cloves, narcissus, celery sprigs, parsley).
Procedure: Pour ink into a jar. Dip the plant stems into the jar and wait. After 12 hours, the result will be visible.
Conclusion: Colored water rises up the stem thanks to thin channels. This is why plant stems turn blue.
Literature
- Ivanova A.I. Methodology for organizing environmental observations and experiments in kindergarten. M., 2004.
- Korotkova N.A. The educational process in groups of children of senior preschool age - LINK-PRESS, 2007.
- Korotkova N.A. Cognitive and research activities of older preschoolers //Child in kindergarten. 2003.№3. P.4-12.
- Loktionova Z.A., Varygina V.V. Search and cognitive work in kindergarten // Methodist. 2006. No. 8. P.60-64.
- Murudova E. I. “Introducing preschoolers to the world around them” Detstvo-press 2010.
- Nikolaeva S.N. Methods of environmental education in kindergarten. M., 2002.
- Perelman Ya. I. “Entertaining tasks and experiments.” - Ekaterinburg, 1995.
- Ryzhova N.A. Environmental education in kindergarten.-M.: Publishing house. House "Karapuz", 2001.
- Semenova T.M. Classes in kindergarten: Children's experimentation as a means of cognitive development of preschoolers. – Preschool pedagogy – December 2012.
- Chekhonina O. Experimentation as the main type of search activity // Preschool education, 2007 No. 6. P.13-16.
Chemical experiments for children
Chemical experiments at home are good because they really look like real magic. It is better to conduct joint chemical experiments when the child is already in high school. But if you want to show your preschooler or elementary school student an exciting chemical experience, just carry out the necessary actions yourself, and let the child remain an observer.
Foam Pillar (or Elephant Toothpaste)
For children 10 years and older.
During the experiment, enough foam is formed that would be enough to brush the teeth of an elephant. It can be explained to a child over 10 years old that hydrogen peroxide decomposes into oxygen and water thanks to potassium iodide (or yeast), which acts as a catalyst (accelerator) of the reaction.
What you will need:
- flask or plastic bottle;
- hydrogen peroxide;
- potassium iodide or one tablespoon of dry yeast;
- liquid soap;
- one package of food coloring.
Step-by-step instruction:
- Pour about one glass of hydrogen peroxide into the container.
- Add dye and about 100 ml of liquid soap.
- Add a teaspoon of potassium iodide or a tablespoon of dry yeast pre-diluted in water - be careful and keep a sufficient distance from the container, the reaction will begin instantly.
Video instructions for the experiment:
Tomato glowing in the dark
For children from 10 years old.
If you carry out the experiment correctly, without excluding any of the necessary ingredients, the result will be a tomato that will glow in a dark room like a small night light. Experience will show the child that chemicals can change the properties of even representatives of the plant world.
Attention! Strictly follow safety rules when experimenting with tomatoes. If concentrated hydrogen peroxide gets on your skin, immediately wash the affected area with water. The luminous tomato obtained as a result of the experiment should never be eaten - it is life-threatening.
What you will need:
- tomato;
- Matchbox;
- White bleach or other cleaning product containing sodium hypochlorite;
- syringe;
- 10 tablets of hydroperite;
- water;
- container for mixing ingredients (for example, a deep cup).
Step-by-step instruction:
- First you need to clean the sulfur from 10-12 matches.
- Add the cleaning agent to the sulfur and mix thoroughly.
- Take the resulting mixture into a syringe and inject it into the tomato.
- Dilute 10 tablets of hydroperite in 15 ml of water - you get a 30% solution of hydrogen peroxide.
- Take the resulting solution into a syringe and inject it into the tomato.
- Take the tomato into a dark room and watch how it glows.
How to make a glowing tomato at home:
Dry fuel snakes
For children over 10 years old.
An impressive experiment will show how interesting the effects can be when different chemicals interact and are exposed to high temperatures.
What you will need:
- dry fuel (can be bought at a hardware store);
- a package of calcium gluconate (sold in pharmacies);
- the surface on which you will conduct the experiment and which you will not mind throwing away later (for example, a small board);
- lighter for a gas stove;
- kitchen tongs.
Step-by-step instruction:
- Place a tablet of dry fuel on your work surface.
- Light the fuel.
- Using tongs, place 6-8 calcium gluconate tablets onto the dry fuel.
- Watch how snakes begin to “grow” from the tablets.
Video instruction:
Experiments with water for children
Experiments with water can be carried out with children of any age - such experiments are simple, spectacular and safe. Children can carry out most of the experiments independently under the guidance and supervision of an adult.
Storm (tornado) in a bottle
For children from four years old.
The kid will see how a spiral funnel-shaped vortex forms in a bottle of water - a child of preschool or primary school age is unlikely to understand such complex terms, so you can simply say that now you yourself will make a storm using ordinary water.
What you will need:
- two plastic bottles with a volume of 1-1.5 liters;
- insulating tape;
- water.
Step-by-step instruction:
- Pour water into one bottle so that there is about 1 centimeter left to the neck.
- Using electrical tape, attach the second one on top of the first bottle - the necks of the bottles should coincide with each other.
- Turn the resulting structure over and shake it well - the water will rush into the bottom bottle, simultaneously forming a water vortex.
- By constantly turning the bottles over, the experiment can be repeated many times.
Video instruction:
Experiment with water, oil and salt
For children 4 years and older.
The experience will demonstrate to the child the properties and features of the interaction of substances that we use every day.
What you will need:
- water;
- vegetable oil;
- salt;
- food coloring;
- cup.
Step-by-step instruction:
- Fill the glass two-thirds full with water.
- Pour in a little vegetable oil - it is lighter than water, and a layer of oil will remain on top without sinking to the bottom of the glass.
- For greater clarity, pour food coloring into the glass.
- Slowly pour salt into the resulting solution - about one teaspoon.
- You will see how the oil and tinted salt sink to the bottom - although the oil is lighter than water, the heavier salt drags the oil down with it.
Video instruction:
Walking Rainbow
For children from 4 years old.
During the experiment, the baby will study different colors and simply admire the unusual phenomenon. Using an example, a school-age child can be told a little about the principle of communicating vessels: that identical liquids in interconnected vessels are always at the same level at rest.
What you will need:
- seven disposable cups;
- water;
- multi-colored food colors;
- paper towels.
Step-by-step instruction:
- Pour water into four glasses: the glasses should alternate - full, empty, full again, empty again, the row ends with a glass filled with water.
- Add food coloring to cups of water.
- Fold the paper towels 4-5 times to make tubes - make six paper tubes in total.
- Using paper tubes, connect adjacent glasses: each glass, except the first and last, will contain parts of two tubes.
- Wait until the stripes turn different colors - you will get an unusual walking rainbow.
Video instructions for the experiment:
A collection of experiences for children of senior preschool experience
Ministry of Education and Youth Policy of the Sverdlovsk Region
State Autonomous Professional Educational Institution
Sverdlovsk region
"Kamyshlovsky Pedagogical College"
Collection
conducting experiments with children of senior preschool age
Developed by:
Sidorova O.I.
Kamyshlov, 2020
Collection of schemes for conducting experiments with children of senior preschool age/comp. Sidorova O.I. - Kamyshlov: GAPOU SO "Kamyshlov Pedagogical College", 2022.
This collection presents various schemes that are necessary for conducting experiments with children of senior preschool age. This collection is addressed to preschool teachers for conducting experiments in the process of organizing experimental activities with children of senior preschool age, can be recommended to parents, and will also be useful to students of pedagogical specialties.
©GAPOU SPO "Kamyshlovsky Pedagogical College", 2022
- Water has no taste;
- Wet sand takes any desired shape;
- Where does sand come from?
- Dry sand painting;
- Examination and comparison of pine and spruce cones;
- Air is lighter than water;
- Water has no odor;
- Examination of stones: size, weight, color;
- Air in man;
- Making ice cubes;
- Conclusion.
Explanatory note
Preschool children are very curious and inquisitive. A child asks many questions a day.
A preschooler's interest in the world around him and the desire to learn everything new is personal development. Throughout preschool childhood, along with play activities, cognitive activity, as a process of acquiring knowledge, skills, and abilities, is of great importance in the development of a child’s personality. One of the leading activities is children's experimentation
.
The main advantage of experimentation is that it gives children real ideas about the various aspects of the object being studied, about its relationships with other objects and with the environment. During the experiment, the child’s memory is enriched, his thought processes are activated, since the need constantly arises to perform operations of analysis and synthesis, comparison and classification, and generalization. The need to give an account of what was seen, to formulate discovered patterns and conclusions stimulates the development of speech.
During experimental activities, situations are created that the child resolves through experimentation and, by analyzing, draws a conclusion, independently mastering the idea of a particular law or phenomenon.
Children of senior preschool age develop a stable habit of asking questions and trying to answer them independently; the initiative for experimentation passes into the hands of the children. Children learn to experiment, independently analyze the results of experiments, draw conclusions, and compose a detailed story about what they saw. Conducting experiments should become the norm of life; they should be considered not as entertainment, but as a way to familiarize children with the world around them and the most effective way to develop thought processes. Experiments allow you to combine all types of activities and all aspects of education, develop observation and inquisitiveness of the mind, develop the desire to understand the world, all cognitive abilities, the ability to invent, use non-standard solutions in difficult situations, and create a creative personality.
The pattern of an experience is determined by its theme. Variants of the scheme must be selected so that the results obtained in the experiment give a clear answer to the question being studied in it, i.e. would confirm or refute the previously developed working hypothesis.
Cards-schemes for conducting experiments and experiments for children
of senior preschool age
1. Water has no taste.
Target:
clarify children's ideas about the properties of water.
You will need
glass of water, salt, sugar.
The teacher pours boiled water into cups and gives it to the children to try. Does water have taste?
Then he dissolves salt in water, stirs it and gives it to the children to try.
He asks the children if the taste of the water has changed.
Then the teacher pours water into other glasses and puts sugar in it and again invites the children to try.
Conclusion:
Water itself is tasteless; it takes on the taste of what is added to it.
2. Wet sand takes any desired shape.
Target:
Through games and experiments, teach children to determine the physical properties of sand.
You will need
tray with wet sand, various molds.
Pour wet sand into molds and make figures.
What kind of figures did you get?
Conclusion:
Wet sand takes any shape.
3
.
Where does sand come from?
Target:
Through games and experiments, teach children to determine the physical properties of sand.
You will need
stones, sheets of white paper, magnifying glass.
Take 2 stones and knock them against each other, rub them over a sheet of paper.
How do you think it's pouring in? Take your magnifying glasses and look at this. How did we get sand?
How does sand appear in nature?
Conclusion:
Wind and water destroy stones, resulting in sand.
4.
Dry sand painting.
Goal:
Through games and experiments, teach children to determine the physical properties of sand.
You will need
dry sand, sheets of paper with drawn pictures, glue sticks.
Suggest using a glue pencil to trace the entire drawing, and then pour dry sand onto the glue.
Shake off the excess sand and see what happened.
Conclusion: You can paint with dry sand.
5. Examination and comparison of pine and spruce cones
Target:
continue to develop children’s knowledge about seeds and fruits, teach them to identify the characteristic features of seeds and fruits of cultivated plants; reinforce the knowledge that plants grow from seeds.
You will need
spruce and pine cones, magnifying glass.
Description. The puppy Sharik was running through the forest and saw cones in the clearing in the grass.
He wondered what tree they were from.
He looked around and saw pine and spruce.
“Try to figure out which tree the cones are from,” the puppy thought.
Children use a magnifying glass to examine the cones, find out how they are similar and how they differ.
They come to the conclusion that the pine cone is round and hard, while the spruce cone is long and soft.
Conclusion:
A cone is a seed from which a tree grows.
6. Air is lighter than water
Target:
prove that air is lighter than water
You will need:
balloon, bowl of water.
Children are asked to “drown” a balloon filled with air. Why doesn't he drown?
Conclusion:
Air is lighter than water.
7. Water has no smell
Target:
introduce children to the properties of water
You will need:
glasses of tap water, garlic.
Invite the children to smell the water and say what it smells like (or doesn't smell like at all). Let them sniff again and again until they are sure that there is no smell. And then add finely chopped garlic to the glass and invite the children to smell the water again.
Conclusion:
The water itself is odorless, but the substances that are added to it begin to smell.
8. Examination of stones: size, weight, color
Target:
tell children about stones, teach them to determine their properties.
You will need
stones of different shapes, colors, sizes, magnifying glass.
Description.
One day, Vaska the cat found a treasure - pebbles of different colors and shapes. He wanted to share his secret with his friend the puppy Sharik.
Children look at all the stones (Vaska’s treasure), determine what color, size and shape they are.
They come to the conclusion that stones vary in color, shape and size.
The teacher offers to stroke each pebble.
— Are the surfaces of the stones the same or different? Which? (Children share discoveries)
The teacher asks the children to show the smoothest stone and the roughest one. To see even better
To examine the surface of the stones, you need to use magnifying glasses.
(Children look at all their stones)
Children take turns holding stones in their palms and determining the heaviest and lightest stone.
Conclusion:
stones vary in color, shape, size; stone can be smooth or rough; There are different weights - light, heavy.
9. Air in man
Target:
introduce children to the properties of air.
You will need
glass of water, cocktail straws.
Educator:
“Guys, do you want to see the air?
Take a glass of water and put a straw in it. Let's blow into a straw, what did you get? Guys, where did they come from?” Conclusion:
We exhale air and bubbles appear in the water, which means there is air inside us.
10. Making ice cubes
Target:
introduce the fact that water freezes in the cold.
You will need
water, ice trays, cold.
Children take a glass of water and carefully pour it into the molds, then take it to the cold or in the refrigerator. After a while they examine the pieces of ice.
Conclusion:
ice is frozen water.
Conclusion
In the Federal State Educational Standard for Education, the target guidelines state that the child shows curiosity, asks questions to adults and peers, is interested in cause-and-effect relationships, tries to independently come up with explanations for natural phenomena and people’s actions, and is inclined to observe. Experimental activities develop in older preschoolers the motivation to understand the world through research, and develop such qualities of mental work as analysis and synthesis. Teaches the correct formulation of questions and the ability to draw conclusions from observing the results of experience, thereby increasing his readiness for active learning at school and motivating the child to actively acquire knowledge.
With the help of entertaining experiments, you will introduce your child to the four main elements: water, air, fire and earth (its gifts). Give your child a lot of positive emotions. Teach your child to observe, analyze, draw conclusions, and express his thoughts. Our goal is not to raise a young chemist or physicist. We want to make your child's childhood interesting, happy, fun, and as educational as possible. Prepare him for further education at school. Make sure that this training is easy for him. Arouse interest in learning, develop curiosity and perseverance. It’s interesting to answer a million different questions that pop up in thousands of “PocheMuk”’s heads every day.
Entertaining physics
Using the example of fascinating experiments, you can introduce a school-age child to the laws of physics - it will turn out to be much more interesting than simply learning a rule from a textbook.
Be careful: some physics experiments involve fire, and it is the responsibility of an adult to light matches or a lighter.
Forks and balance
For children 10 years and older.
The experiment proves that bodies can maintain balance even in a position where it would seem impossible to maintain balance - this is due to the fact that the center of mass of bizarrely shaped bodies shifts lower than that of geometrically simple bodies.
What you will need:
- two forks;
- toothpick;
- matches;
- wooden stick.
Step-by-step instruction:
- Place the wooden stick so that it is as stable as possible - for example, you can stick the stick into an orange or other dense fruit or vegetable.
- Connect the forks to each other with the tines.
- Place a toothpick in the gap between the tines of the forks.
- Place a toothpick on a wooden stick: if done correctly, the structure will maintain balance.
- Try rotating the structure and burning part of the toothpick - the forks will continue to maintain balance.
Video for the experiment:
Experience with alcohol and oil
For children 10 years and older.
The child will see from his own experience that each liquid has a different density.
What you will need:
- tall glass tumbler;
- liquid soap;
- vegetable oil;
- water;
- alcohol (ask your parents what kind of alcohol you can take for the experiment)
- a spoon with a long handle or a glass rod;
- coloring (food coloring or any color) – optional.
Step-by-step instruction:
- Pour liquid soap (approx. 100 ml) into a glass glass.
- Add a few drops of dye to a container of water and mix with a spoon or glass rod.
- Add the colored water very slowly to the liquid soap container so that the water does not mix with it.
- Also gradually add oil. Each layer should be approximately 100 ml.
- Pour alcohol into the last layer.
Video instruction:
Experiment with a candle and a glass
For children 10 years and older.
The child will see that the fire burns oxygen, and due to the lack of air, the pressure inside the container decreases and a vacuum is formed.
What you will need:
- candle;
- flat plate;
- two glasses;
- water;
- one package of food coloring;
- syringe;
- pipette;
- matches or lighter.
Step-by-step instruction:
- Fill one glass halfway with water.
- Using a pipette, add two drops of dye to the water - you can do without dye, but with colored water the experiment will be more visual.
- Place the candle in a plate and add colored water there.
- Light a candle.
- Cover the burning candle with an empty, clean glass.
- Due to the decrease in pressure, a vacuum is formed under the glass, water from the plate is “drawn” into the glass and rises to the top, and the candle goes out due to the lack of oxygen.
Video instruction:
Balloon and fire
For children over 10 years old.
Using an example of an experiment, you can show what thermal conductivity is: explain to your child that water conducts heat faster than air, and that is why a balloon filled with water under the influence of fire will not burst immediately, but only when the water warms up enough.
What you will need:
- two balloons;
- candle;
- matches or lighter;
- a measuring cup, preferably with a spout (you can use an iron dispenser);
- water.
Step-by-step instruction:
- Using a cup with a spout, fill the balloon about halfway with water.
- Inflate a balloon filled with water.
- Inflate an empty balloon.
- Light a candle.
- Bring a ball of water to the fire for 10-15 seconds, during which time the ball will not burst.
- For comparison, bring an empty balloon to the fire - it will burst instantly.
Card index on experimental activities in the senior group. card index on the topic
Card index
"Experimental research activities"
(senior group)
Prepared by: teacher Rabochaya I.V.
"Flying Seeds"
Goal: to introduce children to the role of wind in plant life.
Procedure: Give the children one “flying” seed and one “non-flying” one. Offer to raise your hands as high as possible and simultaneously release both seeds from your hands (for example: beans and maple seeds).
Conclusion: seeds have various adaptations for flight, the wind helps the seeds move.
"Plant water requirements"
Goal: to form children’s ideas about the importance of water for the life and growth of plants. Teach children to draw conclusions during experimentation and make logical conclusions.
Procedure: Choose one flower from the bouquet, you need to leave it without water. After some time, compare a flower left without water and flowers in a vase with water: how are they different? Why did this happen?
Conclusion: plants need water, without it they die
"How water gets to the leaves"
Goal: to show experimentally how water moves through a plant.
Procedure: Cut chamomile is placed in water tinted with ink or paint. After a few days, they cut the stem and see that it has become colored. Split the stem lengthwise and check to what height the colored water rose during the experiment. The longer the plant sits in the dye, the higher the colored water will rise.
Conclusion: water rises up the plant.
"The sun dries things out"
Goal: observe the sun's ability to heat objects. Develop curiosity and expand your horizons. Teach children to draw conclusions.
Procedure: Hang the washed doll's clothes in a sunny area and watch how they dry during the walk. Touch the bricks from which the kindergarten building is built on the sunny side and the shady side.
Conclusion: the sun heats objects.
"Transfer of the Sun Bunny"
Purpose: to show with an example how light and the image of an object can be reflected repeatedly. To develop the cognitive activity of children in the process of conducting experiments.
Material: mirrors.
Procedure: On a sunny day, children look at the “sunny bunny”. How does it work? (Light reflected from the mirror). What happens if you put another mirror in the place on the wall where the sunbeam hit? (It will reflect again)
"Rainbow"
Goal: to introduce rainbows as a natural phenomenon. Cultivate an educational interest in the natural world.
Material: basin with water, mirror.
Hod: Have you ever seen a rainbow after the rain? Do you want to see a rainbow right now?
The teacher places a mirror in the water at a slight angle. It catches the sun's rays with a mirror and directs them to the wall. Turns the mirror until a rainbow appears on the wall. Water acts as a prism, decomposing the white color into its components. What does the word "rainbow" look like? What is she like? Show the arc with your hands. From the ground, a rainbow resembles an arc, but from an airplane it appears to be a circle.
"Air is invisible"
Purpose: to introduce the properties of air - it has no specific shape, spreads in all directions, has no odor of its own. Develop children's cognitive interest in the process of experimentation, establish cause-and-effect relationships, and draw conclusions.
Procedure: the teacher suggests taking (sequentially) scented napkins, orange peels, garlic and feeling the odors spreading in the room.
Conclusion: Air is invisible, but it can transmit odors over a distance.
"Air Movement"
Purpose: to show that you can feel the movement of air. Cultivate interest in experimental activities and love of nature. Continue to develop logical thinking and imagination.
Procedure: Invite children to wave their hand in front of their face. How does it feel? Blow into your hands. How did you feel?
Conclusion: air is not invisible, you can feel its movement by fanning your face.
"Storm"
Goal: to prove that wind is air movement. Develop cognitive activity in the process of experimentation, expand knowledge about air, activate speech and enrich children’s vocabulary (laboratory, transparent, invisible).
Progress: Children make sailing boats. Place them in a container of water. Children blow on the sails, the boats sail. Large ships also move thanks to the wind.
Questions: What happens to the boat if there is no wind? What if the wind is very strong?
Conclusion: Wind is the movement of air.
"Looking at sand through a magnifying glass"
Purpose: determining the shape of grains of sand. To promote the formation of cognitive interest in children, to develop observation and mental activity.
Material: sand, black paper, magnifying glass.
Hod: What is sand made of?
Made from very small grains - grains of sand. They are round and translucent. In the sand, each grain of sand lies separately and does not stick to other grains of sand.
"Sand Cone"
Purpose: to introduce the property of sand - flowability. To promote the formation of cognitive interest in children, to develop observation and mental activity.
Procedure: Take a handful of dry sand and release it in a stream so that it falls in one place.
Gradually, at the place where the sand falls, a cone is formed, growing in height and occupying an increasingly larger area at the base. If you pour sand for a long time in one place, then in another, drifts occur; the movement of sand is similar to a current.
Conclusion: sand is a bulk material.
"Properties of wet sand"
Purpose: to introduce the properties of sand. To promote the formation of cognitive interest in children, to develop observation and mental activity.
Material: sand, molds.
Procedure: Pour dry sand into the mold and turn it over, what happens? Sprinkle a stream of sand onto your palm. Then wet the sand and do the same operations.
Conclusion: wet sand can take any shape until it dries. When sand gets wet, the air between the sand grains disappears and they stick together.
“Soil condition depending on temperature”
Goal: to identify the dependence of soil condition on weather conditions. To promote the formation of cognitive interest in children, to develop observation and mental activity.
Procedure: On a sunny day, invite the children to look at the earth, touch it with their hands: warm (it was heated by the sun), dry (crumbles in their hands), light brown. The teacher waters the soil from a watering can, offers to touch it again, examine it (the soil has darkened, become wet, sticky, sticks together into lumps, the cold water has made the soil colder)
Conclusion: changes in weather conditions lead to changes in soil condition.
"Water and Snow"
Goal: to consolidate knowledge about the different states of water. To promote the formation of cognitive interest in children, to develop observation and mental activity.
Move: Add snow and ice to the group - which will melt faster?
Place loose snow in one bucket, compacted snow in the second, and ice in the third.
Conclusion: loose snow will melt first, then compacted snow, ice will melt last.
"Snow melting"
Goal: to introduce children to the properties of snow. Cultivate interest in experimental activities and love of nature. Continue to develop logical thinking and imagination.
Procedure: Collect snow in a glass jar while walking with your children. Bring to the group and place in a warm place. The snow melts and water forms. Draw children's attention to the fact that the water is dirty.
Conclusion: snow melts under the influence of temperature, turning into water.
"The protective properties of snow"
Purpose: to introduce the properties of snow. To develop observation, the ability to compare, analyze, generalize, develop children’s cognitive interest in the process of experimentation, establish cause-and-effect relationships, and draw conclusions.
Procedure: Place jars with the same amount of water on the surface of the snowdrift, bury them shallowly in the snow. Bury deep in the snow. Observe the condition of the water in the jars.
Conclusion: The deeper the jar is in the snow, the warmer the water will be. The roots are warm under the snow and soil. The more snow, the warmer the plant.
"Water Freezing"
Goal: to consolidate children's knowledge about the properties of water. Cultivate an educational interest in the natural world.
Procedure: Pour water into a bucket and onto a tray. Place in the cold. Where will water freeze faster? Explain why water on a tray freezes faster.
"Transparency of Ice"
Purpose: to introduce the properties of ice. Develop curiosity and expand your horizons. Teach children to draw conclusions during experimentation and make logical conclusions.
Procedure: Place small items in a transparent container, add water and refrigerate. Consider with your children how frozen objects are visible through the ice.
Conclusion: objects are visible through ice because it is transparent.
"Street Shadows"
Goal: to show children how a shadow is formed, its dependence on the light source and the object, and their relative position. Development of children's cognitive interest in the process of experimentation, establishing cause-and-effect relationships, and the ability to draw conclusions.
Progress: Examination of shadows from different objects. When does the shadow appear? (when there is a light source). What is a shadow? Why is it formed? (this is a dark spot, it is formed when light rays cannot pass through an object; there are fewer light rays behind this object, therefore it is darker)
Conclusion: a shadow appears in the presence of light and an object; the outline of the object and the shadow are similar; the higher the light source, the shorter the shadow; the more transparent the object, the lighter the shadow.
"Measuring image dimensions using
various lenses"
Purpose: to introduce an optical device - a lens; form ideas about the property of a lens to magnify images. Teach children to draw conclusions during experimentation and make logical conclusions.
Material: magnifying glasses, glasses, various objects: feathers, blades of grass, twigs.
Progress: examining a magnifying glass, observing changes in the size of objects and images through a magnifying glass.
Conclusion: when viewing objects, their sizes increase or decrease depending on which lens is used.
"Jolly Boats"
(buoyancy of objects)
Goal: learn to note various properties of objects. To develop the cognitive activity of children in the process of conducting experiments.
Procedure: The teacher, together with the children, lowers objects made from different materials (wooden blocks, sticks, metal plates, paper boats) into the water. Observe which objects sink and which remain afloat.
Conclusion: not all objects float, it all depends on the material from which they are made.
Review of the best experiment kits for children
When choosing a children's experiment set, try to take into account two important factors: the age and interests of the child - a teenager is unlikely to like a set with the simplest experiments for kids, and if a child dreams of a set for chemical experiments, it is worth buying just such a set. But there are no gender differences in the sets for young experimenters; the sets are equally suitable for both boys and girls.
"Spy Kit" (EUREKA)
The child will play detective and at the same time get acquainted with a magnifying glass, disappearing ink, and fingerprint powder.
Suitable age : 4-7 years.
Approximate price : 500 rubles.
"Experimentarium" (1 TOY)
A set with which a child can conduct 65 different experiments in the field of chemistry and physics. All experiments are quite simple, the kit is accompanied by colorful instructions.
Suitable age : 4-10 years.
Approximate price: 2000 rubles.
“Entertaining experiments for beginners” (RANOK CREATIVE)
The kit includes only safe components for conducting experiments in the field of physics, chemistry, biology - corn starch, food coloring, Petri dish and the like.
Suitable age : 5-10 years.
Approximate price: 1200 rubles.
"Molecular Cooking" (Qiddycome Super Professor)
A set with detailed recipes with which the child can prepare molecular gastronomy dishes, for example, marmalade pasta or a yogurt sandwich. The kit includes not only the products necessary for cooking, but also the necessary utensils: various containers, spoons, chopsticks.
Suitable age : 7-14 years old.
Approximate price: 2000 rubles.
"Experiments in a Box" (Simple Science)
The kit includes components for carrying out 14 fascinating physical and chemical experiments: for growing a crystal, creating polymer worms, making a hologram, and for other experiments.
Suitable age : 8-14 years.
Approximate price: 2700 rubles.
"Chemical laboratory" (BONDIBON)
A large set will certainly help your child fall in love with chemistry - the set includes safe reagents for 200 different chemical experiments and experiments.
Suitable age : 8-14 years.
Approximate price: 3000 rubles.
"Big Chemical Laboratory" (Intellectico)
The set includes components for 84 entertaining chemical experiments: the young chemist will learn how to make a volcano, create spy ink, coat a coin with silver, and many other interesting things.
Suitable age : 8-14 years.
Approximate price: 2500 rubles.
Even if it seems to you that you are as far from physics and chemistry as possible, still try to conduct at least the simplest experiments with your children. And perhaps, over time, both you and your child will truly love science!