Basic methods and techniques in teaching preschoolers to draw
Basic methods and techniques in teaching preschoolers to draw
1st junior group (2-3yrs)
The foundation of drawing is laid.
The main tasks of the teacher:
Instill in children an interest in drawing. Teach to be attentive in class. Familiarize yourself with materials and supplies for drawing. Teach how to hold a pencil correctly, not put it in your mouth, and draw only on paper. Teach how to hold a brush correctly and move the brush over the paper without pressing. Learn to apply paint only to the bristles of the brush, squeeze out excess paint on the edge of a dish, and rinse the brush in water. Teach to recognize and remember colors (red, blue, yellow, green). Recognize and name images of an object by color. Recognize and name drawn objects. Talk about what you drew yourself. Learn to draw objects as shown by the teacher and independently.
Basic techniques for learning to draw:
Step-by-step explanation and demonstration of what is depicted Explanation as a whole Demonstration of the image - partial or complete Verbal instructions Completing the drawing of the object (the teacher begins, and the children finish drawing, for example, adding strings to balloons) Working together (so that the child does not aimlessly manipulate the pencil, you need to take the child’s hand in yours and work together)
Paint with soft brushes No. 5-6 and paints - gouache.
Learn drawing skills.
Straight lines - horizontal, vertical, oblique.
Topics: “Grass for bunnies”, “Rain-rain, drip-drip-drip”, “Paths”, “Strings for balls”, “Handkerchief”, “Ladder”, “Railroad”
Wavy and curved lines
Topics: “Stream”, “Short and long ribbons”, “Balls for kittens”
Dipping technique (press the brush bristles onto the paper and immediately tear them off)
Topics: “Leaf fall”, “It’s snowing”, “Dog footprints on the path”, “Our feet are walking along the path”
Rounded lines (learning to close a circle line)
Topics: “Rings”, “Sunshine”, “Balls on Strings”, “Big and Small Balls”, “Berry on a Branch”, “Soap Bubbles”
2nd junior group (3-4y)
Has a lot in common with 1st younger group
The main tasks of the teacher:
Cultivate attention and observation in fine arts classes. Learn to sit correctly at the table, hold your body and arms correctly. Learn to use a pencil and brush. Carefully scoop up the paint, squeezing out any excess paint on the edge of the dish. Guide the brush only behind the bristles, rinse it and dry it with a napkin. Familiarize yourself with the properties of paints, use 2-3 colors of paints in your work (using different brushes) Learn to distinguish and name primary colors and know their shades (pink, blue, gray) Learn to independently embody your own ideas in a drawing. Distinguish and name the shape of objects (round, triangular, square), their sizes (large, small, high, low, wide, narrow) Learn compositionally correctly place a drawing on a sheet of paper (in the center) Familiarize yourself with the constructive structure of simple objects
(demonstrate that some objects consist of several parts of the same shape but different sizes, for example, a tumbler or a snowman)
Basic techniques for learning to draw
Consistent demonstration of image methods Partial demonstration of image methods Verbal teaching techniques - explanations, instructions, encouragement Examination of the shape of an object
Drawing skills
Straight, vertical, horizontal, oblique lines and objects consisting of them.
Topics: “Window”, “Short and long ribbons”, “Tree”, “Christmas tree”, “House with a window”
We give a rounded shape and objects based on it.
Topics: “Big red ball, small blue ball”, “Beads and dryers”, “Beads for mom”, “Snowman”. Based on the snowman, we draw objects consisting of round shapes: “Tumbler”, “Bunny”, “Bear”
We learn to paint with a brush flat all the time in one direction. We give a rectangular shape: the teacher draws a base line to help the child draw an angle (separate drawing technique)
We learn to draw a rectangular shape continuously: we draw a line, we stopped, now a corner, and the line went down, we stopped, a corner, a line to the left, we stopped, a corner, a line up.
Topics: “Handkerchiefs are drying”, “The cubes are falling apart.”
5. We draw trees: the trunk is without thickening, the branches stretch upward towards the sun.
We draw a Christmas tree: the trunk is without thickening, the branches are down without bending.
6. Draw a house: draw a line of land at the bottom of the sheet. The child draws the walls according to the principle of a rectangle, connecting the walls, draws the ceiling, from the middle of the ceiling we make a line upward and from it inclined lines extend to the corners of the house - a triangular roof is obtained. In the middle of the house we draw a square - a window. Paint the roof and window.
7. Draw transport: a rectangular cart with two wheels and a handle.
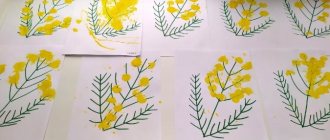
Themes for drawing according to the plan: “Tree and snowman”, “Snowy woman at the Christmas tree”, “Christmas tree in winter”, “Roll-y-dolls went for a walk”, “The cart is carrying cubes”, “Dandelions in the meadow”.
Middle group(4-5l)
The main tasks of the teacher
Introduce children to types of fine art (illustrations in books, reproductions of paintings by artists, folk toys - whistles, nesting dolls). To develop children's powers of observation, attention, memory, sense of color and shape. Teach children to depict simple-shaped objects in drawings, highlighting their main parts. Teach children to draw drawing lines smoothly, change the direction of the lines, turning their hand accordingly. Learn to distinguish, name and apply different colors and shades, learn to draw with 3-4 colors in one drawing. Learn to draw from memory. Learn to place an image on a piece of paper. Improve the ability to draw objects using straight, oblique, arched and wavy lines. Improve the ability to draw objects of round, rectangular, triangular and oval shapes. Teach to convey the proportional relationship of two objects in size (large - small, tall - short) Teach children to carefully paint over a drawing (the pencil does not come off the sheet of paper, the brush follows the pile all the time in one direction)
Basic techniques for learning to draw:
Verbal technique - questions, explanations, instructions. Familiarization with the object, its shape, tracing the contour with a finger. Partial or full display
Drawing Skills:
1. We give a new shape - an oval (we call it - it looks like a cucumber)
Topics for drawing: “Cucumber”, “Lemon”, “Zucchini”
2. We give the concept of distinguishing between round and oval shapes
Topics for drawing: “Tomato and cucumber”, “Orange and lemon”, “Cucumber and zucchini”
We give shading when painting objects. We draw flowers using the dabbing technique. For drawing it is better to take
four-petalled flowers, simple in shape and structure. Please note:
stem - straight or curved. In the future, the number of petals can be
increase.
We draw trees: the trunk is thickened downward, the branches are large, and small branches come from them. Topics: “Garden in autumn”, “Trees in the park” Drawing a Christmas tree: branches with a deflection, a trunk thickened at the bottom
Topics: “Christmas tree and tree”, “A Christmas tree was born in the forest”
Draw a house: the roof is flat, there is a door in the center, windows at the top of the door,
located on the same level. We paint only the roof, windows,
door.
We draw a person: head + frame without detailing the legs and torso; draw with paints, paint over it flat with a brush. When dry, use pencils or felt-tip pens to draw the eyes, mouth and nose.
Topics: “Doll in a long dress”, “Girl in a sundress”, “Girlfriends in a round dance”
Draw birds and animals using familiar shapes - circle, oval, triangle
Topics: “The little white bunny is sitting”, “The bunny met the bun”, “The duck is swimming”,
“Chickens in the meadow”, “Birds peck the grains”, “Beautiful fish”.
We draw transport, using a truck as an example, using familiar shapes - square, rectangle, circle
Topics: “A truck is driving along the road”, “A car is carrying bricks (or sand) to a construction site”
Topics for plot drawing: “Flowers in the meadow”, “Autumn in the park”, “Garden in winter”, “Garden in spring”, “Apple trees in bloom”, “Fish in the aquarium”, “A car carrying bricks to a construction site”, “Girlfriends in round dance”, “Kolobok met a bunny”, etc.
Senior and preparatory school group (5-7 years old)
The main tasks of the teacher:
Develop an aesthetic attitude towards the environment. Develop observation, imagination, attention, independence in performing work. Learn to identify the essential features and shape of objects, their similarities and differences. Teach expressive solutions to the composition of a drawing. We introduce you to arts and crafts and folk crafts. We learn to distinguish, name and select colors and shades, creating shades by gradually adding colored gouache to white (and not vice versa!). We teach the proportional relationship of two or three objects in the picture. We learn to draw according to plan, from memory and from nature. We learn how to use watercolor paints correctly, dilute them with water, carefully pick up paint on the bristles of the brush, holding it obliquely, turning it on a plane. We learn to depict humans, birds and animals statically and in motion. Improved drawing and shading skills.
Basic techniques for learning to draw:
Full display (if a new topic, for example, “a person in motion” or “portrait” or “animal”, etc.) Partial display Examination of an object with hands Detailed examination and analysis of an object (for example, when drawing from life) Explanation, instructions, questions Observation (especially important when drawing nature)
Drawing Skills:
1. We introduce the use of a simple pencil sketch for a more accurate representation of objects. A sketch is made and then painted.
2. We learn to draw the horizon line when:
- a narrow strip of sky, wide of earth. Topic: "Garden in autumn"
- a narrow strip of land, a wide strip of sky. Topic: “Birds fly to warmer lands”
- the entire leaf is earth. Theme: “Blooming meadow”
- the whole leaf is the sky. Topic: “Planes are flying”
3. We introduce drawing from life - one of the most difficult types of drawing, where there is no demonstration of work by the teacher.
We draw fruits, vegetables, flowers, branches, leaves. The composition is compiled by the teacher. It is advisable to place the nature at eye level in front of each row of tables where children sit.
Behind the nature there is a background of the same color as the children’s sheet (white, blue, greenish, pink). Explain the location of objects on a sheet of paper without showing them. At the end of the lesson, we compare the drawing with nature - “similar or not similar.”
We learn to draw flowers in a vase. We divide the vertical sheet into 3 equal parts (vase, stem, flowers), the lower one part is a vase, the 2 upper parts are flowers or branches. Vases are drawn in simple shapes.
We learn to draw objects on the table. We give the concept of “still life”
| Senior group | Preparatory group |
| 1st quarter Round and oval shaped objects (“Tomato and cucumber”, “Apple and plum”) on the table line | 1st quarter Round and oval-shaped items (“Tomato and cucumber”, “Apple, plum and pear”) on a platter or plate |
| 2nd quarter Houseplant with simple-shaped leaves in a pot (“Tradescantia”, “Sansevieria”) | 2nd quarter Indoor plant with leaves of complex shape in a pot (“Croton”, “Ficus”, “Violet”) Combined still life (“Branch with leaves and apple”) on the table line We introduce the blocking technique using the example of drawing a watermelon and a watermelon slice. |
| 3rd quarter We draw flowering branches of fruit trees in one color (cherry plum, pear, peach). We draw bouquets of uniform flowers of simple shape (only daffodils or only tulips) Don't forget about the background! | 3rd quarter Drawing blossoming branches of fruit trees with color overlay (apple tree, apricot, quince). We draw mixed bouquets of homogeneous flowers of simple shape (daffodils and tulips together) Don't forget about the background! |
4. Learn to draw a person. Be sure to provide a simple pencil for sketching. We explain why this is needed.
| Senior group | Preparatory group |
| Drawing a man in full height Divide the vertical sheet into 5 parts. 1 part (the head) is taken as the basis. Next - part 1 - the neck and torso to the waist (we draw the so-called “T-shirt”). Next - 1 part from the waist to the middle of the thigh (draw a trapezoidal “skirt”). Next - 2 parts - legs. On the side of the shoulder and to the end of the “skirt” are the arms (2 straight parallel lines). The hand ends in the form of a “circle”. Legs in the shape of a triangle. If it’s a boy, then the “pants” go down from the waist. | Drawing a man in full height All the same. The hand ends in the form of a “mitten” |
| Drawing a portrait of a person Draw an oval covering the entire vertical sheet. This face Divide into 2 parts and draw bangs (hair) in the upper part. Under the bangs there are eyes and eyebrows in the form of dots and arched lines. Next, we divide the lower part of the oval into 2 parts again. This is the level of the nose (put 2 dots). Next, we divide the lower part into 2 parts again. This is the level of the lips; we draw them in the form of an arcuate line and semicircles. | Drawing a portrait of a person All the same. Eyelashes are drawn and ears are drawn in the form of semicircles. |
| Drawing a person in profile The principle is the same as in full height We show this using the example of a child. | |
| Drawing a person in motion using the example of “stick men” The principle is the same, we just show changes in the position of the arms and legs. We explain that the arms and legs bend at the joints. Topics: “Athletes”, “We do exercises” | Drawing a person in motion using the example of “stick men” We learn to draw a person in clothes and at work, correctly conveying proportions and movements. |
5. We learn to draw birds and animals based on an oval and a circle. Plastic and wooden toys are used as a sample. A sketch is made with a simple pencil.
6. We learn to draw transport based on rectangular and square shapes. A sketch is made with a simple pencil.
7. We learn to draw buildings: in the senior group - two-story ones, in the preparatory group - multi-story ones. We pay special attention to the correct and symmetrical arrangement of the windows (one above the other!), and that the upper and lower parts of the windows are at the same level (we make auxiliary thin lines with a simple pencil). You can paint multi-storey buildings like a “cage” with a wide brush. The roof is flat, like in the middle group. In the preparatory group we draw fairy-tale houses, shops, theaters, schools.
Drawing a night city. If the background of the picture is black, the houses and silhouettes are gray. If the background is blue, the houses and silhouettes are black. The light in the windows is yellow.
8. Draw trees. We give the concept - the crown of a tree. Please note that each tree has its own crown, foliage color and trunk shape; we observe trees on the street. We use painting methods - “poke”, chaotic lines, so that the gap is visible.
On spruce trees we add needles using different drawing techniques.
9. Subject drawing becomes more complicated as you acquire skills. We learn to arrange the composition proportionally: cars are smaller than houses, people are smaller than trees and houses, distant objects are smaller, nearby ones are larger. We learn to arrange objects in the space of a sheet in accordance with how they are located in life: closer, further, or partially blocking each other.
Lesson topics are selected in accordance with the theme of the week, the season and taking into account the children’s sufficient skills in the image.
Methodological recommendations for conducting classes in visual arts (drawing)
- All material is prepared in advance.
In accordance with the type of drawing, the topic of the lesson, prepare paper of different formats, backgrounds (you can use colored half-cardboard or tint the paper with watercolors, gouache paints, ink, etc.).
- Gouache paints are diluted with water until the thickness of liquid sour cream; to prevent the paints from crumbling after drying, they can be diluted with milk.
For activities with children of the younger group, gouache paints are poured into small jars so that the water does not evaporate; you can cover them with paper or newspaper moistened with water.
- Water for washing brushes is poured into transparent cups or unbreakable jars.
In younger groups, if children paint with paint of the same color, the water is not prepared. There can be more than one jar per table, so that children can change the jar of water as the water gets dirty. It is advisable to do this in older groups so that children are not distracted and do not disrupt the creative process.
- The drawing paper must be signed: in the lower right corner, write the child’s name and the initial letter of the surname with a pencil.
Paint brushes are placed in stands; in the younger group, children paint with one thick round or medium-sized flute brush, and in the older and preparatory groups for school, children paint with two brushes: thick and thin. There should be more of them than children in the group.
- Pencils must be sharpened well; in the younger group they can be placed in cups, stands, and later offered in an open box for pencils; In the middle group, pencils are given in a box. For drawing with pencils in older groups, it is necessary to use 18 - 24-color boxes of pencils. In the same box or separately, older preschoolers should have a simple pencil.
- All drawing materials (art materials, jars of water, napkins for drying brushes, supplies for brushes) are placed on a separate table, from where children take it before starting to paint. Clean jars, brushes, and napkins are also placed there. It should be remembered that some of the visual materials are stored in children’s tables, so before class it is necessary to check with the children the condition of these materials.
- Particular attention must be paid to the placement of visual didactic material for the lesson, prepare a stand for the nature, think about the placement of the nature or several natures.
- At the end of the lesson, viewing and analysis of children's drawings will be organized, so you should think about where the drawings will be placed (on a special table, on easels, on a board, etc.).
- Modern requirements for conducting visual arts classes provide for the connection of visual activities with other types of children’s activities: gaming, music, speech, theater, so the teacher does not say that the lesson is over, he creates the conditions for the transition to another type of activity.
Drawing fir trees
Junior group
We draw on tinted paper, on the entire sheet or strip, with green paint and a wide brush.
Explanation:
We indicate where the spruce grows - I draw an even, straight line from left to right with green paint. Then I draw a straight and beautiful trunk - I draw a vertical line from top to bottom, start painting with the tip of the brush, and then with the whole brush. Now I'm drawing branches. At the top of the head the branches are short and point upward towards the sun. I draw the rest of the branches, starting from the top - I draw a line from the trunk down on one side and on the other, at the top they are short, and then they grow, grow (we draw the line of the branch), and this branch is even longer (grows, grows, grows).
Middle group
We draw on tinted paper, on the entire sheet or strip, with brown and green paint. We give 3 brushes: wide for the trunk, medium thickness for the branches and thin for the needles.
Explanation:
I take a wide brush and use brown paint to mark where the spruce grows, drawing an even straight line from left to right. Then I draw a straight, beautiful trunk - I draw a vertical line from top to bottom, start painting with the tip of the brush, and then with the whole brush. I take a medium-thick brush, with which I will paint brown twigs. The spruce tree has a crown. I draw 2 small branches that look up at the sun. Now I draw the rest of the branches, starting from the top. The branches at the top are small and look down on one side and the other, below the branches are longer, even longer and the longest. Now I paint needles on the Christmas tree with a thin brush and green paint. They grow on branches on one side and the other.
In winter, you can draw a spruce covered with snow and decorated with lights for the New Year holiday.
Senior group
We draw on two-stripe tinted paper with brown and green paint. We give 3 brushes: wide for the trunk, medium thickness for the branches and thin for the needles.
Explanation:
We don’t indicate where the spruce grows, we immediately draw the trunk. I take a wide brush and use brown paint to draw an even straight line at the end with pressure, from the top point I draw another similar line next to it and so on several times to get a beautiful, straight trunk. Now I paint the branches with a medium brush. The technique is the same as in the middle group. At the top 2 are small up, the rest are long to the sides. The spruce branches have “legs” - small branches, I’ll draw them under the big ones (show). Now we paint the pine needles with green paint and a thin brush.
We decorate the New Year tree with a garland and draw a stand under it. In this group we give images of fir trees near and far. Please note that here the branches are not painted separately with brown paint, but the spreading paws are painted immediately with green paint.
Preparatory group
We draw on tinted paper, gouache, palette - on it we will create different shades of green. We give 3 brushes: wide for the trunk, medium thickness for the branches, thin for the needles.
Explanation:
The drawing technique does not change. Only when depicting needles do we pay attention to the fact that the upper branches are young, elastic and the greenery on them is bright, the needles on the branches below are old and dark in color
Drawing trees
Junior group
We draw on tinted paper, on the entire sheet or strip, with black paint and a wide brush.
Explanation:
We indicate where the tree grows - I draw an even, straight line from left to right with black paint. Then I draw a straight, beautiful trunk - I draw a vertical line from top to bottom, start painting with the tip of the brush, and then with the whole brush. Now I'm drawing branches. The tree has a crown - I draw 2 small branches up. The spruce branches grow downward, and the tree branches grow upward towards the sun. Raise your hands up, in the same way we will draw twigs on a tree, the brush will show where the twig grows - it grows from the trunk upward (I draw a line), now I draw a twig on the other side - it grows, grows.
Middle group
We draw on tinted paper, on the entire sheet or strip, with brown paint. We give 2 brushes: wide for the trunk, medium thickness for the branches.
Explanation:
I take a wide brush and use brown paint to mark where the tree grows, draw an even, straight line from left to right. The tree has a straight, beautiful, even trunk - I draw a vertical line from top to bottom, start painting with the tip of the brush, and then with the whole brush. I take a medium-thick brush, with which I will paint brown branches. With the tip of the brush I paint 2 small branches on the tops of the heads, which look up at the sun. The tree has thick branches, and they all grow upward - towards the sun, I paint them with the whole brush on one side and the other of the trunk. And on thick branches there are thin ones, they also reach out to the sun, I paint them with the tip of a brush on one and the other side of the branch.
Encourage children to watch their friend’s work and exchange opinions.
In the middle group, you can draw a tree at different times of the year: in winter, covered with snow, in spring, summer, autumn - with leaves, we draw them by dipping them.
Senior group
We will draw varieties of trees. Pay special attention to the fact that if children in the older group, even after repeated observations, draw poorly, then this work should be transferred to the preparatory group, since this material is very difficult for children.
Pine
If children have mastered the technique of drawing fir trees well, they can be taught to draw pine trees.
We draw on two-stripe tinted paper, gouache, palette. We give 3 brushes: wide for the trunk, medium thickness for the branches, thin for the needles.
Explanation:
The pine has a beautiful, even trunk of light brown, golden color, because pine really loves light and sun. Create this color on the palette. The technique for drawing a trunk is the same as for spruce. Pay attention to the branches, they grow to the sides of the trunk, alternately on one side and the other, the branches are short at the top, longer at the bottom. There were also branches below, but they all lacked light and sun, and they broke off, leaving only small twigs. Pine needles are emerald, long and fluffy. Using a thin brush, make long strokes from the branch in different directions.
Birch
We draw on two-stripe tinted paper with white and black paint. We give 2 brushes: wide and medium thickness.
Explanation:
The birch has a beautiful trunk - I paint the trunk with a wide brush of white paint, just as we painted the trunk of other trees. The birch tree has black specks on its trunk, we will paint them later when the white paint has dried. Birch is called curly birch. Its branches are beautiful, elastic, and bent down. I take a medium brush and use black paint to paint thick branches from the trunk on one side and the other, starting from the top. And from the thick branches come thin ones, like garlands, descending down. The birch trunk has dried up, now let’s decorate it with black dots. Remember, when we looked at it, we noted that the trunk was very black at the bottom and there were fewer dots at the top.
We draw a birch tree at different times of the year: snow-covered in winter and green in spring (we draw the outline of the crown and the leaves with dots in a raw way).
Apple tree
We draw on two-stripe tinted paper, gouache, palette. We give 2 brushes: wide and medium thickness.
Explanation:
I paint the trunk with a wide brush and dark brown paint. The drawing technique is the same. Now I will paint the crown with a medium-thick brush. The crown of the apple tree is like a bowl. Large branches grow from the bowl towards the sun, and small ones on them. Because the apple tree has such a crown it is called spreading. I paint the leaves of the apple tree by dabbing, with the end of the brush pointing upward.
You can also give the theme “Apple tree in bloom” - with pink paint we paint the flowers with curls, but we don’t paint the leaves.
Drawing varieties of trees in the older group can only be taught if the children have high technical skills. In case of difficulties in the senior group, it is better to leave drawing a tree according to the method of the middle group and teach drawing a birch; the rest should be taught in the preparatory group.
Preparatory group
We continue to draw varieties of trees.
Oak
We draw on tinted paper in two stripes, gouache, palette. We give 3 brushes: wide for the trunk, medium thickness and hard.
Explanation:
The oak is called a giant, its trunk is very thick, I will paint it with a wide brush with brown paint like this - I will draw a central line and “build up” the trunk on one side and the other. The trunk is thick, the oak is mighty, it stands firmly on the ground - the roots are visible. Using a medium brush, I paint the branches with brown paint. The branches have bent from time to time, they are old and thick. The oak tree does not have a crown like other trees. At the top the branches are curved and thick curved branches extend from the trunk. Small curved branches come off from the thick branches; I paint them with the tip of a brush. The greenery of the oak is transparent, carved, I will paint it with a hard glue brush “poke”.
Pine
In this group you can teach drawing pine trees with colored pencils, but for children it is very difficult. Children also learn to draw a young pine tree.
We draw on two-stripe tinted paper, palette. We give 2 brushes: wide for the trunk and medium thickness for the needles.
Explanation:
Using a wide brush with light brown paint, I paint a short trunk. The technique is the same as when drawing fir trees. We pay special attention to the branches. I draw 2 small ones at the top, and then from the trunk I draw 2 branches up to the sun and from here 2 down. Now, with the middle brush, I paint the needles, the upper branches are young - the needles on them are light, bright, the lower branches are older - the needles are dark.
In this group you can show how to draw a crown without branches - with an outline.
Also at this age, children enjoy drawing various fairy-tale trees.
Get text
The importance of classes using non-traditional drawing techniques
The meaning of alternative drawing techniques:
- help overcome fears and insecurities;
- develop spatial thinking and a sense of color, shape, texture;
- create conditions for the free expression of children's individuality;
- introduce children to the properties of various materials;
- instill a taste for unconventional thinking and creative exploration;
- improve fine motor skills;
- allow you to experience a feeling of joy and emotional satisfaction.
Alternative drawing techniques allow you to discover the creative potential in every child
Unconventional techniques create a special atmosphere; they inspire and inspire. In addition, in combination with traditional techniques, which are extremely important, they give a sense of novelty and are an impetus for the development of initiative, independence, stimulate ingenuity and interest in visual activity.
