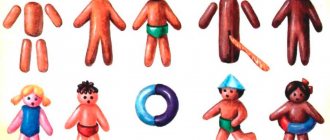
Age category
It is recommended to start making simple crafts from plasticine from the age of one. However, each child needs an individual approach. First you need to show your child how to make a craft from plasticine, and if he shows interest, then you can continue the process with him. Otherwise, leave your classes for a later time.
From 1 to 3 years old, children begin to control their hands; at this age it is advisable to accustom the child to simple activities:
- Knead the plasticine;
- Tear off pieces from it;
- Roll into balls;
- Crush and flatten the balls with your palms or suitable objects;
- Roll rolls of various thicknesses and lengths;
- Wrap the rolls in rings;
- Sculpt a whole craft from individual parts.
For children of this age group, it is advisable to purchase air plasticine.
From 3 to 5 years old, a child already has full control of his hands and can sculpt from ordinary plasticine, and he can make crafts that are more complex, interesting, and carry some meaning.
Techniques for creating applications from plasticine
Before making the applique, you can draw a template on a cardboard sheet. Various techniques are used to create paintings from plasticine:
- Smudging. A piece of material is kneaded in the hand until soft and spread on the cardboard. Used to create background color or fill in shapes. Individual details in the picture can be made voluminous for emphasis.
- Plasticine balls. They can be used to fill an outline or to highlight accents in a drawing.
- Flattening. The ball is glued to the surface and pressed lightly with your finger.
- Scratching. Patterns are cut out on a pressed piece of plasticine. For this work, a knife or a special tool with a figured carving is used.
- Strokes. The material is smeared on the finger and applied in strokes to the work surface.
- Flagella. Sausages of different thicknesses are rolled out of plasticine to create an outline or outline the boundaries of the design.
- Extrusion with a syringe. After use, the remaining plasticine should be easily removed from the syringe body.
The application method is selected based on the child’s age group. You also need to focus on his abilities and skills.
Plasticine applications for schoolchildren
It will be interesting for 2nd grade students to portray a character from a fairy-tale cartoon. Before starting work, take a ready-made template and glue it to cardboard.
Then the outline of the template is pasted over with flagella of different colors. Eyes are molded from flattened balls of plasticine. Large applique elements can be made solid.
A plasticine applique option for grade 4 is a postcard with a picture of a tank or rocket. A sheet of cardboard is cut into the shape of a shield. Balls are glued on top, from which numbers are molded.
Four large circles are flattened from below, on the sides of which there are two similar circles of reduced size - these are the tracks of the tank. A black dot is placed on each of them.
A caterpillar strip in the form of an inverted trapezoid is formed from brown plasticine flagella. A thick green tourniquet is placed on it.
A green semi-oval is placed on the right side, to which the flagellum is glued. A red star is stuck on it. At this point, the plasticine application is considered complete.
Materials and tools for modeling
In addition to the spatula, it is worth thinking about preparing the workplace.
Suitable working surface:
- Special board;
- Oilcloth;
- Sheet of cardboard;
- Kitchen cutting board.
Some natural and artificial materials may also be useful, such as:
- Cones;
- Nuts;
- Pebbles;
- Beads;
- Rhinestones, etc., it all depends on the intended product.

