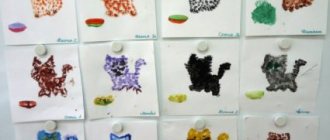
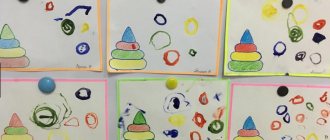
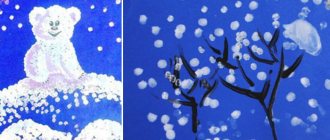
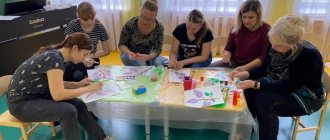
What are the benefits of using non-traditional techniques?
This is interesting. From an early age, children try to reflect their impressions of the world around them in visual activities through the visualization of sensations. Hence the desire to draw with fingers on foggy glass, with a stick on the sand and with chalk on the asphalt.
So, existing non-traditional drawing techniques have the main advantage - they allow you to quickly see the results of your work. And, really, putting a blot on paper with your own finger and seeing a funny design in it is fast and fun. In addition, unusual techniques allow
- develop creative abilities;
- form a non-trivial view of the world around you;
- help develop imagination and creativity;
- develop fine motor skills;
- cultivate independence.
Lesson notes on fine arts using non-traditional techniques in the junior group
Lesson notes on fine arts using non-traditional techniques in the junior group
Sweater for my friends
Non-traditional technique:
finger painting
Target:
introduce finger painting techniques; develop initiative, consolidate knowledge of colors; learn to make a basic pattern.
Equipment:
two dolls - a boy and a girl, gouache, silhouettes of sweaters of different colors, sketches of sweaters with different patterns.
Progress of the lesson:
A situation is being played out: boy and girl dolls come to visit the children. They talk about how the clothing store sells sweaters that are completely uninteresting, without patterns, but they would like to wear bright, multi-colored ones. The teacher invites the children to help a boy and a girl decorate sweaters for their friends. Shows on two or three samples possible alternations of color when drawing with fingers, notes the brightest options. When shown to children, the names of certain colors are clarified. During the process, the pressure and amount of paint collected are adjusted. At the end of the lesson, children's works are examined along with the dolls. A boy and a girl thank you for the beautiful sweaters.
Meeting with a kolobok
Non-traditional technique:
tearing paper.
Target:
develop aesthetic feelings by conveying an artistic fairy-tale image using appliqué technique; learn to tear paper of different hardnesses.
Equipment:
illustrations for the Russian folk tale “Kolobok”, sketches depicting a joyful and sad Kolobok, yellow double-sided paper, yellow napkins. PVA glue, whatman paper depicting the path along which Kolobok is rolling, trays, eyes, nose and mouth cut out of paper for Kolobok.
Progress of the lesson:
The teacher tells the children the fairy tale “Kolobok”, but suggests changing the ending so that Kolobok runs away from the Fox. Then the paper “dough” for Kolobok is prepared by tearing off the paper and napkins. The teacher reminds that small pieces need to be torn off. Each child pours the prepared “dough” from his tray onto a circle pre-drawn with glue. You will get one big Kolobok. The question is asked what is he missing. The teacher shows a cheerful and sad Kolobok. Children determine what their Kolobok will be and why. Glue on the missing parts of the face. The lesson ends with an examination of the cheerful Kolobok. It is emphasized that the dough was prepared by everyone together.
Sun
Non-traditional techniques:
drawing with the palm (with the whole hand), imprinting with signets.
Target:
evoke aesthetic feelings for nature and its images using non-traditional artistic techniques; develop color perception and hand-eye coordination.
Equipment:
sheets of blue paper (50x50 cm) with a yellow or orange circle in the middle, gouache (yellow, orange, lemon, red) in bowls (for printing) and saucers (for drawing with the palm of your hand), potato signets, napkins, umbrella, sketches depicting the sun of different colors and execution techniques.
Progress of the lesson:
The teacher invites the children to play with the sun and reads the nursery rhyme “Bucket Sun”:
Bucket sunshine! Come up quickly, light and warm the calves and lambs, even the little guys.
Shows sketches of the sun, made in various visual techniques. The name “ray” is introduced, and the visually effective technique “stroke the rays with your finger” is used. The teacher introduces the concept of red, yellow, orange, “warm shades.” Demonstrates different ways of creating an image, making rays with signet impressions from potatoes or palms. Children choose a technique that is more suitable for playing with the sun. If there are difficulties, the teacher shows how to create an image individually. Children examine the resulting works, choose the most colorful sun, the most cheerful, the most ruddy, etc. They play the game “Sunshine and Rain”, for which children’s drawings are used: if the teacher shows a picture of the sun, the children “walk in the clearing” if he opens an umbrella, everyone hides under the umbrella from the rain.
mimosa branch
Non-traditional techniques:
finger painting, paper napkin rolling.
Target:
teach finger drawing techniques, creating an image by using a dot as a means of expression; consolidate knowledge and ideas about color (yellow), shape (round), size (small), quantity (many), quality (fluffy) of an object; develop application technique skills; develop associative thinking, perception of color, shape. The size of the object; cultivate interest in creative visual activities. Equipment: mimosa branches according to the number of children, vase, red material for drapery; yellow gouache poured into jars, glue, balls of paper napkins, sheets of paper on which mimosa leaves are drawn for each child, images of the sun, fluffy chickens and round balloons; musical material: P. Tchaikovsky “Snowdrop” from the children’s album “Seasons”.
Progress of the lesson:
Children greet the sun to the music of P. Tchaikovsky. It brought them a large bouquet of mimosa as a gift. The teacher asks the children to repeat the name. A mimosa branch is examined. You are invited to carefully examine, smell, and carefully touch the mimosa branches. The teacher asks what color the flowers are, how many there are, what shape they are, what they look like. Shows illustrations of round yellow balls flying across the sky and fluffy chickens. Children find similarities with mimosa flowers. The sun invites the children to “dress” bare mimosa branches. Lying on their tables. The teacher names the material needed to complete this task. Shows how to get mimosa flowers: paper balls need to be glued to branches in different places. He notes that mimosa flowers can also be depicted using fingers and gouache; to do this, dip your finger in paint and make an imprint on a sheet of paper. Children's attention should be paid to the accuracy of completing the task. Remind you to use tissues if necessary. The lesson ends with words of encouragement to all children. The beauty of the resulting mimosa branches is noted. Their similarity to living objects is determined. Each child is invited to show their mimosa to the sun.
Berries and apples on a plate
Non-traditional techniques:
potato prints, cork stamps or finger painting.
Target:
practice combining various techniques when depicting a simple still life, in arranging the drawing over the entire plane of the sheet.
Equipment:
berries and apples, a plate, sheets of oval, square, round paper (diameter 30 cm) in pastel colors, round potato seals, corks, bowls with gouache for printing and finger painting, napkins, sketches with images of still life on plates of various shapes, on tray, basket, etc.
Progress of the lesson:
Berries and apples are considered. The teacher draws the children's attention to the shape (round), size (large and small), color (red, blue, yellow, orange). Reads a poem by E. Sedova:
Small berries, ripe and tasty, scattered like beads on a large plate.
The apples are rosy, round and smooth, and they beg: “Eat us!” We are so sweet!
Children study pedagogical sketches, choose those they like and dislike. The teacher helps determine which seals can be used to make apples and berries. One of the guys shows how to obtain an image. It is specified that berries and apples should be scattered throughout the plate. Children choose whether they will print berries with cork or paint with their fingers, and try different paints. At this time the poem is repeated. The teacher talks with each child who completed the drawing. He asks what colors he chose and how he painted. The most complete plate, the brightest apples, the most colorful berries, etc. are called. Particularly noted are works in which a plate, tray or basket that is different from each other is chosen for painting.
Long-term planning for fine art activities in 2 ml. group
SEPTEMBER
| No. | Lesson topic | Technique | Program content | Equipment |
| 1. | My favorite rain | Finger painting | Introduce the non-traditional fine art technique of finger painting. Show techniques for obtaining points and short lines. Learn to draw rain from clouds, conveying its character (small droplets, heavy rain), using dots and lines as a means of expressiveness. | Two sheets of light gray color with clouds of different sizes glued on. Blue gouache in bowls, napkins, an umbrella for playing, illustrations and sketches. |
| 2. | Funny fly agarics (1st lesson) | Finger painting | Continue to introduce non-traditional fine art techniques of finger painting. Learn to apply dots rhythmically over the entire surface of the paper. Strengthen the ability to evenly paint over mushroom caps, dip the brush into paint as needed, and rinse it well. | Fly agarics of various shapes cut out of white paper; scarlet, crimson and orange gouache, brushes, bowls with white gouache, napkins, illustrations of fly agarics. |
| 3. | Funny fly agarics (2nd lesson) | Finger painting | Learn to draw grass with your fingers (or brushes). Learn to decorate work with dry leaves, instill gluing skills (creating a basic collage) | From previous lesson + dry leaves |
| 4. | Vegetables and fruits on a plate. (Komarova, p. 15) | Application | Introduce children to round objects. Learn gluing techniques: spread glue on the back of the form, take a little bit of it with a brush, work on oilcloth, press the image to the paper with a napkin and your entire palm. | Circles with a diameter of 15-18 cm (plate), images of apples, tomatoes, oranges, etc.) |
OCTOBER
| No. | Lesson topic | Technique | Program content | Equipment |
| 1. | Berries and apples | Imprint with cork, potato signet (circles of different sizes) | Introduce the technique of printing with cork, paralon swab, and potato signet. Show how to obtain a fingerprint. Learn to draw apples and berries scattered on a plate, using contrast in size and color. If desired, you can use finger painting. Develop a sense of composition. | A circle of tinted paper, gouache in bowls of yellow, red, purple, green, various signets, napkins, natural berries and apples or dummies. |
| 2. | My favorite cup | Imprinting with cork, potato signet (circles of different sizes), finger painting. | Strengthen the ability to decorate simple-shaped objects by applying the design as evenly as possible over the entire surface of the paper. Practice typing techniques. | Cups of different shapes and sizes cut out of paper, multi-colored gouache in bowls, various signets, napkins, an exhibition of dishes. |
| 3. | Yellow leaves are flying. (Komarova, p. 16) | Drawing using the dipping technique | Learn to hold a brush correctly, remove excess paint on the edge of the jar; depict leaves by applying the entire bristles of the brush to the paper. Learn to recognize and correctly name the color yellow. Develop aesthetic perception. | Paper 1/2 landscape sheet size, yellow gouache. |
| 4. | Balls are big and small. (Komarova, p. 17) | Application | Learn to glue circles onto a strip. Strengthen children's ideas about the different sizes of objects. Learn to alternate images of different sizes. Practice using proper gluing techniques. | Balls large and small, strips of white paper. Circles made of paper of the same color, with a diameter of 3 cm and 2 cm. |
NOVEMBER
| No. | Lesson topic | Technique | Program content | Equipment |
| 1. | Birds peck berries | Finger painting, cork imprinting | Learn to draw twigs, decorate using finger painting and cork printing techniques (making berries of various sizes and colors). Strengthen your drawing skills. Develop a sense of composition. | Half a sheet of various colors, brown gouache, a brush, red and orange gouache in bowls, corks, drawings of birds cut out from old books. |
| 2. | Let's draw water in an aquarium with fish. (Doronova, p. 14) | Drawing with gouache on wax crayons | Exercise children in completely painting the plane of a sheet of paper by applying sweeping strokes. Learn to saturate your brush bristles with paint in a timely manner. Do not allow children to rub the brush on the paper. Help children develop a feeling of joy from the results obtained. | Sheets of paper with images of fish drawn by the teacher with colored wax crayons |
| 3. | Radiant sun, why do you often hide? | Potato stamp imprint | Practice typing techniques. Reinforce the concept of “beam”. Learn to draw a ray using typing techniques. Develop color perception. | Individual bridge with a yellow circle in the middle, red, yellow, orange, raspberry gouache in bowls, drawings with the image of the sun. |
| 4. | Pyramid. (Komarova, p.25) | Application | Teach children to depict an object consisting of several parts, to arrange the parts in decreasing order. Strengthen knowledge of colors. Develop color perception. | Pyramid, Mugs of different colors on different tables. |
DECEMBER
| No. | Lesson topic | Technique | Program content | Equipment |
| 1. | The little Christmas tree is cold in winter. | Finger painting, cork imprinting | Strengthen your finger painting skills. Learn to make prints over the entire surface of the sheet (snowflakes, snowballs). Learn to draw a Christmas tree. | Tinted sheet of paper (blue, purple), green gouache, brush, white gouache in a bowl, napkins, samples of Christmas trees. |
| 2. | My mittens | Printed with potato stamps. Cork, finger painting | Practice typing techniques. Strengthen the ability to decorate an object by applying the design as evenly as possible over the entire surface. | Mittens cut out of paper of various shapes and sizes, signets, gouache in bowls, exhibition of mittens, napkin. |
| 3. | Balls or other Christmas decorations for decorating the Christmas tree. (Doronova, p. 33) | Drawing with gouache with a brush. | Teach children to depict rounded shapes and familiar Christmas tree decorations using expressive means available to them. Evoke joyful memories associated with the New Year holiday in children. | Sheets of paper divided into squares by fold lines, gouache paint of different colors |
| 4. | A beautiful napkin. (Komarova, p.28) | Application | Teach children to make a pattern on square paper, placing large circles of the same color in the corners and in the middle, and small circles of a different color in the middle of the sides. Develop compositional skills, color perception, aesthetic feelings. | White paper measuring 15*15 cm, circles of different sizes, well-matched in color, samples. |
FEBRUARY
| No. | Lesson topic | Technique | Program content | Equipment |
| 1. | My favorite tree | Sanguine, coal (optional) | Strengthen the ability to draw trees with sanguine or charcoal. Practice drawing straight lines with medium pressure on a sanguine or charcoal stick (so that the line is clearly visible and so that the crayon does not break) | Sheets, sanguine, coal, illustrations and sketches. |
| 2. | Flower for dad | Potato stamp imprint | Practice drawing using signets. Strengthen the ability to complete drawing stems and leaves on half-blooming flowers. Develop a sense of composition. | Postcard for dad: on the front side there is an applique, on the spread there is a place for a drawing, signets in the shape of flowers, gouache of different colors, brushes. |
| 3. | My favorite animal from fairy tales | Poking with a hard semi-dry brush | Practice the poking technique with a semi-dry hard brush. Continue to learn how to use such a means of expression as texture. | Whatman |
| 4. | A beautiful flower as a gift for mom. (Komarova, p.34) | Application | Teach children to compose an image in parts. Cultivate the desire to make a beautiful thing for a gift. Develop aesthetic perception. | Petals of different colors and sizes, a stick and a green leaf, paper the size of ½ landscape sheet of any soft tone. |
JANUARY
| No. | Lesson topic | Technique | Program content | Equipment |
| 1. | The Christmas tree is fluffy, elegant | Poking with a hard semi-dry brush, painting with fingers | Practice the technique of poking with a semi-dry hard brush. Continue to learn how to use such a means of expression as texture. Strengthen the ability to decorate a picture using finger painting. | Small Christmas tree cut out of thick paper, green gouache, hard brush, red and orange gouache in bowls, napkin |
| 2. | Cheerful snowman | Poking with a hard semi-dry brush | Practice the poking technique with a semi-dry hard brush. Continue to teach how to use such a means of expression as texture | A snowman cut out of gray or blue paper, white gouache, a hard brush, red and black markers, whatman paper, tinted in a dark color. |
| 3. | Durable fence. (Doronova, p.29) | Drawing with gouache with a brush. | Exercise children in drawing straight vertical lines. Encourage them to create images based on play motivation: draw a strong, beautiful fence for bunnies or other toys that need their help and protection | Half a sheet of thick paper, cut lengthwise, gouache paint, toys, scissors for the teacher. |
| 4. | Snowman. (Komarova, p.29) | Application | To consolidate knowledge about the round shape, about the difference in size of objects. Learn to compose an image from parts, arranging them correctly. Practice careful gluing. | Blue paper, ½ landscape sheet size, 3 circles of different diameters, additional details. |
MARCH
| No. | Lesson topic | Technique | Program content | Equipment |
| 1. | Mimosa for mom | Finger painting | Practice finger painting and rolling balls from napkins. Develop a sense of composition. | Card made of colored paper with a painted twig, cut out mimosa leaves, 4x4 napkins. yellow gouache in bowls, glue, brushes. |
| 2. | Sun | Drawing with palms | Introduce the technique of palm typing. Learning how to quickly apply paint and make prints is like rays of sunshine. Develop color perception. | A sheet of whatman paper with a yellow circle drawn in the middle, gouache in scarlet, orange, yellow, crimson colors, brushes, plastic saucers for paint. |
| 3. | Ladybugs on the lawn. | Finger painting | Practice finger painting techniques. Strengthen the ability to apply dots evenly over the entire surface of an object, draw grass of various shades (individual activity) | Cut out and painted ladybugs without dots on the backs, whatman paper, napkins, light and dark green paper, black gouache in bowls. |
| 4. | A beautiful scarf. (Komarova, p.38) | Application | Learn to make a pattern on a square sheet of paper, arranging the elements of the pattern in a certain order. Develop spatial concepts. Develop a sense of color, composition, aesthetic perception. Cultivate initiative. | A square measuring 16*16 cm, squares, triangles in matching colors. Several types of samples. |
APRIL
| No. | Lesson topic | Technique | Program content | Equipment |
| 1. | Two merry geese lived with granny | Palm drawing | Continue to teach how to use the palm as a means of painting, color it with paint and make an imprint (the thumb looks up, the rest to the side). Strengthen the ability to complement an image with details. | A lake drawn in advance, white, gray, green gouache, brushes, red and black markers for drawing details. |
| 2. | Magic pictures (magic rain) | Drawing with a candle | Introduce the technique of drawing with a candle (magic rain). Carefully paint the sheet with liquid paint. Then everyone receives a magical picture - a sheet with a pattern already applied by the candle and carefully paints it over. | Candle, blue ink, sheets of thick paper. Half a sheet of paper with drawings already applied with a candle. |
| 3. | Compotes and jam in jars for playing “Shop”. (Doronova, p.49) | Drawing with gouache. | Encourage children, using expressive means accessible to every child, to depict the fruits and berries that they have identified, tasted and would like to draw. | Gouache paints, silhouettes of cans of different sizes cut out of paper. |
| 4. | Birdhouse. (Komarova, p.40) | Application. | Teach children to depict in appliqué objects consisting of several parts (rectangular, round, triangular). Refine your knowledge of colors and develop color perception. | Tinted paper of any soft tone, the size of ½ landscape sheet, a rectangle measuring 8*13 cm (wall), a rectangle measuring 1.5*5 cm (shelf), a circle with a diameter of 3 cm (window), a triangle for the roof. |
MAY
| No. | Lesson topic | Technique | Program content | Equipment |
| 1. | Grass | Palm drawing | Practice palm typing techniques. Strengthen the ability to fill the entire surface of a sheet with prints. Develop color perception. | Whatman paper, dark and light green gouache, brushes, napkins. |
| 2-3. | A painting with beautiful blue flowers to decorate a group. (Doronova, p.53) | Drawing with gouache, mixing paint. | Encourage children to be interested in mixing paint to create light shades of colors. Get children interested in this process and provide an opportunity to practice getting the color blue. | A sheet of whatman paper decorated with a beautiful frame, ½ album sheet for each child, palette, white and blue gouache paints, brushes. |
| 4. | Chickens in the meadow. (Komarova, p.45) | Application | Learn to compose a composition from several objects, freely arranging them on a sheet of paper, and depict an object from several parts. Continue to practice your neat gluing skills. | Illustrations. Green paper the size of a landscape sheet, circles with a diameter of 4 and 2 cm, additional details. |
Get text
