It’s no secret that children love everything bright and beautiful; a rich, rich palette attracts the child’s attention. Therefore, a rainbow made of colored paper is one of the most common and favorite crafts for children. We offer you materials and instructions for creating this fun composition: videos, templates, different assembly methods and types of finished work. A simple creative process for children will be very interesting and exciting, and simple elements of the craft in the finished version will look neat and impressive.
- How to make a paper rainbow with your children
- Required materials and tools
- Step-by-step creation of applications from photos
- Step-by-step assembly of a three-dimensional craft
- Origami with a simple diagram
- Templates and stencils for cutting
- Examples of ready-made crafts
How to make a paper rainbow with your children
To clearly explain to your child how to make a rainbow from colored paper with your own hands, you can remind them before starting work that a rainbow is an atmospheric phenomenon. It can only be seen when it is raining and the sun is shining at the same time.
The second important point is that the 7 colors of the rainbow are always the same and unchanging (as they say in the children's joke about a pheasant...), and their sequence should be observed when assembling the composition. The next nuance is that the obligatory geometric shape of the craft must be maintained - an even arc (semicircle).
Depending on what material is used, the finished craft will have some features. For example, a rainbow made of corrugated paper will differ from its counterpart made of classic colored paper. The last work has clear and contrasting transitions, while the first will be more voluminous, delicate, with slightly blurred boundaries (due to the compressed texture of the paper).
Having familiarized the child with the important points during assembly and its sequence, you can begin to work.
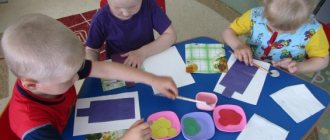
Required materials and tools
To create a paper rainbow you will need:
- colored paper, cardboard, white paper;
- scissors;
- pencil and eraser;
- glue, tape, stapler;
- felt-tip pens or paints for drawing small, additional elements.
When making an applique, you may need frames, stands or ribbons (for hanging).
Step-by-step creation of applications from photos
A rainbow applique made from colored paper can be easily done even by the smallest “masters” of the junior group of kindergarten. Simple craft steps:
- Using the template, narrow stripes (1.5-2 cm wide) are drawn and cut out in 7 rainbow colors (red, orange, yellow, green, blue, indigo and violet), then a yellow or orange sun, and white or blue clouds (2 PC.).
- The strips are glued to a sheet of white paper in the appropriate order, tightly to each other, and the glue is allowed to dry.
- The excess white paper is cut off from the resulting rainbow and the sides are aligned.
- The sun is fixed on the base of the future application (cardboard, sheet of paper) in the upper part on the right or left, and possibly in the middle.
- In the middle part, a rainbow blank is placed horizontally, and carefully lifted, creating an even arc, glued or secured with a stapler or tape.
- The last ones to glue are the clouds at the edges of the rainbow.
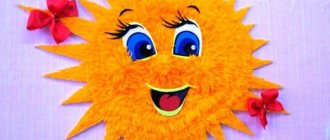
You can add birds to the composition, add a smile to the sun, and drops of rain to the clouds.
The paper appliqué can be simplified even more if the rainbow is not given a curved three-dimensional shape, but simply glued to the base, with “rays” from the sun diagonally to the cloud, which can be created from cotton wool.
To prevent cotton air clouds from losing their appearance over time and becoming disheveled, you can carefully spray them with hairspray from a long distance (30-40 cm). If you use varnish with glitter, you will get the effect of “reflections of droplets in the sun.”
An interesting version of the applique, in which the stripes of the future rainbow are cut into squares. Then each spectrum is assembled into an arc of these squares (like a mosaic).
Step-by-step assembly of a three-dimensional craft
A rainbow for cutting can be slightly complicated; consider an option that is suitable for decorating interiors or themed celebrations (hanging, or stationary on a table or shelf). The assembly proceeds in stages:
- Strip blanks are made from colored paper in the required 7 shades - 2 cm wide, 12-14 cm long;
- the strips are first placed on the table in the color sequence in which they should be in their natural environment;
- the first upper red stripe remains with the original length, and all the rest are shortened, relative to the previous one by 1-1.5 cm;
- using a scissor blade, each strip is given a curved shape;
- The rainbow is assembled - an orange stripe is glued to the red stripe (from below), glue is applied to both edges of the stripes;
- there should be free space between the strips (1-5 cm), and the shape of the arc should be maintained;
- then all the strips are glued in the same pattern, the last one is more straight - purple;
- Air clouds (of arbitrary shape) are formed from cotton wool or polystyrene foam, and a prepared rainbow is glued to them.
The voluminous paper rainbow is ready, it can be placed in the most prominent place, and it will lift your spirits with its bright and cheerful appearance. For hanging use, thread a string through the bottom side (in the center of all strips) and tie it with a bow.
It is advisable to make small slits in the foam, where the ends of the rainbow will fit perfectly, and then fix them with glue.
A voluminous craft with a more complex technique can be made using the classic version of the applique, but the strips will not be pre-glued to the base:
- The first to be fixed with glue (on the sides) in the form of an arc is the central green strip;
- then the following strips are attached closely to it on each side;
- nuance - the orange stripe should slightly overlap the yellow one, and the red stripe should overlap the orange one;
- the same thing on the other side - the blue one goes over the blue stripe, and the purple one goes over the blue one.
This creates a more even and rounded outline of the rainbow. A sun and a cloud are glued to the edges of the rainbow - these are the symbols that make the rainbow appear.
Video master class
The master class, which is worth familiarizing yourself with before starting work, helps your child understand in more detail the principle of assembling a craft, and appreciate the final spectacular result of a beautiful rainbow made of colored paper.
Origami with a simple diagram
An origami rainbow with a simple diagram can be assembled very quickly, even by a child:
- prepare squares of colored paper (in the spectrum of rainbow colors) with dimensions of 5x5 cm;
- make modules from which the craft will be assembled;
- the paper square is folded diagonally, then vertically in the middle;
- the workpiece is turned over with the fold up;
- the lower right part is bent upward at a right angle, also repeated on the left side;
- the workpiece is turned over with the bottom up;
- the upper right corner is bent down, then the left as well;
- the resulting triangle is turned over with the wide side up, and by carefully bending the pocket, they create the shape of a flag with two sharp corners;
- The finished module has one folding side and one blind side;
- start assembling the craft - insert the orange module through the opening side into the red module so that the latter protrudes by 4-5 mm;
- the sharp corners of the red flag on the folding side (top and bottom) are folded into the pocket of the orange module (securely fastened);
- Using this principle, they continue to assemble the rainbow craft; you can alternate the 7-color spectrum several times.
The original rainbow snake is ready. If desired, its ends can be connected with glue, you will get a round wriggling rainbow. Now the child knows how to make a rainbow out of paper that will attract the attention of others and lift their spirits.
Material (senior group): Broken applique “Rainbow-arc”
Dear parents!
I suggest you and your children do the work
“Rainbow-arc” in the style of broken applique.
This mosaic rainbow, assembled from small parts, has an original look. Its creation will require attention and accuracy from the child.
In the process of work, the child will continue to improve the ability to carefully tear small pieces from a sheet of paper and stick them on the base, work with glue, and consolidate knowledge of the colors of the rainbow. This activity promotes the development of fine motor skills and creative imagination in children.
Preliminary work: looking at the picture “Rainbow”, memorizing the saying “Every hunter wants to know where the Pheasant sits” to remember the colors.
Materials and equipment: white cardboard, pencil, colored paper (red, orange, yellow, green, blue, indigo, violet), glue.
First you need to draw a rainbow on a piece of paper. Then you need to carefully tear off small pieces of colored paper of the desired color and sequentially stick them on the base. It is advisable to leave a small space between the pieces of glued paper. Then the finished cut-out applique will look like a mosaic.
Good luck!
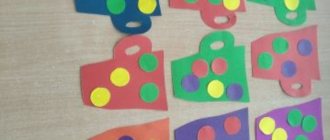
Templates and stencils for cutting
Rainbow templates for cutting greatly simplify and reduce the time spent working on crafts - you just need to print them out and start assembling. The child does not need to independently draw and then cut out individual details to assemble the composition, which may not turn out particularly successful. When using ready-made stencils, all children will have the same blanks - no one will be upset or upset (due to unsuccessfully drawn details).
Rainbow using a glass of water and light
This experiment is very simple; it can be performed both in summer and winter. The main thing without which the experience may not be completed is without the sun. Necessary tools: glass, water and sun.
This kind of experiment is carried out either early in the morning, when the sun has just set, or in the evening, when it has not set below the horizon.
- The rainbow will be best seen on white wallpaper, or a bright room will suffice.
- You need a glass filled with water.
- Stand with your back to the sun so that the rays fall on a glass of water.
- Take the glass in your hands and begin to move it down and up in space.
- Do this until you see a rainbow.
Examples of ready-made crafts
The rainbow craft looks great in any type of execution - in three-dimensional form, or origami, or panels. In addition, you can always make your own author’s changes and additions to the work, which will give the craft a feature and originality.
Paper rainbow is a great leisure activity. Exciting, interesting work will not only lift the child’s spirits, but will also add new knowledge about the world around him. The finished craft can be used in games, or for interior decoration, or you can give it to a loved one as a souvenir.
Rainbow with water drops
This method is very interesting to carry out in the countryside, in the courtyard. When it's a sunny day, take the kids by the hands and try this experiment.
- It's actually very simple, you just need a regular hose with water.
- For everything to work out, first stand with your back to the sun.
- Start moving the hose in different directions, up and down, and eventually until you see a rainbow.
- We advise you to conduct this experiment in the summer, because children are very curious and will want to touch this amazing natural phenomenon.
Rainbow using CD
The experiment with the disk is quite unusual and amazing in its results. It is recommended to conduct the experiment in a dark room or in the evening.
- First, grab a CD. In order not to accidentally spoil the thing, it is better to take an old unnecessary disk;
- Secondly, take a sheet or cardboard;
- Thirdly, you will need a bright flashlight.
Take the disk and place it so that the mirror side is facing up. Direct the light from the flashlight onto the disk, move it at different angles until a rainbow appears.
How does this happen? This is because the disc is made from plastic, which creates grooves on the surface. They, in turn, perform the function of prisms; accordingly, the light is refracted and a rainbow appears.
This is a fascinating experiment you can conduct on a cloudy evening with your children.
Rainbow in the dark
As you understand from the name, this experiment is carried out only in the dark; it wouldn’t work any other way.
To make a rainbow, do the following:
- Fill the container with water;
- As in the previous experiment, attach a mirror to the container;
- Place the container with water in any place, the main thing is that it is level;
- Start shining a flashlight on the mirror, and let the child try to catch a rainbow using a white piece of paper or cardboard.
Such a rainbow can be called a lunar rainbow, because the brighter the light from the flashlight, the brighter the rainbow will be. Here is such an interesting and amazing experiment that came out at home, with all the colors of the rainbow.