On the topic: methodological developments, presentations and notes
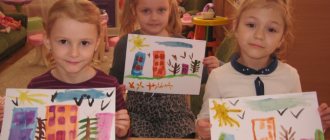
Program content: Learn to draw rowan, highlighting the characteristic features of the bunch. Reinforce the idea of the color red; cultivate interest in collective creativity. Continue learning doat.
Introduce children to the concept of “war”.
Author: Olga Aleksandrovna Kharkova teacher Place of work: MBS (K) OU Primary correctional school - kindergarten No. 10 Age: Second junior group Description of material: material used.
Goal: Formation of elementary ideas about the life of birds in the spring. Objectives: Educational: To develop children’s ability to depict objects consisting of several parts in appliqué; behind.
Introducing children to decorative arts and cultivating interest in Russian folk art. Notes on drawing in the second junior group on the topic “Let's decorate the Dymkovo duck.
Notes on drawing in the second junior group (3-4 years old) Topic: “Mimosa for a bear” (non-traditional drawing techniques).
Source
Preview:
State budgetary preschool educational institution
Kolpinsky district of St. Petersburg
Notes on drawing in the second junior group A "Ladushki"
on the topic: “A house with round windows for a bunny”
Abstract of educational activities for visual activities “House with round windows for a bunny” (2nd junior group)
1. Instill an interest in drawing.
2. Continue to develop children’s ability to hold a brush correctly without straining their muscles.
3. Continue to develop children's skills in drawing straight, vertical and horizontal, long and short, round shapes.
4. Develop the ability to create simple plot compositions.
5. Consolidate knowledge of color names: yellow, blue.
To consolidate children's knowledge about the hare - what they look like, what they eat, where they live.
Develop fine motor skills of the hands.
Foster mutual assistance and mutual assistance.
Materials and equipment:
Picture of a bunny and hares, a house, gouache in blue and yellow colors, brushes, cups of water, album sheet, palette, napkins.
1. Introductory part. Raising the emotional mood of children.
Children stand near the teacher.
Guys, good morning! Have you seen the sun today? (children's answers)
-Did you smile at him? Let's smile at the sun and at each other! (children smile).
2. main part. Surprise moment.
- Guys, a bunny came to visit us. Let's look at the bunny. Look what kind of fur he has? (children's answers)
- Guys, I completely forgot where our bunny lives? (children's answers). Remind children that the hare is a wild animal, lives in the forest, and changes its coat in winter and summer.
-But that’s right, well, what a great fellow you are, you reminded me, and now let’s all remember together what a bunny eats? (carrots, cabbage, grass, etc.)
-Oh, look what a house our bunny has. The teacher draws the children's attention to the illustration of the house.
-It seems to me that there is someone in the house... Let's see? (children's answers)
-Oh, there are bunnies here, look how many there are! But it’s cramped for all of them to live in the house, guys, maybe we can help the bunnies? Let's draw houses for them? (children's answers).
-Now, let's go to our workshop. The children sit at the tables.
-We will now turn into artists and draw real houses! Now raise your eyes and see how we will draw houses for bunnies.
The teacher explains and clearly shows the step-by-step process of drawing:
— We will paint the house in blue. From the middle of the sheet we draw a long, vertical strip from top to bottom, step back and draw the same strip from top to bottom, and now we connect with a short strip from left to right at the top, and connect the long strips at the bottom. Now we have drawn the walls, and now we will draw the roof, above the house we find the middle at the top and put a dot, and now from this point we draw a long strip to the edge of the house, on the left side and on the right side. Now let's draw a window. The bunny's window is round, like a mink. But with yellow paint, we will draw a sun, we draw the sun at the top, at the top of the sheet. Our sun is round like a pancake, and we paint it with yellow paint, and draw straight rays from the sun.
- Let's raise our fingers! The teacher conducts finger gymnastics.
One two three four five!
Let your fingers go for a walk!
This finger found a mushroom,
This finger cleans the table,
Well, this one just looked!
3. Productive activities of children.
4. Final part. Summing up, analysis and exhibition of works.
-What a great fellow we are, we tried so hard, now there will be enough houses for all the bunnies, they will be cozy and warm there! Now, please tell me, which house do you think is the most beautiful? Why? Which house is the biggest? Now show me the smallest house? Well done, today we helped the bunnies, and now let’s quickly hang up our houses so that the bunnies can live there sooner! Children help the teacher organize an exhibition of works.
"Furniture" GCD in the second junior group
Performed:
Ivanova Elena Yurievna,
teacher
MADOOU Borovsky kindergarten "Zhuravushka"
GCD summary: “Development of mathematical abilities by means of non-traditional drawing in the second junior group on the topic “Furniture”
Goal: To develop children's powers of observation, elementary mathematical concepts, and holistic visual perception of the world around them.
Tasks:
1. Develop the ability to navigate in spatial directions (draw lines from top to bottom, left to right, use the words “on”, “in”, “behind”);
2. Develop the ability to see the general characteristics of objects (shape, color, size, material of manufacture), use the general concept of “furniture”;
3. Continue learning to draw straight lines.
GCD move:
During free play activities, children find a broken doll chair and table.
Children: - Elena Yuryevna!
Educator: - What happened, guys?
Children: - The furniture for the dolls is broken!
Educator: - What a pity... But we can help the dolls! And I know how! Where do you think furniture is made?
— Children's answers (at the factory)
Educator: - Correct!
Educator: - Guys, let's help our toys. I propose to open a furniture factory here. Close your eyes, turn around yourself - one, two, three! We became carpenters!
What pieces of furniture do you know? (children's answers). Bed, chair, table, wardrobe.
What do they sleep on? (on the bed).
Where do clothes go? (into the cupboard).
What are they sitting on? (on the chair)
What do they have lunch for? (At the table)
What is furniture made of? (from boards).
On the table for each child are prepared sheets of dots, as well as gouache and cotton swabs.
In front of the children there is a children's table and chair
Educator: What is there at the table?
Children: Legs and table top. They show.
Educator: What does the chair have?
Children: Seat, back and legs?
Educator: What do a table and a chair have in common?
Children: There are 4 legs, the seat and table top are square, and the table and chair are made of wood.
Educator: To make furniture, you need special drawings, which are called “schemes”. Can you draw? (yes) Then let's try to draw diagrams of a table and a chair...
Before us lie really smooth boards and drawings - mysterious drawings.
Educator: If you look at them carefully, you will see what it looks like: a table or a chair. what should be done?
The dots will help you read the drawing, open the drawing. Try to connect these points with a line (I show you how to do this on the sheet). The guys begin to draw and connect the lines of their drawings.
At the end of the GCD we consider what tables and chairs we got.
Cheerful music plays, the teacher and the children conduct the dance game “We are sitting on chairs.”
Educator: - What wonderful masters you are! Now we can send these drawings of chairs and tables to a furniture factory. And they will make us new furniture for the dolls! And then they will deliver it for our dolls! (put the drawings in a large envelope to send them)
Used Books
- From birth to school. Basic educational program of preschool education / ed. NOT. Veraksy, T.S. Komarova, M.A. Vasilyeva. – 4th ed., revised. – M.: MOSAIKA-SYNTHESIS, 2022. – 352 pp.;
- Approximate comprehensive thematic planning for the program “From birth to school.” Second junior group / Ed. T.S. Komarova. - .: MOSAIC-SYNTHESIS, 2022. – 168 pp.;
- Complex classes according to the program “From birth to school” edited by M.A. Vasilyeva, V.V. Gerbova, T.S. Komarova. Second junior group / author-comp. T.V. Kovrigina, M.V. Kosyanenko, O.V. Pavlova. – Volgograd: Teacher, 2013. – 262 p.;
- https://www.maam.ru/detskijsad/konspekt-zanjatija-po-poznavatelnomu-razvitiyu-vo-vtoroi-mladshei-grupe-na-temu-mebel.html
“Certificate of publication in the media” Series A No. 0007630
We invite teachers of preschool education in the Tyumen region, Yamal-Nenets Autonomous Okrug and Khanty-Mansi Autonomous Okrug-Yugra to publish their teaching materials: - Pedagogical experience, original programs, teaching aids, presentations for classes, electronic games; — Personally developed notes and scenarios of educational activities, projects, master classes (including videos), forms of work with families and teachers.
Why is it profitable to publish with us?
1. “Kindergartens of the Tyumen Region” is an officially registered specialized media outlet at the federal level. 2. The activities of the editorial office are supported by the Department of Education and Science of the Tyumen Region 3. We issue a “Certificate of Publication” in the media. 4. The document has a unique number, is entered in the register, has the original seal of the editorial office of the online publication and signature. 5. “Certificate of publication” in the media is sent to the author in both paper and electronic versions.
Details >>>
Sample “Certificate of publication of author’s methodological material in the media.”pdf
Share
Summary of drawing lesson “Draw a house”
Tasks:
1. Correctional and educational:
Consolidating knowledge about colors and geometric shapes of objects.
Continuing to teach children how to create simple compositions.
2. Correctional and developmental:
Development of cognitive processes: perception, memory, thinking.
Execution of the drawing according to the sample. Demonstration and explanation by the teacher of the main method of examining the subject. Focus on the sequence of actions to complete tasks. Memorizing a sequence of actions, switching from one action to another (changing colored pencils).
Development of observation skills.
Using visual supports (arrangement of objects on a flannelgraph) to attract children's attention to the addressed speech, developing its understanding.
Continuation of training in basic planning of upcoming activities. Using drawing techniques learned during activities outside of class.
Development of creativity.
An action plan is proposed by the teacher. Operational control of an adult: use of explanations and instructions.
Improving the lexical composition of oral speech.
Children naming an object, a sample and its parts, designating their signs using speech, the purpose of the object, the location of the object in space (inside-outside, top-bottom, left-right). Brief answers to the teacher’s questions, repetition of the teacher’s task (instructions).
3. Correctional and educational:
Attracting children's attention to the topic of drawing in everyday household activities and in the lesson itself.
Formation of accuracy skills in work.
Development of emotional responsiveness.
Material for the lesson – drawing “Draw a house”, simple and colored pencils (12 colors), album sheets.
Work should begin with developing the ability to deliberately consider, i.e. visually examine. Under the guidance of a teacher, children isolate the main elements and details of an object, determine their relationship, position in space, and notice changes in the object itself or its location. Repeated completion of such tasks contributes to the development of observation, which in turn allows the child to form a holistic and at the same time detailed idea of the object.
Before the lesson, preliminary work must be done - remember what geometric shapes were studied in previous classes, find the shapes in the surrounding space (in a group), pronounce (a window is a rectangle, a mirror is a circle, the roof of a dollhouse is a triangle, etc.), viewing illustrations in order to arouse interest in the upcoming lesson, the activity of children, the desire to engage in visual activities in general.
Lesson structure:
Introductory part - 3 min.
A conversation about the components of the house (walls, roof, window), about what can be drawn next to the house, familiarization with the composition on a flannelgraph for example - 5 minutes.
Physical exercise (finger gymnastics) - 2 min.
The main part of the lesson is 20 minutes.
Lesson summary: 5 min.
Progress of the lesson:
Introductory part
“Guys, we read a fairy tale about Little Red Riding Hood, who went to visit her grandmother. Today in class we will draw the house where my grandmother lived. Let's remember what kind of houses we know? The response of children (big and small) is expected here. They also simultaneously monitor how the teacher builds a composition on a flannelgraph. Then the structure of the image in the picture, the shape, proportions and arrangement of parts of the house are analyzed.
P.: “Does the house stand on the ground or hang in the air, or is it located in the sky?”
D.: “Below.” "On the ground".
P.: “Every house has walls (a wall is placed on the flannelgraph - a yellow rectangle). Please note that the rectangle is even and the lines are straight. What else needs to be built to make a house?”
D: “Roof” (in chorus). “Mom” (one hesitant answer).
P: “That’s right, the roof. The roof is on top of the walls and protects the house from rain and snow, so it fits tightly to the walls of the house so that neither snow nor raindrops get into the house. The roof is triangular in shape. Please note that all sides of the roof are level. What else is missing in our house?”
D: “Stola.” "TV." "Parents."
P: “Let’s think about it. Grandmother lives in the house. But how can she get into the house?
D: “We need a door.”
P: “We need to draw a door. We'll draw it on the left. The door is rectangular in shape, look carefully at the size it is smaller than the wall. Draw it beautifully, evenly. Let it be open (see sample) so that grandma can enter the house. You must remember to draw a staircase (based only on the sample, without verbal instructions). Do you remember?
D: “We still need to draw a window.”
P: “We will definitely draw a window. Do you remember what and in what order we will draw? Repeat."
D: “Walls. The roof. Door".
P: “That’s right. Well done. It’s very good that you remembered about the window. Windows come in different shapes: square, rectangular, and even round. We will draw a square window. There will be one window in the center of the wall. Try to draw it beautifully, neatly.”
Consolidating the concepts of spatial orientation. Then there is an analysis of the color in the picture - green grass grows on the ground, the sky is blue, the sun is yellow. And after all this - a holistic perception of the picture.
Fizminutka (finger gymnastics)
Knock-knock-knock, knock-knock-knock. There is a knock again.
The other finger on your hand tapped the thumb.
We will all take turns tapping our fingers and, of course, rest.
Now we'll be pussies. Hey, don't come too close.
Let's scratch it a little. We are not guys, but cats.
Now let's start drawing.
The main part of the lesson is children's independent activity.
First, a sketch of the drawing is made with a simple pencil. “We look carefully, remember how round the sun is, high in the sky. Home is on the ground." “Let's take a sheet of paper, a yellow pencil and color the sun. Now the grass is green. Where is our green pencil?
Individual work with children is carried out; the teacher approaches each child and guides the child with recommendations.
The final part.
P: “Guys, class is over. Show what you got. Did you do everything right?”
Children show their drawings. Everyone is happy with the results of their work. They believe that no one makes mistakes. When a teacher points out mistakes, children do not react to the teacher’s words and do not get upset. Analysis of children's drawings.
Bibliography:
1. E.A. Erzhanova. Visual activities in the training and education of preschoolers with developmental disabilities. // Defectology. - 2003. - No. 6
2. Teaching children with intellectual disabilities: (Oligophrenopedagogy): textbook. manual for university students / pod. ed. B.P. Puzanova. — 2nd ed., erased. - M.: Publishing House, 2006
3. Fundamentals of special psychology: Textbook for students of secondary pedagogical institutions L.V. Kuznetsova, L.I. Peresleni, L.I. Solntseva and others; edited by L.V. Kuznetsova. — 2nd ed., erased. - M.: Publishing House, 2005. - 480 p.
MAGAZINE Preschooler.RF
Notes on drawing for children of the 2nd junior group Topic: “Puppy”Target:
- Forming the ability of children to paint with a hard brush using the poking method, mastering the color palette (orange, brown).
Tasks:
Educational
- To develop children’s ability to paint with a hard brush using the poking method.
- Improve the ability to hold a brush correctly while working.
- Master the color palette (orange, brown)
- Strengthen the ability to draw with crumpled paper and select colors, complement small missing details using plasticine.
- Enrich children's vocabulary
Developmental
- Develop creative abilities and aesthetic perception.
Educational
- Cultivate a kind attitude towards pets.
- Cultivate activity and the desire to complete work to the end.
- Continue to encourage independence and creativity.
Correctional
- Develop fine motor skills of hands
Integration of educational areas:
- cognition
- communication
- artistic creativity
- socialization
- music
- health.
Materials:
Half a landscape sheet with a drawn outline of a puppy (for each child).
Brown, orange gouache, hard brush.
A small sheet of paper (palette) for each child to check the poke and the correctness of the chosen color, jars for brushes, plasticine lumps of different colors for the eyes (2 pcs.) and black for the nose (1 pc.), fabric napkins.
Two paper kennels (orange and brown) for the didactic game “Each dog has its own house .
Puppy caps for dynamic pause.
Demo material:
Outline of a puppy on a sheet of paper, film on a laptop with a picture of a puppy and a dog.
Preliminary work:
Looking at illustrations, postcards, paintings depicting dogs, playing with a toy dog, reading E. Charushin's stories about Tomka, watching the dog on a walk.
Progress of the lesson
Children enter the hall. Educator: - I’m very glad to see you, Hello! Draws children's attention to guests.
Children say greeting:
Hello hands - clap, clap! Hello legs - top, top! We need to say hello to each other! Hello dear guests!
We will draw!
The children turn to the teacher.
Voss: Guys, I’ll tell you a story about Grandma Arina (the teacher puts on an apron and scarf), who lived in a very beautiful, noisy yard and had many friendly, kind and funny pets.
The leader asks the children a question: “Do you like pets?”
Children: - Yes.
Then I invite you to take a walk through this wonderful yard and get to know my pets.
The voices of pets are heard. She lived with Ryaba the Hen, Rogatushka the Burenushka, a purring cat, a yoke horse and three cheerful little pigs.
Oh, guys, look, whose house is this? I wonder who lives in it?
Now I'll ring the bell. The sun calls (the monitor turns on), a dog and a puppy appear. A problematic situation is created: “How to help a puppy find friends ,” because he has no one to play with.
- Children, we need to help the puppy, draw friends. Shall we help? (Yes).
-I will teach you how to draw beautiful puppies using the poking method. Come to me. And the puppy will watch us how children can draw beautifully.
(Children approach the easel and stand in a semicircle.)
Educator: - You know how to paint with a soft brush, but today you will learn to paint with a hard brush. Try with your finger to see how hard the brush is... The brush bites...
Teacher (shows): - I put paint on a brush and paint with a poke: first I’ll paint the face along the contour, it’s round, and now in the middle. Then - the body, legs, tail. I’ll rinse the brush in water, dry it on a napkin and put it in a glass. And we will draw the grass under the paws in a way that is already familiar to you - with crumpled paper, what color? (green).
-Right. I put paint on a crumpled leaf and paint grass.
And I’ll make the nose and eyes out of plasticine, look. I take a small ball and press it to the muzzle with my finger, and now another one. Here are the eyes. And now the nose. Look how the dog turned out! Fluffy, soft, funny.
-Tell me, which brush will you use to paint the puppy’s fur? (hard).
-Where should you first draw the fur on the head or body?
Now sit down at the tables. Now we will do a little warm-up. Take a hard brush in your hands. Begin:
We hold the brush like this: (Hand on the elbow. Hold the brush above its metal part). It's difficult? No, it's nothing! The tassel poked and the heel clicked. (Move your hand along the text).
One poke, two pokes. And then, then, then (Circular movements of the hand). The brush runs around. Spun like a top.
After a poke comes a poke. (Children poke on the table with a dry brush).
- Well done, put some paint on a dry brush and get to work.
Independent work of children.
The teacher controls the drawing process and helps the children if necessary.
Physical education minute.
Friendly puppies run merrily, singing cheerfully in their ringing voices: “Woof - woof - woof!” And then the front legs raise,
And they happily wag their tails at each other. They ran away...... They played out (circling behind their tail). And everyone quickly gathered to see me (the teacher hugs the children) -2 times.
(Children perform movements in accordance with the text).
Voss: - Guys, we need to finish our work, and to do this, go to your tables. What haven't you done for the dogs yet?
Children answer: - Eyes and nose.
Voss: - That's right. Let's make eyes and a nose from plasticine. Take the small blue balls, these are the eyes, and place them on the puppy’s face and press with your finger.
-Well done! Ready!
-What else do we have left? Nose.
-Let's take a big black lump and make a nose for the dog.
Our puppies are ready.
-Now let’s draw the grass with crumpled paper.
Didactic game “Let’s put the puppy in the house .
Educator: - Children, take your work in your hands and come to me. In front of you are houses for puppies. We need to put brown puppies in a brown house, and orange (red) ones in an orange house. (Children place their puppies next to the houses of the corresponding color).
An analysis of children's work is carried out.
Educator: - Guys, what funny, wonderful puppies you have turned out to be: fluffy, cheerful! You tried, you worked carefully. Now Shustrik will have many, many friends!
A puppy is heard barking.
The boy turns on the laptop and a puppy appears, who is very happy and says to the children “thank you very much!”
Educator: - guys, let's remember what we did today? (Children's answers) What brush did you paint with? (hard). Well done! Today we tried, did a good deed for the puppy, and I’m giving you each a friend (the teacher gives out puppies).
Voss: - And now we need to return to the children's room. garden.
-Eyes close. The kids are smiling. The eyes open. They return to the kindergarten.
Summary of direct educational activities in artistic creativity Topic: “Puppy” 2nd junior group MBDOU No. 144 D/S “Sun” Educator high. sq. categories Kalacheva E.V.
| Next > |