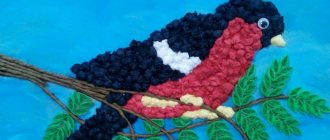
Ready-made examples of complex and detailed plasticine hedgehogs
Experienced craftsmen can try to make a complicated version of a hedgehog from plasticine, where the detail increases and becomes more complex, for example:
You can create original mini-compositions:
Applications with a plot look very beautiful, natural and decorative. Such a composition, placed in a frame, will enliven a child’s room, give a cheerful mood and warm memories from work (possibly together with the child).
A plasticine hedgehog is easy to make, and the various forms of production make you want to make a new version. Ready-made crafts can be used in games, decorate the interior of children's rooms, or used for themed parties in the garden.
You can make a Hedgehog from Smeshariki, detailed instructions here.
What qualities can modeling instill in a child?
In addition to the benefits, such an activity helps the baby achieve new skills and abilities. Therefore, we sculpt with the kids from plasticine step by step and develop important qualities.
Qualities such as:
- Love for work. By kneading small pieces of plasticine, the baby understands that to get a good result you have to work hard.
- Creative thinking. Try to give your child as much independence as possible. Let the hedgehog look more like a potato, and the fox have a strange shape. He learns on his own and develops his imagination and thinking.
- The ability to find a way out of the current situation. When something doesn’t work out for the baby, he asks you to fix it. You must show him possible solutions. For example, a bear cub can't hold his head up. Offer to attach it to the body using a match. Thus, from an early age the child will learn to find a way out of various situations. In essence, logical thinking develops, which is very important for a growing child.
Hedgehogs made of cones and plasticine
For this idea you need to prepare cones and nuts of different shapes. Let's take a big long cone. We mold the necessary parts from plasticine. We will need an elongated muzzle, two white and two black balls, one large ball for the nose and a red tongue. We collect all the details of the muzzle and fasten them together. We glue chestnut shells on top as spines. We sculpt long legs and attach them to the pine cone. We attach nuts to two pieces of orange mass. This will allow the figure to remain stable. If desired, you can fashion different delicacies and decorate the hedgehog with them.
How to make a hedgehog from plasticine
If your child likes to create animal figures from plasticine, invite him to make a hedgehog. This cute, prickly animal will add to your baby's collection of products. To make a little animal, we suggest you choose one of the instructions below. You will learn how to make a hedgehog from plasticine in different ways.
If you have already sculpted a cat from plasticine, which we talked about in the previous article, then making a charming hedgehog will not be difficult. We have selected several options for making a hedgehog for you. The first two will be based only on the use of plasticine.
Craft hedgehog from seeds and plasticine
For the next idea we will need sunflower seeds and brown plasticine. Finding these materials is not at all difficult, and making such a hedgehog is suitable even for the smallest. Cut a piece of plasticine and roll it into a ball. Give it a droplet shape. It is not necessary to perfectly smooth the entire surface, as it will be deformed by the seeds. We attach eyes consisting of black and white balls. Don't forget about the big brown nose. Now, let's move on to the most interesting moment. Insert the seeds in rows with the wide end down. The first row will consist of 4-5 seeds, depending on the size. Next, we increase the number of needles in one row. Cover the entire surface of the hedgehog with seeds. An original, and most importantly, interesting children's craft is ready!
Craft hedgehog made from chestnut and plasticine
Chestnut has a very interesting shell that can be used for crafts. Its shape resembles the spines of hedgehogs, so we will use it for the animal’s fur coat. The basis of the hedgehog will be the fruit itself - the nut. We sculpt an elongated sharp muzzle and glue it to the nut. We attach ready-made eyes on top, or we sculpt them ourselves. We sculpt a mouth from a small piece of red plasticine. Glue chestnut shells on top. You can create a composition from a hedgehog and dried autumn leaves.
Hedgehog made of plasticine and seeds on cardboard
This craft, like the previous one, requires seeds, only not sunflower ones, but watermelon ones. The hedgehog will turn out flat, so you need to prepare cardboard. Draw the silhouette of a hedgehog on cardboard of the desired color. Carefully cut it out. We will cover the base with brown plasticine, so we will prepare it in advance. Knead the mass thoroughly until it becomes soft and pliable. This will make working with the material easier. We tear off small pieces and press them onto the cardboard. The layer should be thick enough for the bones to stick. We draw a clear boundary between the head and the body. We cover only the body with plasticine. We begin to insert the seeds at a slight angle, starting from the top. We continue to insert the seeds in rows until the entire back is covered. Glue on an eye consisting of a white and black circle. Add a nose, mouth and eyebrow. To make the hedgehog look brighter and more interesting, we add various details in the form of leaves, mushrooms and berries. In this way you can make animals of different sizes and you will get a whole hedgehog family!
Plasticineography - hedgehog made of plasticine on cardboard
This option is suitable for school-age children. Its production requires accuracy, perseverance and patience. The picture with a hedgehog and a tree can be printed and transferred to cardboard, or drawn. Knead the green and blue plasticine in your hands. It should become more flexible to make it easier to work with. We cover the sky with a thin layer of blue material. We do the same with grass, but using green color. Carefully smooth out the background. Now, we will need thin flagella of dark brown and black color. They must be the same thickness. We lay out the tree and stump with flagella. Two colors will allow you to imitate the pattern of wood. We outline all the elements with a black outline. Fill the bird with gray color. The next step is to deal with the foliage on the trees. We roll balls from three shades of green plasticine. Each ball must be flattened and rolled at the base. Fill the entire crown with leaves. We roll needles from black plasticine. We will use them to make a prickly fur coat for a good hedgehog. At the final stage, we add details in the form of grass, mushrooms, flowers, a hollow and the sun. We cover the clouds with a white mass. Place the picture in the frame. This craft will make a wonderful gift and will decorate any shelf.
Modeling a hedgehog from plasticine - step-by-step master classes
First of all, let's prepare plasticine and tools for working with it. You can use regular plasticine, but lightweight plasticine is better for this option. It will dry quickly and the figurine will not become deformed in the future.
First of all, let's form a large ball of white mass.
We press a groove in the center of the plasticine with our fingers, thereby separating the head from the body.
We form a hump in the upper part, and press the area above it a little inward.
Using a sharp tool, we make two eyes at a great distance from each other. We push a smile under the nose. Draw a line from the nose to the mouth and cut out a recess just below.
Insert eyes made from black plasticine balls.
Attach the oval nose and mouth.
From the brown mass we form needles of different lengths and thicknesses. We attach the largest needle at the top.
We continue to attach the spines on both sides, gradually reducing their size.
Using a tool with a round tip, we press out the places for the handles.
Let's work on the apple decorating the back of the hedgehog. We roll the red ball. We make a recess at the top. We slightly narrow the fruit from below. Use a sharp wooden stick to make a hole at the top.
We place several crushed needles on the back of the animal. For strength, insert a toothpick and plant an apple on it. Next, we fill the entire space of the back of the hedgehog with needles.
Roll the white paws and form the toes. Place a soft pink ball into the depression under your fingers and flatten it. We cover a thin stick with white mass and roll the foot. We cut through the fingers and smooth out the corners. Cut off the excess and insert the legs into place.
The final details remain. Place a twig and a green leaf inside the apple. Add thin eyebrows.
The result is a cute and kind animal that will not leave anyone indifferent.


