Drawing with leaf prints is a non-traditional technique. The completed work always looks interesting and creative, whether the child is at least 2 years old, at least 7 years old. A creative activity brings a lot of fun and can interest even those kids who don’t like to draw in general. We will tell you in detail how to make beautiful drawings and what materials you need to use.
The benefits of learning different drawing techniques
Drawing is one of the simplest and most accessible ways to show your creativity and give free rein to your imagination.
Physiologists and psychologists have proven that creative activities are very beneficial for children. They have a positive effect on development:
- train hand motor skills;
- teach to fully perceive colors and shades;
- improve memory and creative thinking;
- promote independence in decision making;
- Increase concentration and perseverance.
Children who master several drawing techniques often use an unconventional creative approach in life and cope with complex tasks using extraordinary methods.
In preschool and primary school age, it is especially useful to study non-traditional types of fine art: drawing with prints of leaves, palms, plasticine printing, monotype, frottage, grottage, blotography and others. They do not require small movements, straight lines, or shading from the child, which are so difficult to achieve at a young age. Creative activities are always fun and interesting.
Topic: Drawing an autumn forest
For work you need to prepare: - gouache paints; - white A4 album sheet; - a flat, wide brush (for example, No. 12), - fallen leaves from different trees.
How to draw an autumn forest with children using the technique of leaf prints on paper: step-by-step description
Step 1. Draw the sky on the background.
Let's start with decorating the background. Place the A4 size sheet horizontally. Dip the brush into white and blue paint and, moving from left to right, paint the sky and blur it a little with water. Going down the sheet, we try to take more white paint onto the brush than blue. The sky can be drawn on 1/4 sheet.
Step 2. Draw the earth on the background.
Invite the children to remember what colors autumn has? Let them think about how old trees differ from young ones? What trees will they depict in the drawing? Let's paint the ground with fallen leaves using brown-green paints by moving the brush from left to right.
Step 3. Draw a tree using the technique of leaf prints on paper.
Choose a piece of paper you like, preferably a large one. We paint it on the reverse side with paint of any color in accordance with the colors of autumn. This is an important nuance, since the veins on the back of tree leaves are more pronounced, which means they will give us a more beautiful print.
Reminder: In this painting technique, the paint should be thick enough. Do not wet the brush too much in water, otherwise the print will be smeared.
Also paint the tail of the leaf.
Then you need to take a leaf, place it carefully on the prepared background in the background so that there is no shift of the leaf on the paper. Cover the top of our sheet with a paper napkin. It will protect your work from smearing the paint that has come out from under the piece of paper. Next, you need to press the napkin with your palm or lightly stroke it with your fist.
Remove the napkin. Carefully remove the leaf by the tail.
So the first painted tree appeared in our autumn forest!
Step 4. We draw large old trees with leaf prints.
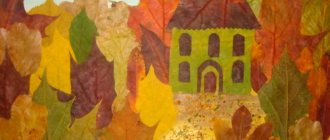
Similarly, we draw several more trees with prints of different large leaves and paints of different colors. These are old trees, they are larger in size. Try coloring the leaves in several colors. This is what happened to four-year-old Nastenka.
Step 5. We draw young trees and bushes with imprints of leaves.
Now let's select a few smaller leaves - these will be young trees and shrubs. Let's paint them with different autumn colors and make prints in the foreground. Thus we get a landscape - an autumn forest. This is the autumn forest seven-year-old Lisa painted with leaf prints.
Description of the technique of drawing leaves
To make a beautiful, bright picture with your children, you must first prepare the materials. You will need:
- leaves of different sizes and shapes;
- album paper;
- paints;
- brush;
- a glass of water;
- pencil;
- a draft on which paint will be applied to the leaves.
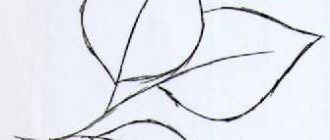
Next you need to come up with a composition. For example, make an autumn forest, a sun, a vase with a herbarium, or a large tree out of leaves. Example pictures:
Using a simple pencil, you should draw the outlines of the drawing, which will help you understand where to place each next print of the sheet. Now all that’s left to do is apply paint to the top of the leaf with a brush (several colors can be used at the same time) and apply it to a pre-designated place on the paper.
The secret to a beautiful print is thick ink. It is important to apply it to the entire leaf, paying special attention to the stem and vein areas. The seal must be placed evenly, without fidgeting with your hand, and removed in the same way - with a careful movement.
Method of applying paint around the leaves
You can leave an imprint of a sheet in different ways. Drawings with white leaves on a colorful autumn background are very colorful and bright. Examples:
It is even easier to draw such pictures. Children of the youngest age can cope with the task. To do this, you need to place leaves of different shapes on a white A4 sheet, and holding them, carefully decorate the background. At the final stage, the leaves are removed.
By the way, it is more convenient to use leaves cut out of cardboard as stencils. They fit more tightly, and the prints are always smooth.
Leaf prints using frottage technique
Another unusual way to obtain a leaf imprint is to rub wax crayon on paper placed on top of a densely veined leaf. Frottage is literally translated as “to rub, to rub.” An undoubted advantage of the technique is the realistic transfer of the materiality of the sheet, its shape and relief. In order for the drawing to turn out beautiful, and the leaves not to fidget when rubbed, it is recommended to compose and glue the composition on a draft, and then put landscape paper on top and start drawing.
Examples of pictures:
Non-traditional drawing techniques can and are even very usefully combined with each other. This will allow the child to more fully express his idea. And how interesting it is to then look at the resulting masterpieces of little artists!
Drawing with plasticine stamps
You can start a creative activity of painting with leaf prints at any time of the year, even in winter. Only instead of living leaves from trees, stamps are prepared. The easiest and fastest way to make blanks is from plasticine. To do this, you first need to roll out a layer 0.5–1 cm thick, cut out a shaped sheet with a plastic knife, and then place it on a flat circle with a handle.
If desired, veins can be squeezed out on plasticine leaves. To prevent the stamp from becoming deformed during printing, it is recommended to keep it in the freezer for 20–30 minutes.
By the way, using a leaf stamp you can draw not only on paper, but also on fabric. It turns out something like this:
Each of the non-traditional drawing techniques for children looks like a small exciting game. The implementation of a creative plan in various ways fosters courage, spontaneity and gives complete freedom to express individuality. Such simple, at first glance, prints of autumn leaves under the guidance of a parent or kindergarten teacher can turn into real masterpieces. Try to master this technique too!
Leaf prints on paper: drawing with children
Leaf prints on paper are an unconventional drawing technique with preschool children, which allows you to get an interesting texture of the image using paints. This technique uses natural tree leaves.
There are several stages in drawing using this technique.
Stage 1. Autumn leaves of trees and shrubs are collected together with children on an autumn walk. Leaves of different shapes and sizes are selected.
Stage 2. A plot is invented from the collected elements - leaves. What can be depicted using collected leaves, using them as mosaic elements to create a pattern or plot? What are they like? What can be added to bring the picture to life?
The child lays out a “sketch” of leaves on paper - his future plot. He can finish drawing something with a simple pencil. Think immediately about what kind of background you will need so that it matches the plot and contrasts with the color of the autumn leaves.
Stage 3. We begin to create in the background - create a drawing using the “leaf prints on paper” technique. First we make the background - paint it with a wide flute brush.
Stage 4. When the background is dry, we make leaf prints on it according to our sketch.
Drawing with leaf prints on paper in kindergarten
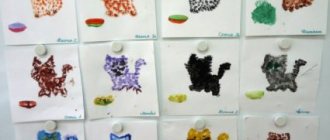
And here is how children from Saratov drew with imprints of leaves on paper. This photo was sent to our competition “Autumn Workshop” by Natalya Vasilyevna Ilyushina (Saratov, MDOU kindergarten No. 196 of compensatory type, teacher of the 1st category).
Such drawings—prints of autumn leaves—were made by Natalya Vasilievna’s children.
Leaf prints on paper: materials for activities with children
Before drawing with leaf prints, when discussing the subjects of future children's works, read one of the poems about autumn to the children, discuss what color palette autumn has, how autumn differs from other seasons. Place the leaves of different trees around the children and play the game “We walked through the forest” (the description of the game is given below) and discuss how the leaves of different trees differ from each other in shape, size, color, and how they can be recognized.