Long-term plan for educational and experimental activities in the senior group
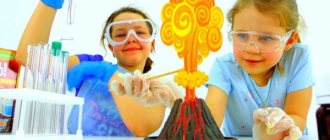
Create a holistic idea of water as a natural phenomenon; Introduce the properties of water (liquid, transparent, odorless, tasteless) Give an idea of the importance of water in human life; Foster respect for water.Have you heard about water? They say she is everywhere! In a puddle, in the sea. in the ocean And in the tap Is this true? How do you think? (children's answers) Educator: Where did the droplet come from, where could it be? Let's look at the pictures where our Droplet traveled. Name them (lake, sea, ocean, puddle, river, stream, stream, swamp) Educator: So, a droplet is a particle of what? (Water) Educator: Who needs water? (Children’s answers) (the panel “Who Needs Water” is hung) Educator: Can a person live without water? (Children's answers) Educator: Without water there would be no life on our Earth. Water is the basis of life. Educator: What do you guys think, what can water do? (run, flow, pour, drip, gurgle) Educator: Guys, do we have water in our group, where is it? (in a water tap) Experiment N1. “Water is a liquid” (there are glasses of water on the table, an empty cup, measuring cups, children are pouring water from one container to another) Educator: Guys, what can we say about water? Let's draw a conclusion. (Water is a liquid. It can be poured into anything: into a glass, into a bucket, into a vase. It can be poured out, poured from one vessel to another) Experiment N2. “Colorless water” On the teacher’s table there is a glass of water, a glass of milk, and a spoon. Teacher: (dips spoon into milk) Guys, can you see the spoon? (No). (puts the spoon in the water) Can you see the spoon now? (yes) Educator: Milk, what color? (white) And what color is the water? (water has no color, it is colorless). Educator: Guys, do you think water can change its color? Want to make sure of this? On the teacher’s table there are two glasses of water, brilliant green, and potassium permanganate. Educator: I’ll now add a magic crystal (potassium permanganate) to the water and we’ll see what happens to the water. Has the water changed its color? (yes) And now I’ll add a magic drop (green stuff) to the water. Let's see what happens to the water. The water changed its color. Educator: So what conclusion do we draw? (water may change color depending on what is added to it)
Experience N3. “Water has no smell” Educator: And now I invite you to smell the water. Does the water smell anything? (children's answers) Educator: What conclusion can we draw? (water does not smell of anything, it has no odor) Experiment N4. “Water without taste” Educator: And now I invite you guys to taste the water. What is she like? Sweet? Salty? Sour? (Children's answers) Educator: Therefore, we draw a conclusion. (Water has no taste, it is tasteless) Educator: Today you learned a lot about water and its properties. And so that you don’t forget, I have prepared these symbols. Let's remember once again what kind of water there is? Water is a liquid; Water is colorless; Water has no odor; The water is tasteless. Educator: Guys, do you need to save water? Why? (children's answers) Educator: For washing and cooking, only purified water is needed. And to get clean water, people spend a lot of work and effort. This is why you need to conserve water and close the tap tightly.
Card index of games for research activities
WATER GAMES
"Smart Jackdaw"
Purpose: to determine that the water level rises if objects are placed in the water.
Content:
1. Reading the story by L.N. Tolstoy "Smart Jackdaw".
2. Children pour a partial container of water and drop pebbles or coins into it, bringing the water level to the edge.
"Water Mill"
Goal: To consolidate children's knowledge about the properties of water (the power of water).
Contents: Children pour water onto the turntable or place it under running water under the tap and watch the turntable rotate.
"Colored Ice"
Goal: To generalize children's knowledge about the two aggregated states of water - liquid and solid, about the properties of water (the ability to freeze to take the shape of the container in which it is located; cold water freezes faster than warm water).
Contents: Children pour warm and cold water into molds and freeze it.
"Water Filtration"
Goal: To consolidate the ability to filter water in various ways (cotton wool, sand, starch, filter paper).
Contents: Children filter water using various techniques.
AIR GAMES
"Dry out of the water"
Purpose: To consolidate children's knowledge about the properties of air (air takes up space)
Contents: Children place a dry cloth in a glass and directly lower it into a jar of water. Remove from the water - the napkin is dry. Children lower the glass with a napkin at an angle - the napkin gets wet.
“Which is faster?”
Purpose: Detect atmospheric pressure.
Contents: Children simultaneously lower 2 sheets of paper (vertically and horizontally; and watch which one lands faster)
"Stubborn Air"
Objective: To discover that compressed air takes up less space and that compressed air has power.
Contents: Children draw water using a syringe (without a needle) and try to squeeze the piston by holding the hole with their finger.
"Let's blow up the balloon"
Goal: To consolidate with children knowledge about the work of the lungs.
Contents: Children inflate and deflate balloons, reinforcing knowledge about how the lungs work. The balloon is inflated - inhale. We release the air - exhale.
GAMES WITH SAND.
«Guess by touch"
Goal: To consolidate children's knowledge about the properties of sand (flowability, opacity).
Content: Children find objects in the sand by touch and recognize them.
"Rescuer"
Goal: To develop in children the ability to generalize, to continue to introduce the qualities of sand (opacity, roughness).
Contents: Children solve riddles and find clues in the sand.
“Who can fill the bottle with sand faster?”
Goal: To consolidate children's knowledge that wet and dry sand have different properties.
Contents: Children fill bottles with dry and wet sand using various techniques (using a spatula, funnel, paper bag).
“Where is the water?”
Goal: Determine that clay and sand absorb water differently.
Contents: Children pour water into transparent containers filled with clay and sand.
GAMES WITH TREE
“Which tree is the bark from?”
Goal: To develop in children the ability to find a tree using a piece of bark.
Contents: The game is played both on the street and in a group. Children use a piece of bark to find the desired tree or tree branch.
“What is made of wood?”
Goal: To strengthen in children the ability to generalize and find objects made of wood among surrounding objects.
Content: Children find wooden objects and group them (created by nature and man-made).
“Name the tree based on its description
«
Goal: To generalize children’s knowledge about trees and their distinctive features.
Contents: Children name the tree by description, find the tree in pictures or on the site.
"Drowning - not drowning"
Goal: To consolidate children's knowledge about the properties of wood (does not sink in water).
Content: Children choose objects made of wood from the proposed objects and immerse them in water.
GAMES WITH PAPER
"Paper Snowballs"
Goal: We consolidate children’s knowledge about the properties of paper (easily wrinkles) and qualities (lightness)
Contents: Children make snowballs out of paper and try to get them into the basket.
"Spinner"
Goal: To develop the desire to transform the object
Contents: Children make a pinwheel out of paper, try to make it rotate in various ways (standing still, blowing on the pinwheel, while running, holding the pinwheel in front of them).
"Magic Paper"
Goal: To promote children’s assimilation of the properties of carbon paper (exact copying of a drawing).
Contents: Children draw using carbon paper, alternately placing matte and glossy sides on the drawing.
"Leaf in the Water"
Goal: To consolidate with children knowledge about the properties of paper (different types of paper get wet in different ways).
Contents: Children place pieces of paper (wallpaper, newspaper, toilet paper, Whatman paper, napkin, etc.) into a transparent container with water of different types, but of the same size.
GAMES WITH METAL
“What does it sound like?”
Goal: To consolidate the ability to identify metal objects by the sound they make.
Content: Children play metal and non-metal musical instruments, compare where the sound was louder.
"Don't get your hands wet."
Goal: To develop in children the ability to identify the properties of metal objects (metal sinks, is attracted by a magnet).
Properties: Children immerse metal and non-metallic objects into a transparent container and remove them using a magnet.
"Metal - non-metal"
Goal: Identify metallic and non-metallic objects by their qualitative characteristics (brilliance, smoothness, opacity)
Contents: Children place objects made from different materials on different trays.
“Find and name.”
Goal: To consolidate the ability to find metal objects in the surrounding space.
Contents: Children look for objects made of metal in the group room.
GAMES WITH MAGNETS
“We draw with magnets”
Goal: consolidate knowledge about the interaction of a magnet and metal shavings
Contents: Children scatter metal shavings on cardboard and use a magnet to create various patterns and designs.
"Magic Mitten"
Purpose: To develop children's knowledge about the ability of a magnet to attract objects.
Contents: Children put on a mitten, place a magnet inside and try to attract metal and non-metal objects.
"Jolly Fishermen"
Purpose: To generalize knowledge about the properties of a magnet (the ability of magnetic forces to pass through water).
Contents: Children lower a magnet into water on a string and take out objects lying at the bottom.
"An unusual nail."
Purpose: Determine the ability of metal objects to be magnetized.
Contents: children attract a nail with a magnet (magnetize it), connect it from the magnet, magnetizing smaller objects to the nail.
GAMES WITH MIRROR AND MAGNIFYING GLASSES
"Scouts"
Goal: To develop in children an understanding of how many times light and the image of an object can be reflected, that is, to see it where it should not be visible.
Contents: “Scout” stands around the corner, and with the help of a mirror, by repeated reflection, without showing himself, he looks at what is happening.
"Magic Circle"
Goal: to consolidate children’s knowledge about the formation of white color from the fusion of seven colors of the spectrum. Contents: Children rotate the top (there are 7 colors of the spectrum on the top), look at it, find out what color they see.
"Double Reflection"
Purpose: Determine the features of mirror reflection (reverse orientation)
Content: children draw while looking in the mirror.
“Look through a magnifying glass.”
Goal: To consolidate children’s knowledge that simple glass cannot magnify objects, only the concave glass of a magnifying glass.
Contents: Children examine small drawings through a simple glass and through a magnifying glass.
HUMAN
"Eyesight check"
Goal: To identify the dependence of the vision of an object on distance.
Content: Children look at pictures depicting objects from different distances.
"Sounds in the water."
Purpose: To identify the features of the propagation of sounds through solid and liquid bodies.
Contents: Children lower pebbles into water, listen to them sink to the bottom, watching from the side and putting their ear to a container of water
"Guess by the smell"
Goal: To strengthen with children the ability to recognize familiar smells.
Contents: Children sniff pieces of foam rubber impregnated with various compounds and determine the smell of the substance.
"Edible-inedible."
Goal: To consolidate the ability to find, name and classify edible and inedible.
Content: children learn to find edible and inedible things from pictures and divide them into groups (food, tools, clothes, etc.)
Card index of experiments for introducing nature to children of senior preschool age
Municipal budgetary preschool educational institution
"Kindergarten "Solnyshko" town. Gvardeiskoe"
Simferopol region of the Republic of Crimea
Card index of experiments for familiarization with living and inanimate nature for children of senior preschool age
Prepared by: teacher Vernovskaya P.N.
October, 2016
Experimentation is one of the most successful ways to introduce preschoolers to the world of living and inanimate nature.
Experimental activities are available to children from preschool age. In games with sand, water, and snow, children learn, explore, observe and participate in amazing transformations in the world around them. In experiments with flour, salt, and water, they study the properties of solutions, observe changes in the properties of materials under the influence of high or low temperatures, and participate in changes in the state of simple substances (water into ice and steam, candle wax, chocolate, dough, and much more). Such experiments, although simple at first glance, develop logical thinking skills in children, help them find cause-and-effect relationships, analyze and systematize knowledge. Preschoolers develop speech activity and coherent speech, and their vocabulary is enriched.
To carry out experimental activities, it is necessary to organize an experimental corner in the group, where you can select equipment for experiments: straws, plates, measuring cups, spoons, materials for playing with soap foam, dyes (gouache, watercolor paints), magnifying glasses, water vessels, a wonderful bag, mirror, waste material (ropes, laces, braid, wooden spools, clothespins, corks), seeds of beans, beans, peas, etc.
The topics of experiments and experiments are very diverse. But the principle “from simple to complex” should always be followed. You can conduct experiments as complete independent lessons, or use them as part of a lesson to consolidate previously acquired knowledge. It is also good to use ICT - technologies that can be used to show the progress of an experiment and capture experiments using photos or videos.
The list of experiences and topics is quite wide. They can be the following: vegetables, fruits, weather, trees, air, wind, cereal plants (rye, grain, wheat), bread dough, water, metals, magnets, shiny, smooth, rough objects, reflective surfaces, light (rays) ), seasons - seasons, the plant world, colors in nature, soil properties, stones, minerals, fabrics and so on.
The desire for knowledge and science born in childhood, correctly formed in time and supported by both teachers and parents, will make it possible to cultivate in our future generation a desire to learn and think.
I offer examples of experiences and experiments for children of senior preschool age
"Aggregative states of water"
Purpose: To prove that the state of water depends on air temperature and is in three states: liquid - water; hard – snow, ice; gaseous - steam.
If it is warm outside, then the water is in a liquid state. If the temperature outside is sub-zero, then the water turns from liquid to solid (ice in puddles, instead of rain it snows). If you pour water on a saucer, then after a few days the water will evaporate, it will turn into a gaseous state.
"Properties of Air"
Target. Introduce children to the properties of air.
Material. Scented wipes, orange peels, etc.
Process. Take scented wipes, orange peels, etc. and invite the children to smell the odors in the room one by one.
Conclusion: Air is invisible, has no definite shape, spreads in all directions and has no odor of its own.
"The air is compressed"
Target. Continue to introduce children to the properties of air.
Materials. Plastic bottle, uninflated balloon, refrigerator, bowl of hot water.
Process. Place the open plastic bottle in the refrigerator. When it is cool enough, place an uninflated balloon on its neck. Then place the bottle in a bowl of hot water. Watch the balloon begin to inflate on its own. This happens because air expands when heated. Now put the bottle in the refrigerator again. The ball will deflate as the air compresses as it cools.
Conclusion: When heated, air expands, and when cooled, it contracts.
"The air expands"
Purpose: Demonstrate how air expands when heated and pushes water out of a container (homemade thermometer).
Progress: Consider the “thermometer”, how it works, its structure (bottle, tube and stopper). Make a thermometer model with the help of an adult. Make a hole in the cork with an awl and insert it into the bottle. Then take a drop of colored water into a tube and stick the tube into the cork so that a drop of water does not jump out. Then heat the bottle in your hands, a drop of water will rise up.
"Water expands when it freezes"
Goal: Find out how snow retains heat. Protective properties of snow. Prove that water expands when it freezes.
Procedure: Take two bottles (cans) of water of the same temperature for a walk. Bury one in the snow, leave the other on the surface. What happened to the water? Why didn't the water freeze in the snow?
Conclusion: Water does not freeze in snow because snow retains heat and turns into ice on the surface. If a jar or bottle where water has turned into ice bursts, then we can conclude that water expands when it freezes.
"Living Water"
Target. Introduce children to the life-giving properties of water.
Materials. Freshly cut branches of quickly blossoming trees, a vessel with water, the label “Water of Living”.
Procedure: Take a vessel and label it “Water of Living.” Look at the branches with your children. After this, place the branches in the water and remove the vessel in a visible place. Time will pass and they will come to life. If these are poplar branches, they will take root.
Conclusion: One of the important properties of water is to give life to all living things.
"Evaporation"
Target. Introduce children to the transformation of water from liquid to gaseous state and back to liquid.
Materials. Burner, vessel with water, lid for the vessel.
Procedure: Boil water, cover the vessel with a lid and show how the condensed steam turns back into drops and falls down.
Conclusion: When water is heated, it changes from a liquid state to a gaseous state, and when it cools, it changes from a gaseous state back to a liquid state.
“Can a plant breathe?”
Target. Reveals the plant’s need for air and breathing. Understand how the respiration process occurs in plants.
Materials. Houseplant, cocktail straws, Vaseline, magnifying glass.
Progress: An adult asks if plants breathe, how to prove that they breathe. Children determine, based on knowledge about the breathing process in humans, that when breathing, air should flow into and out of the plant. Inhale and exhale through the tube. Then the hole in the tube is covered with Vaseline. Children try to breathe through a straw and conclude that Vaseline does not allow air to pass through. It is hypothesized that plants have very small holes in their leaves through which they breathe. To check this, smear one or both sides of the leaf with Vaseline and observe the leaves every day for a week.
Conclusion: The leaves “breathe” on their underside, because those leaves that were smeared with Vaseline on the underside died.
“Do plants have respiratory organs?”
Target. Determine that all parts of the plant are involved in respiration.
Materials. A transparent container with water, a leaf on a long petiole or stem, a cocktail tube, a magnifying glass.
Process. An adult suggests finding out whether air passes through the leaves into the plant. Suggestions are made on how to detect air: children examine a cut of a stem through a magnifying glass (there are holes), immerse the stem in water (observe the release of bubbles from the stem). An adult and children conduct the “Through a Leaf” experiment in the following sequence: a) pour water into a bottle, leaving it 2-3 cm empty;
b) insert the leaf into the bottle so that the tip of the stem is immersed in water; tightly cover the hole of the bottle with plasticine, like a cork; c) here they make holes for the straw and insert it so that the tip does not reach the water, secure the straw with plasticine; d) standing in front of a mirror, suck the air out of the bottle. Air bubbles begin to emerge from the end of the stem immersed in water.
Results. Air passes through the leaf into the stem, as air bubbles can be seen releasing into the water.
“Do the roots need air?”
Target. Reveals the reason for the plant’s need for loosening; prove that the plant breathes from all parts.
Materials. A container with water, compacted and loose soil, two transparent containers with bean sprouts, a spray bottle, vegetable oil, two identical plants in pots.
Progress: Children find out why one plant grows better than another. They examine and determine that in one pot the soil is dense, in the other it is loose. Why dense soil is worse. This is proven by immersing identical lumps in water (water flows worse, there is little air, since less air bubbles are released from the dense earth). They check whether the roots need air: to do this, three identical bean sprouts are placed in transparent containers with water. Air is pumped into one container using a spray bottle, the second is left unchanged, and in the third, a thin layer of vegetable oil is poured onto the surface of the water, which prevents the passage of air to the roots. Observe the changes in the seedlings (it grows well in the first container, worse in the second, in the third - the plant dies).
Conclusion: Air is necessary for the roots, sketch the results. Plants need loose soil to grow so that the roots have access to air.
“What does the plant secrete?”
Target. Establishes that the plant produces oxygen. Understand the need for respiration for plants.
Materials. A large glass container with an airtight lid, a cutting of a plant in water or a small pot with a plant, a splinter, matches.
Progress: An adult invites the children to find out why it is so pleasant to breathe in the forest. Children assume that plants produce oxygen for human respiration. The assumption is proven by experience: a pot with a plant (or cutting) is placed inside a tall transparent container with an airtight lid. Place in a warm, bright place (if the plant provides oxygen, there should be more of it in the jar). After 1-2 days, the adult asks the children how to find out whether oxygen has accumulated in the jar (oxygen is burning). Observe the bright flash of flame from a splinter brought into the container immediately after removing the lid.
Conclusion: Plants produce oxygen.
“Do all leaves have nutrition?”
Target. Determine the presence of plant nutrition in the leaves.
Materials. Boiling water, begonia leaf (the reverse side is painted burgundy), white container.
Progress: An adult suggests finding out whether there is nutrition in leaves that are not colored green (in begonia, the reverse side of the leaf is painted burgundy). Children assume that there is no nutrition in this sheet. An adult invites the children to place the sheet in boiling water, examine it after 5 - 7 minutes, and sketch the result.
Conclusion: The leaf becomes green, and the water changes color, therefore, there is nutrition in the leaf.
"In the Light and in the Dark"
Target. Determine the environmental factors necessary for the growth and development of plants.
Materials. Onion, a box made of durable cardboard, two containers with soil.
Progress: An adult suggests finding out by growing onions whether light is needed for plant life. Cover part of the onion with a cap made of thick dark cardboard. Draw the result of the experiment after 7 - 10 days (the onion under the hood has become light). Remove the cap.
Conclusion: After 7–10 days, draw the result again (the onion turns green in the light, which means nutrition has formed in it).
“Who is better?”
Target. Identify favorable conditions for the growth and development of plants, justify the dependence of plants on the soil.
Materials. Two identical cuttings, a container of water, a pot of soil, plant care items.
Progress: An adult suggests determining whether plants can live for a long time without soil (they cannot); Where do they grow best - in water or in soil. Children place geranium cuttings in different containers - with water, soil. Watch them until the first new leaf appears. The results of the experiment are documented in an observation diary and in the form of a model of the dependence of plants on the soil.
Conclusion: The plant’s first leaf appeared in the soil faster, the plant gains strength better; The plant is weaker in water.
“Where is the best place to grow?”
Target. Establish the need for soil for plant life, the influence of soil quality on the growth and development of plants, identify soils that differ in composition.
Materials. Tradescantia cuttings, black soil, clay and sand.
Progress: An adult chooses soil for planting (chernozem, a mixture of clay and sand). Children plant two identical cuttings of Tradescantia in different soil. Observe the growth of cuttings with the same care for 2-3 weeks (the plant does not grow in clay, but grows well in chernozem). Transplant the cuttings from the sand-clay mixture into black soil. After two weeks, the result of the experiment is noted (the plant shows good growth).
Conclusion: Chernozem soil is much more favorable than other soils.
"How a shadow is formed"
Goal: Understand how a shadow is formed, its dependence on the light source and the object, and their mutual position.
Procedure: Show the children a shadow theater. Find out whether all objects provide shadows. Transparent objects do not give a shadow, since they transmit light through themselves; dark objects give a shadow, since the rays of light are reflected less.
Street shadows. Consider the shadow on the street: during the day from the sun, in the evening from lanterns and in the morning from various objects; indoors from objects of varying degrees of transparency.
Conclusion: A shadow appears when there is a light source. A shadow is a dark spot. Light rays cannot pass through an object. There may be several shadows from yourself if there are several light sources nearby. The rays of light meet an obstacle - a tree, therefore there is a shadow from the tree. The more transparent the object, the lighter the shadow. It is cooler in the shade than in the sun.
“What does a plant need to nourish itself?”
Target. Determine how the plant seeks light.
Materials. Indoor plants with hard leaves (ficus, sansevieria), adhesive plaster.
Procedure: An adult offers the children a riddle letter: what will happen if light does not fall on part of the sheet (part of the sheet will be lighter). Children's assumptions are tested by experience; part of the leaf is sealed with a plaster, the plant is placed near a light source for a week. After a week, the patch is removed.
Conclusion: Without light, plant nutrition is not formed.
“What then?”
Target. Systematize knowledge about the development cycles of all plants.
Materials. Seeds of herbs, vegetables, flowers, plant care items.
Progress: An adult offers a riddle letter with seeds, finds out what the seeds turn into. Plants are grown during the summer, recording all changes as they develop. After collecting the fruits, they compare their sketches and draw up a general diagram for all plants using symbols, reflecting the main stages of plant development.
Conclusion: Seed – sprout – adult plant – flower – fruit.
"How to Detect Air"
Goal: To determine whether air surrounds us and how to detect it. Determine the air flow in the room.
Procedure: Suggest filling plastic bags: one with small objects, the other with air. Compare bags. The bag with objects is heavier, the objects can be felt to the touch. The air sac is light, convex, and smooth.
Light a candle and blow on it. The flame is deflected and is affected by the air flow.
Hold the snake (cut from a circle in a spiral) over the candle. The air above the candle is warm, it goes to the snake and the snake rotates, but does not go down, as the warm air lifts it.
Determine the movement of air from top to bottom from the doorway (transom). Warm air rises and goes from bottom to top (since it is warm), and cold air is heavier - it enters the room from below. Then the air warms up and rises again, which is how we get wind in nature.
“What are the roots for?”
Target. Prove that the root of the plant absorbs water; clarify the function of plant roots; establish the relationship between the structure and functions of the plant.
Materials. A geranium or balsam cutting with roots, a container with water, closed with a lid with a slot for the cutting.
Progress: Children examine cuttings of balsam or geranium with roots, find out why the plant needs roots (roots anchor plants in the ground), and whether they take up water. Conduct an experiment: place the plant in a transparent container, mark the water level, tightly close the container with a lid with a slot for the cutting. They determine what happened to the water a few days later.
Conclusion: There is less water because the roots of the cuttings absorb water.
“How to see the movement of water through the roots?”
Target. Prove that the root of a plant absorbs water, clarify the function of the roots of the plant, establish the relationship between structure and function.
Materials. Balsam cuttings with roots, water with food coloring.
Progress: Children examine cuttings of geranium or balsam with roots, clarify the functions of the roots (they strengthen the plant in the soil, take moisture from it). What else can roots take from the ground? Children's assumptions are discussed. Consider dry food coloring - “food”, add it to water, stir. Find out what should happen if the roots can take up more than just water (the root should turn a different color). After a few days, the children sketch the results of the experiment in the form of an observation diary. They clarify what will happen to the plant if there are substances harmful to it in the ground (the plant will die, taking away harmful substances along with the water).
Conclusion: The root of the plant absorbs other substances in the soil along with water.
"How does the sun affect a plant"
Purpose: To establish the need for sunlight for plant growth. How does the sun affect the plant?
Procedure: Plant onions in containers. Place in the sun, under a cover and in the shade. What will happen to the plants?
Remove the cap from the plants. What bow? Why light? Place in the sun, the onions will turn green in a few days. An onion in the shade stretches towards the sun, it stretches out in the direction where the sun is. Why?
Conclusion: Plants need sunlight to grow, maintain green color, since sunlight accumulates chlorophytum, which gives green color to plants and for the formation of nutrition.