Home is a native place where parents are always waiting, where it is warm and cozy. Therefore, the house applique becomes the main one, both in kindergarten and at school, in the primary grades of a child’s education. With the help of such crafts, you can find out the student’s relationship with his family, how he relates to the family hearth. Paper houses also help to study Russian folk tales; with their help, the teacher can tell children about different types of buildings.
- How to make a house in the form of an applique
- Required materials and tools
- Step-by-step assembly with photos
- Recommendations for design
- Video master class
- Simple instructions on how to make a house with kids
- Origami schemes
- Templates and stencils for applications
Preparing for an application on the theme “Home”
In the middle group, the preparation of materials for the application is carried out exclusively by the teacher. It is he who cuts out paper blanks for children in advance and selects other details. So, for the theme “Home” you will need the following materials:
- The basis is A4 paper (traditionally white, but to create a night or evening composition you can use black or dark blue cardboard). Of course, if collective work is planned, then the teacher prepares a large base - a sheet of Whatman paper, tinting it in certain colors (for example, sky and grass, asphalt, etc.).
- Directly details for applique. These are blanks for the wall of the house (a large rectangle or square), the roof (also a rectangle or square), a window (a strip that the children will cut into pieces or ready-made parts), doors, pipes (the last two elements appear at the request of the teacher). An interesting idea is to use not plain paper as a blank for the wall of the house, but pages of old glossy magazines with bright pictures. And for a night composition, an ordinary newspaper is also great (against a dark background it will look very unusual). You can also use paper with patterns. Often the reverse side of ordinary colored paper is decorated in this way.
- Other materials needed: glue, glue brushes, scissors, oilcloths, napkins.
Blanks can be made not only from ordinary colored paper, but also from patterned paper, glossy magazines and even newspapers
The teacher can offer preschoolers such unusual materials as cotton wool, cotton pads, napkins, sequins, foil, and confetti. For example, using halves of cotton pads, you can create an original design for the snow-covered roofs of houses and the snowdrifts near them. You can use confetti or shiny sequins to designate snowflakes.
To make the composition more original, the teacher can offer children unusual materials, for example, halves of cotton pads and ready-made foil snowflakes
But it’s still too early for middle school students to make houses out of pasta, straw, and cereals. This activity requires perseverance, fairly developed fine motor skills and is more suitable for older preschool age.
Templates and stencils for applications
Parents who cannot devote a lot of time to activities with their child can use ready-made printable templates. At the moment, there are blanks not only for structures, but also for their individual parts. These can be windows, doors, roof, adjacent structures to create an overall composition.
The following are templates that can be printed and significantly reduce the time needed to create crafts.
Applications with images of houses always interest children and older children. This is interesting and simple, because for simple compositions it is enough to simply cut out shapes of the correct shape and assemble them using the mosaic technique. As a result, entire compositions are obtained, each child shows his imagination, so the applications are different, each attractive in its own way. Parents can make the task more difficult for older children by talking about the need to cut out shapes and assemble the houses themselves.
Theme options
Appliqué at home is traditionally offered to middle school students in November. The theme according to the program is designated as “Big House” (two or three floors). But the teacher can slightly modify the key image:
- "Village house"
- “The house where I live” (the child creates an image of his own house - private or apartment).
- “House on the Hill” (especially if children live in the corresponding area).
- “Snow-covered house” (winter applique).
- “Cat House” or “Teremok” (based on a fairy tale).
In addition, the composition can be collective - “Houses of our city (village).”
Children can make appliqué on separate sheets of paper, which are then combined into a collective panel
Video: New Year's application “Snow-covered houses”
How to motivate children to be creative
An important part of a teacher’s job is to create motivation for creativity in preschoolers. Of course, in the middle group, game characters are actively used for this. For example, Dunno (a doll) appears in the group and reports that in his Flower City he learned to drive a car and broke many houses. His friends are offended by him, and the hero asks the guys to help build new beautiful buildings.
Dunno comes to the guys and says that he broke almost all the houses in Flower City when he was learning to drive a car.
Another option is that a sad boy Vanya (also a doll) comes to the preschoolers. He says that when he grows up, he really wants to become a builder - to build large brick houses. In the meantime, he would like to make houses out of paper, but he doesn’t know how.
You can start the lesson with a riddle about builders:
- Among the clouds on high, We are building a new house together, So that the people in it can live happily in warmth and beauty.
Then the teacher briefly talks with the children about this profession, emphasizes its importance, and asks the children who would like to build houses in the future.
If the lesson is based on the fairy tale “Cat House” or “Teremok”, then you need to remember the content of the work with the children, read out especially important points, and show illustrations. And watching a cartoon or a fragment of it will definitely inspire kids to get creative.
If the lesson is based on a fairy tale, you need to remember its content and look at the illustrations
Video: cartoon “Cat House” (1958)
Video: cartoon “Terem-Teremok” (1971)
You can first take your children on an excursion to nearby houses, especially if a new house is being built nearby.
Table: finger gymnastics “House”
| Text | Movements |
| Under the mushroom there is a hut-house, A cheerful gnome lives there. | Connect your palms with a hut |
| We'll knock softly | Tap the fist of one hand on the palm of the other hand |
| Let's ring the bell. A gnome will open the door for us and invite us into the hut-house. | The palms of both hands are facing down, fingers crossed; The middle finger of the right hand is lowered down and sways slightly |
| The house has a plank floor, | Place your palms down and press your edges together |
| And on it is an oak table. | The left hand is clenched into a fist, the palm of the right hand is placed on top of the fist |
| Nearby is a high-backed chair. | Point your left palm vertically upward, and place the fist of your right hand on its lower part with your thumb towards you |
| There is a plate with a fork on the table. And there are mountains of pancakes - a treat for the guys. | The palm of the left hand lies on the table and is directed upward, representing a plate, the right hand represents a fork: the palm is directed downward, four fingers are straightened and slightly spread apart, and the thumb is pressed against the palm |
Table: finger gymnastics “I want to build a house”
| Text | Movements |
| I want to build a house | Fold your arms together and raise them above your head |
| So that there is a window in it | Connect the fingers of both hands into a circle |
| So that the house has a door, | Place your palms together vertically |
| Nearby for a pine tree to grow. | We raise one hand and “spread” our fingers |
| It was sunny, it was raining, | First, we raise our hands up, fingers “spread”. Then we lower our fingers down and make “shaking” movements |
| And the tulip bloomed in the garden! | We put our palms together and slowly open our fingers - “tulip bud” |
Table: physical education
| Text | Movements |
| One two three four five. Let's build and play. | Children do jumping jacks |
| We are building a big, tall house. | Stand on tiptoes and stretch arms up |
| We are installing windows and roofing. | Show the window, the roof with your hands - clasp your hands above your head |
| What a beautiful house! | Extend your arms forward with a pointing gesture |
| And everyone lives together in it. | Squats |
Preparatory stage
Even in the younger group, the teacher involved the kids in preparing the classes. Then these were tasks at the “Take and bring” level. In the middle group, children gradually become “participants” in creating the necessary conditions for work. That is, their participation should concern not only organizational issues, but also the direct preparation of materials and blanks for application.
Application is one of the favorite activities for children in kindergarten.
What appliqué techniques can be used?
Before deciding on the scope of children’s responsibilities for preparing an appliqué lesson, let’s get a clear idea of what crafts techniques they are already familiar with. So, at 4–5 years old, children can perform 6 types of applications:
- invoice - parts are cut out of colored paper and glued to the background;
- torn - colored paper is torn into small pieces, which fill the space of the template on the base;
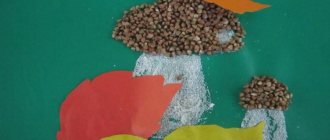
- mosaic - the contours of the figures on the base are filled with confetti, cereal or pasta, as well as plasticine, cotton wool;
- ribbon - the figures are cut out according to the principle of a round dance: all the parts are the same and are connected to each other by some elements;
- silhouette - shapes are cut out along the contour on the base, then a backing is applied to highlight the silhouettes. This type of applique is not often used in kindergarten, because the participation of children, due to the complexity of the technology, is limited only to connecting the base with the substrate;
- collage - cut out pictures are pasted onto the base. Despite the apparent simplicity, it is not easy for kids to master the technology of carefully cutting out parts, as well as harmoniously creating the overall composition of the collage
If you come up with an original background and material, then even a simple applied applique, which kids are familiar with from the younger group, will turn into a new and interesting task
What can children 4–5 years old do?
Based on the list of techniques for performing applications, it is clear what actions children in the middle group can perform independently:
- cut out large and medium-sized elements with scissors, and also do it symmetrically;
- create simple figures from plasticine based on “balls”, “pancakes” and “sausages”;
- tear up pieces of paper;
- work with glue (liquid PVA or in a stick), dose its amount on the surfaces that need to be joined;
- handle different materials for applique (cut dry leaves, bend and unbend thin cardboard, lay out cereals within the contour, etc.).
The more elements in the application, the simpler they should be in execution
Materials
Having chosen the technique, the teacher selects materials to complete the application. For the “Home” craft it could be:
- colored paper (of different densities, since kids already have an idea of working with thin cardboard and regular colored paper);
- pieces of fabric (the teacher prepares such parts, but the kids will already be able to glue large pieces of fabric correctly and evenly);
- plasticine (windows can be made from plasticine, showing the window frames with lines);
- natural materials (leaves, chestnuts, etc. for decorating the front garden);
- pasta, cereals, cotton wool - materials for filling large application spaces;
- pencils, felt-tip pens, paints (if you need to complement the background with other elements, for example, clouds, sun).
Additional tools and accessories
In addition to the necessary paper, glue and brushes, you need to prepare:
- wet wipes to remove excess glue from the base and to clean your fingers;
- small work tablecloths to keep your work area clean;
- scissors.
In order for the work to be a pleasure, the baby must have all the necessary accessories to complete the applique.
To make the craft look original, think about how to use elements such as:
- corrugated paper (to show the relief of a tiled roof, you only need a triangle of this material);
- cotton wool or cotton pads (looks beautiful when decorating a roof or garden plot during the snowy season);
- sequins (to imitate snow, if we are depicting a house in winter), braid (to show a fence), candy wrappers, for example, for the front door, etc. Please note that these details are used only if children no longer have problems identifying , which figure symbolizes which element of the building, i.e. the main goal of the lesson has been fulfilled.
How to motivate to work during an applique class on the topic “Home”
Another important stage in preparing an application lesson is motivation. Kids, like a car engine, need to be started so that they do the job smoothly and efficiently. To do this, the teacher’s arsenal must include different types of work that fit the theme of a particular lesson, which can be used one at a time or in different combinations.
How to Organize a Conversation
This is interesting. The famous teacher, philosopher, author of an original method of child development, Maria Montessori, spoke about the importance of talking with a child like this: “Talk with your child as much as possible about everything and everywhere - at home, on the street, on the road. Your conversations, stories and discussions are more important than any teaching aid.”
Not a single type of activity can do without this, especially since it works on the development of speech - a key competence of a preschooler. The most convenient form of conversation is short questions that require as brief answers as possible. For example, if the location of the kindergarten allows: “If you look into the yard, what do you see? That’s right, home!” Or: “Where does the mouse live? And the bear? Birdie? Where do you guys live?” You need to lead the conversation so that the answer is the word “house”.
A short dramatization, for example, of the fairy tale “Teremok” can be an excellent motivation.
Images
This is the next stage, logically following from the previous one. There are different types of houses, so you can see their types in the pictures.
Looking at the drawings will give the child an understanding of what houses look like and who they are intended for.
Poems and songs
The guys are happy to get involved in working with rhyming lines and a memorable motive - they repeat, perform the simplest movements to them. One classic “Cat House” is worth it! Kids enjoy watching who comes to visit the cat's new home, saying words for almost all the characters.
- The house we live in is located around the corner. It is large, multi-story, with a new elevator, very important! He wears a dashing hat, taller than all the neighboring houses! On top is a round antenna In a web of wires, A hundred people and a hundred cats live in it at the same time! - Hey hello! - I meet the house, raising my head up, He shakes the roof in response: - Good morning, Yaroslav!
- Here is a square, a triangle, it turns out to be a whole house! We'll put a cat in it, he'll have fun! Here is a flower on the windowsill, a tea table on the balcony. Next to the house there is a garage, a booth and our dog;
- The deer has a big house, He looks out of his window. A bunny runs across the field and knocks on his door! Knock-knock open the door, there’s an evil hunter in the forest, bunny-bunny, run your paw over to me
The deer quickly opened the door, let the bunny into his house, bunny, bunny, run your paw over to me. oh, oh, I’m scared, something doesn’t feel right, my heart sank into my heels and didn’t go awayDon’t tremble, my little bunny, I looked out my window, an angry hunter ran away, sit for a while. Yes, let me sit, I’m not trembling anymore, my fear has passed, you’re a good friend.
Fairy tales
This method of motivating children can be considered universal, since fairy tales can be told both at the beginning of the lesson and during the process of completing the application (to keep the kids interested in the results of the work).
Tale of Iris Review “Smile at Home” with questions for conversation - table
| Text of the story “Smile at Home” | Questions and tasks for the fairy tale about the House |
| A bear has a den, a swallow has a nest, Baba Yaga has a hut on chicken legs, and a man has a house. Once upon a time there lived a House. Four corners. A house is like a house. With a reliable roof and a good stove. With warm floors and beautiful walls. A little fabulous, a little magical. The house was nice, but he never smiled. Because there were no residents in it. But one day people settled in it. The hostess began to restore order in the House. And the owner made sure that everything in it was in good order. And the House seemed to perk up. But he was still missing something... What do you think the House was missing? I think like this: children’s laughter, children’s games, children’s smiles... When children finally appeared in the House: boys and girls, he was very happy. He winked at the Sun, and this made the House brighter and warmer. And one day Sunny saw Dom finally smile. Naughty. Wide. Charming. Dom’s sincere smile made everything around him smile. After all, children are happiness. This is the world. This is a million smiles... |
|
Scheme for drawing up lesson notes
It is important to clearly formulate the goals and objectives of the application lesson. To complete the “Home” craft, the following educational areas can be identified as goal-setting areas:
- continued work on consolidating knowledge about the simplest geometric figures, as well as the first steps to transform them into each other;
- creating conditions for teaching children to see a three-dimensional image behind a picture or oral story;
- developing the ability to recreate a figurative representation of a specific object on a reduced scale;
- nurturing a sense of proportion and aesthetic taste.
Lesson objectives:
- learning to put together a whole image from parts - geometric shapes;
- strengthening the skills of cutting paper into strips in a straight line;
- continuing to work on neatly cutting corners;
- repetition of the rules for gluing parts onto the base;
- nurturing a sense of proportion when working with different materials within one application.
In order for children to enjoy the application, the teacher must carefully plan every minute of the lesson. An approximate timing can be represented as follows:
- Introduction (implementation of the motivating component - 5–7 minutes).
- The main part (work on the application - about 18 minutes, including a break for finger exercises and physical education).
- Summing up (5-6 minutes for self-assessment of work and praise from the teacher).
The first and last stages are given at intervals so that, depending on the level of preparation of the children, the teacher can correctly combine other types of activities. So, for children with weak abilities, more time needs to be devoted to motivation than to summing up the results, and for children who immediately get involved in the work, on the contrary, the final stage is the most important in the entire lesson.
For variety, the house can be made for a specific character from popular cartoons or games
Example of a lesson summary for the middle group: Panchekhina Svetlana “Big House” – table
| Progress of the lesson |
|
| Final questions |
|
| Quote from: https://www.maam.ru/detskijsad/konspekt-nod-po-aplikaci-na-temu-bolshoi-dom.html | |
Photo gallery of children's works
Traditional house complemented by a chimney on the roof
Two-story houses are made according to the same scheme - two rectangles (floors), a triangular roof and yellow windows
The composition is made on an unusual black background, and the snow is made using a broken method
Children draw window elements with a pencil
Children glue their photographs to each window; the sun and flowers on the trees are made from wads of napkins.
In a three-story house, the roof and door are in harmony in color
Application based on a famous fairy tale - in the windows of the little house the children draw animal faces
By cutting out a house from paper, middle group students consolidate their understanding of the shape of surrounding objects and expand their horizons. The teacher can play on this topic using game motivation, offering the children unusual materials for work and some non-standard techniques.