If you have long dreamed of learning to draw on your own, but did not dare, if you considered it something difficult, something for the especially gifted, we believe that our course will help you change this belief.
Carl Purcell ("Your Artist's Brain"), explaining that drawing is actually not difficult, compares this process to taking a test, all the answers to which are already on the board, because the object that we are going to draw is already in front of us. All we can do is copy, that is, “copy the answers from the board.” In this course we will learn to see and “cheat.”
We admire the works of recognized artists. It seems to us that they were endowed with a special talent, genius. Indeed, there are many geniuses with brilliant visual memory who can accurately draw in detail what they saw only once. There are also those who create their own unique reality on canvas from their imagination.
However, among the recognized artists there are many who have achieved excellent results through hard work, dedication and perseverance. And certainly all of them were beginners learning the basics of drawing from scratch. So we can safely say: if you want, you can learn anything, you just need to want it. And if you are reading these lines, it means that you already have a desire to learn to draw. This is half the battle done, all that remains is to learn a new skill.
What is drawing?
Drawing is a discipline through which I continually rediscover the world. I realized that what I had never drawn, I had never really seen. And that only when I start to draw an ordinary thing do I realize how unusual it is - a real miracle (Frederick Frank, “The Zen of Contemplation”).
You can draw in different ways: realistically, hyperrealistically, stylized, abstractly. There are many directions. They are all interesting in their own way. But in this course for beginning artists we will learn the basic techniques of realistic drawing . With proper practice and systematic study, you will learn to draw absolutely any objects.
The role of using non-traditional drawing techniques in the artistic development of preschool children
As mentioned above, the use of non-traditional drawing in kindergarten is beneficial for children. Due to the fact that completely atypical objects can be used in drawing, preschool children are given the opportunity to think outside the box. It turns out that they are having fun and usefully spending their time. They experiment with different painting techniques and try different ways of expressing themselves. Classes develop observation skills, creativity, and artistic taste. The educational process turns into a fun game. Therefore, modern methods of creative activities are increasingly being used in kindergartens. Diagnostics of the use of non-traditional drawing methods in kindergartens shows good results.
Unconventional spray painting technique
Non-standard methods of drawing are always fun, emotional and creative. The result of such creativity is beautiful and unusual, even if the child has no artistic skills.
Course Description
The course that you are about to take will help you learn step by step how to draw with a pencil almost from scratch. Naturally, passing it does not guarantee high skill and professionalism, but you can still raise your skills and abilities to a whole new level, especially if you are a beginner.
Why do you need to learn to draw? Only you can answer this question yourself. Perhaps you are planning to go to study as an artist and make fine art your profession and life’s work. Perhaps your current job requires drawing skills, and you just need to master the basics. It is also possible that with the help of drawing you simply want to express yourself - your soul requires this, but no attempts lead to success.
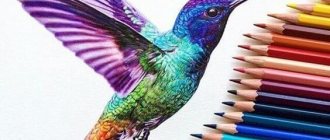
Whatever your situation, our drawing course is designed to help you achieve your goal of learning to draw beautifully. Moreover, using the proposed methods, you will learn to draw almost any objects - from simpler ones (books, vases, fruits) to quite complex ones (such as trees, birds, animals, buildings).
However, don’t think that tomorrow you will become the next Picasso or da Vinci. To benefit from the course, you will need to study every day. Of course, it is not at all necessary to sit drawing for half a day, but you will still be required to follow a certain system and regularity - you need to practice 4-5 days a week for at least an hour (keep in mind that the longer your classes are, the faster the result will come and the better it will be).
The drawing course consists of seven lessons, each of which is devoted to mastering a specific topic and skill (we will say more about this a little later). To learn how to draw faster, we recommend not only going through all the classes systematically, but also making your practice as varied as possible.
Even if the lesson talks about, for example, how to draw a pear or an egg, you shouldn’t limit yourself to that. Feel free to take on other similar objects and start drawing them. Do this several times. Remember that drawing is a clear example of a practice in which quantity gradually turns into quality.
By following these simple recommendations, in just 2-3 weeks you will learn to depict well what you see in front of you, even if you start learning drawing completely from scratch. If you are persistent and practice longer, your artistry will begin to pleasantly surprise you within a few months.
Basic drawing rules
You shouldn’t start right away with complex plots. First, practice with linear drawings, paying attention to the proportions of objects. Sketch a street or railway going into the distance - this will help you become familiar with perspective and the horizon.
Take a sheet of paper, draw it into random sections and shade it using different types of shading. Use pencils of different softness, change the pressure, create smooth transitions.
Then move on to drawing simple three-dimensional images from life - for example, a ceramic vase or fruit. Experiment with light sources. You will become familiar with the laws of chiaroscuro and learn about 6 of its varieties: highlight, light, penumbra, own shadow, reflex and falling shadow. You will also notice that it is the boundary between light and shadow that conveys the basic shape of the object.
Try to depict several objects together so that they partially overlap each other. You will study more deeply the laws of perspective, composition, and understand the principles of arranging images on a sheet.
Copy paintings by famous artists. Pay attention to the types of shading, proportions, ways of conveying the dynamics of objects.
Take the risk of drawing something more complex in shape from life and conveying the texture of the surface. Which strokes will better convey the softness of cat fur, and which ones will depict the fluidity of a silk scarf? Practice and after a while you will be able to create a legend on the topic of depicting draperies from various fabrics.
The creation of any drawing must begin from the general to the specific. Analyze the image, mark the location of the main objects on the sheet. Break down complex shapes into simple ones, sketch them out, observing proportions. And continue to gradually complete the details of the image - from large to small.
How to learn to draw?
Of course, everyone has their own abilities and talents, characteristics and predispositions. For some, the art of drawing will come easily, while others will have to be more diligent and diligent in their independent learning. But, be that as it may, everyone can learn to draw beautifully.
In each of the drawing lessons you will find theory with a lot of illustrations, practical tasks and exercises. As we said, the course consists of seven lessons, and this was not done by chance - each lesson can be called a big step towards mastering the ability to draw.
As you progress through the lessons you will progress from simple to complex. As a result, what seemed difficult to you just yesterday will begin to yield today, and tomorrow will not cause any difficulties. As with our other training programs, when creating this course we tried to present the material as intelligibly, understandably and concisely as possible, which makes it even more accessible to master.
To immediately pick up a high pace and start learning to draw quickly, you can watch all the lessons before the first lesson. This will allow you to understand what you have to deal with, and will also prevent you from rushing and eliminate the desire to get ahead of yourself (you should not move on to the next lesson without completing the previous one).
Plus, try to pay more attention to tasks that cause increased interest or difficulty. If something doesn’t work out the first time, try again to fully understand the basics and sufficiently master a particular skill.
Creative drawing methods and techniques
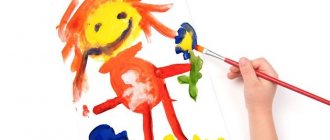
Non-standard drawing techniques for children will help make artistic activities fun and interesting. Such methods will make joint creativity fun and will evoke extremely positive emotions in children and adults. In the future, the child himself shows interest in children's painting. The drawings can be anything - careless, dirty and even multi-colored. The main thing is full involvement and keen interest in the process of joint activity.
Drawing with a cut of vegetables and fruits
For cut painting you need to prepare: paper, watercolor or gouache, cut halves of fruits and vegetables. You can use any products: apples, pears, potatoes, cucumbers, carrots, in other words, everything you have in the house. Non-standard drawing techniques for children with sections are fascinating for both children and their parents.
The required amount of dye is collected on the product - you can even prepare a separate container for them, and then you can start making stamps with cuts.
An adult can draw the basis for the cuts himself - tree branches, animal body, house. The kid himself will make stamps in any places he likes on the sheet. The finished drawing may not turn out right the first time, but the main thing here is patience and skill.
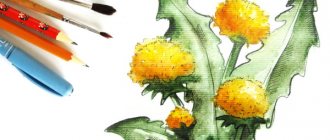
Drawing with leaves
For the sheet technique you will need any leaves of bush and deciduous trees, brushes, as well as a piece of paper and watercolors. You can practice this technique at any age, even from two years old.
The kid chooses a few colors he likes and then applies them to the leaves. Then the watercolor should be allowed to dry a little so that it does not spread, after which it can be transferred to paper.
From leaves you can create absolutely any picturesque composition - trees, flowers, sun and even a forest.
Drawing with a toothbrush
A fairly simple and common way of artistic activity. For it, in addition to a standard drawing set, you will need an old toothbrush. With a brush you can draw almost anything:
- Beautiful spruce branches;
- Volumetric azure waves;
- Beautiful rays of the sun;
- Flower petals. Brushes with a toothbrush make great cloves.
An adult can help the child by drawing the base themselves, so that the child can complete parts of the drawing with a toothbrush. The brush should be placed perpendicular to the paper, after which you should move the teeth of the brush with your finger to create a pinpoint spray.
Splatter painting
A very fun and entertaining art technique. For this you will need: watercolor, gouache, dried leaves or grass templates, paper and an old toothbrush. It is very important to follow the correct technique:
- Moisten the brush with water and the chosen color;
- Shake off excess liquid;
- Place the template on paper;
- Start randomly splashing different colors.
The images come out very lively, colorful and interesting. The spray direction can be chosen in different ways - vertically, horizontally or even diagonally.
Basic Tools
| 1 | A simple pencil (for example, Koh-i-noor). For construction, it is convenient to use harder pencils (2H, N, HB). This makes it easier to get a lighter and cleaner base for subsequent work with softer pencils (2B, 4B, 6B). However, as the softness of graphite increases, its tonal range (tone scale from light to dark) increases. The harder we press the pencil, the darker the tone we get, and vice versa. Therefore, with some practice, all the work can be done with one soft pencil, adjusting the pressure. During the drawing process, you will choose the most optimal pencil option for yourself or a combination of them. |
| 2 | Thick, smooth paper (for example, for drawing or whatman paper). It can be used for multiple corrections, which is very important at the beginning of training. |
| 3 | Eraser (for example, Koh-i-noor with an elephant). Such erasers are moderately soft to carefully remove graphite, hard enough and do not crumble, so they are convenient for drawing over the shaded area. |
| 4 | Sharpener or stationery knife. The second way is to achieve a more elongated and sharper open section of graphite. Thanks to this, the pencil will not have to be sharpened too often. |
What you need to draw with a pencil
Pencils
.
They are soft and are marked with the letters “H” , “B” and numbers. The higher the H , the harder the pencil and the paler the line it leaves. B value means a soft lead and a rich black color. Hard pencils are used most often in sketching, and for drawing you will need: HB for sketching and 4B , 6B and 8B for various types of shading.
Choose pencils for drawing
Paper. It should be dense (90-110 g/m2) and smooth. Then you will have a chance to correct the mistake you made and draw small details. Special sheets for drawing or drawing or graphics paper are best; in extreme cases, use watercolor paper. If you plan to just practice your hand on sketches or shading, without corrections, you can use good quality office paper.
Choose paper for drawing with a pencil
Eraser. You should not buy multi-colored children's erasers - they do not serve their purpose well enough and can stain the paper. You don't need a hard eraser either - they are most often used when working with hard or colored pencils. Take a soft eraser in a neutral color, such as FaberCastell.
Stationery knife or cutter. When drawing with a pencil, you will need to frequently adjust the point of your pencils. An ordinary sharpener is not always able to help, since in drawing, in addition to the classic cone sharpening, “spatula” sharpening is used. With its help, depending on the position of the pencil relative to the paper, you can get a thin or thick line - useful for quickly setting tone and creating complex strokes.
Additional tools
| 1 | Nag. This is both an alternative to an eraser and a drawing tool. It wrinkles like plasticine, you can give it the desired shape (more rounded or with a sharp tip) and draw on top of the shaded area. |
| 2 | A piece of fine-grained sandpaper (it’s very convenient for quickly sharpening the tip of a pencil). |
| 3 | Thin liner. Liner is a type of capillary pen with water-based ink. The drawing liner produces fine, rich lines. |
| 4 | Color pencil. |
| 5 | Tablet for drawing. |
| 6 | Scotch tape to secure your work on the tablet. |
| 7 | Tracing paper or parchment paper for baking (needed in the last lesson). |
Simple step by step lessons
Maple leaf in three steps
Step 1 - Sketch
Start your maple leaf drawing by roughly sketching its basic shape and central axis in light, thin lines. You don't need to draw any smaller curves of the sheet, just some basic lines respecting the proportions of the different sides of the sheet.
Step 2 - Outline
Add an outline drawing of the outer shape of the leaf to your sketch. Once you're done, you can erase the guide lines left from the previous step.
Step 3 - Details
Within the resulting outline, draw the main veins running from the base of the leaf to the tips, and smaller veins extending from them.
What surface do we draw on and how do we hold the pencil?
Draw on a table or tablet. The second one can be rested on the back of a chair or the edge of a table if there is no easel. The tablet is especially convenient for larger drawings, whose shape is visually slightly distorted when placed horizontally. For small jobs this is not critical.
If you are drawing on an inclined surface, it is good to hold the pencil as follows: hold it between your thumb and forefinger, and hold it with the rest. It will take some getting used to, but it will be worth it. The hand will move more freely, not from the wrist, but from the shoulder. This makes it convenient to draw small details and draw long, smooth lines in one motion. During tonal development, the image is not blurred by the hand - it is suspended or rests on the extended little finger.
At this point, the introductory and preparatory stage is over, and now there is nothing stopping you from starting to practice and learn to draw. We wish you success in completing the course and mastering fine art skills.