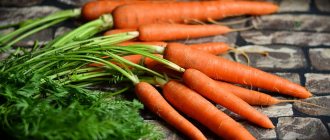
Vegetables made from ball plasticine: carrots
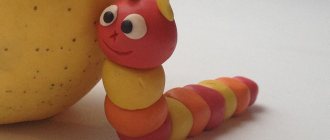
For bunnies, bunnies, mice, bears and favorite dolls, children can easily make carrots. An appetizing and healthy vegetable should always be on the table. For modeling, it is better to use a special ball mass, which hardens in air after a short time. In this case, the resulting doll food will become durable and you can play with it for a long time. Carrot sculpting is a very simple job.
Materials for modeling
- gel ball mass of orange and green colors;
- stack.
We sculpt a carrot from plasticine step by step. Prepare a mixture of a suitable color. Usually the shades presented are very bright, alluring, and the small inclusions are crushed weightless foam. Due to this filling, the finished products are very light.
Prepare small portions of the two indicated shades.
Abstract of the GCD for sculpting “Fruits and Vegetables” in the preparatory group
Marina Fursova
Abstract of the GCD for sculpting “Fruits and Vegetables” in the preparatory group
Targets: The child is able to choose his own occupation and participants in joint activities
Tasks:
Educational: To cultivate interest in Russian folklore, riddles. Developmental: To develop the ability to sculpt familiar objects from life (fruits, vegetables , conveying their character and features.
Educational: reinforce sculpting techniques: flattening , rolling, stretching, pressing.
Speech: Improve dialogic and monologue forms of speech
Materials and equipment: Plasticine, stacks, backing board, napkin, dummies of fruits and vegetables .
Preliminary work:
Contents of direct educational activities:
Content
1 Organizational point:
- Guys, the time has come when all the summer residents have harvested their vegetables . You and I also need to prepare vegetables for the winter so that the cooks can prepare tasty and healthy food for us. And you will find out what kind of vegetables you and I will prepare in the answers.
2 Creation of a problem situation, motivation
(children guess, teacher takes out dummies)
-Well done guys, you guessed the riddles.
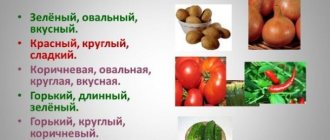
- Now, guys, let's take a close look at the vegetables . Trace them with your fingers and tell me what shape your vegetables ?
- tomato, onion - round;
- cucumber, potatoes - oval;
-carrots – elongated;
-beets are cone-shaped.
-Please remind me what color your vegetables ?
- tomato – red;
-potatoes - white, pink;
- cucumber – green;
-beets – dark cherry;
-carrots – orange;
- onion - brown.
3 Familiarization with new material, solving a problem situation
Physical school
We are standing in the garden
We are surprised by nature. (Stretching arms to the sides)
Here is the salad, and here is the dill.
We grow carrots there. (Touch your left foot with your right hand, then vice versa)
.
We will work with you
Let's declare a fight against the weeds -
We'll tear it out by the roots
Yes, squat lower. (Squats)
.
Everyone is amazed at the fence
Nettles grew luxuriantly. (Stretching - arms to the sides)
.
We won't touch her -
We've already been burned a little. (Stretching - arms forward)
.
We watered everything from a watering can
And we sit on the benches. (Children sit down)
.
Children are invited to the tables. On the tables there is plasticine and boards, stacks, I explain the sequence of work.
Explanation and demonstration of the sequence and techniques of sculpting :
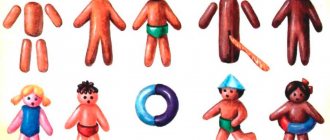
1) Take a piece and squeeze it in your hand so that it becomes plastic.
2) We begin to give the piece the shape of the intended object.
3) We work in a stack, creating grooves.
4) Attach individual parts.
-Guys, let's play a little with our fingers. before we get to work.
Finger gymnastics “Cabbage”
4 Initial comprehension and consolidation of the material in practice
Independent work of children. As I work, I help children who find it difficult to choose sculpting .)
-All the guys did a great job with the task, and I invite you to play.
P/game “Our bed”
What's growing in our garden bed? (Children walk in a circle, one child stands in the center with his arm outstretched)
Cucumbers, sweet peas,
Tomatoes and dill,
For seasoning and for testing.
There are radishes and lettuce - our garden bed is a treasure.
(To whomever the child points, he turns his back to the person standing next to him and on the command: “One, two, three - run.”
They run in different directions around the children. Whoever runs to his place first is the one who leads.)
5 Reflection
Guys, what did you like about the lesson, what did you remember? Are you satisfied with your work? All the work is good, they worked hard! At the end of the lesson, the work is put on display.
Food for plasticine dolls: other ideas
We have collected enough ideas to make a doll kitchen filled with different products. You can sculpt not only from ball plasticine. but also from ordinary clay, as well as from polymer clay - this is how the toys harden and become like ordinary plastic figures.
Making food from plasticine with your own hands is quite easy. Check out our selection of ideas and get creative. Good luck!
Plasticineography “Fruits” for children 5-6 years old. Master class with step-by-step photos
Do-it-yourself still life from plasticine “Fruits”. Master class with step-by-step photos.
Author: Anastasia Chukhalo, 6 years old, senior group, MBDOU No. 202 General developmental kindergarten “Fairy Tale” Head: Tatyana Nikolaevna Kokorina, drawing teacher, MBDOU No. 202 General developmental kindergarten. Description: this master class will be of interest to teachers of senior and preparatory groups and primary school teachers who lead circle work, and who like to make crafts from plasticine. Purpose: these crafts can become interior decoration or a gift for loved ones. Goal: creating a picturesque picture using plasticine. Objectives: - learn to mix plasticine to obtain new colors and shades; - learn to apply sausage strips according to the shape of an object, conveying its texture, shape - promote the development of creative imagination - promote the development of fine motor skills of the hands, which contributes to the development of speech, memory, attention; - promote the development of perseverance; - promote interest in painting, plasticine, and modeling. Necessary tools and materials: - template-base grapes, oranges, fruits;
- plasticine of appropriate colors; - stack; - board for modeling; - white cardboard. Progress:
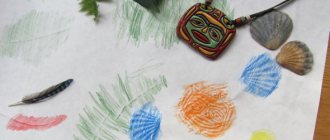
All children undoubtedly love to draw. And we decided to get creative and decided to draw... with plasticine. Plasticineography is an opportunity to create entire pictures. She interested not only children, but also adults. This is a fun activity that allows you to create without a brush or paint. Since children's fingers get tired very quickly from rubbing plasticine on paper, we made our task a little easier and chose “drawing with sausages.” So, look what we got. 1.Preparing templates. We find coloring pages of oranges, grapes, fruits on the Internet and choose the one we like. 2. We started with grapes - it is easier to perform and is suitable for getting acquainted with this technique. If you want to try it with younger children, then offer them cherries. Prepare plasticine in the required colors.
3.Mix purple and raspberry colors and roll into sausages.
4. Roll the sausage into a spiral, like a snail’s house, and carefully stick it to one of the grapes.
5.Based on the shape and how visible the berry is, fill the rest of the berries with one or more sausages. Let's move on to the leaves. 6. Take light green and dark green plasticine and roll a lot of small sausages. We fill the sheet from the middle to the edges to convey the shape and texture.
7.When all the leaves are filled, we will make an outline with it, circle the leaf.
8. Add additional volume to the berries that are located next to the leaves in order to lift them above the leaves and highlight them.
9. Finally, we will make a frame from plasticine, so the work “Grapes” immediately takes on the appearance of a painting and looks more complete.
Let's move on to oranges. 1. Let's prepare a template and plasticine in the required colors.
2. Mixing orange with yellow, roll several sausages.
3. We begin to fill the inside of the orange. We lay out the sausages in a triangle shape. Press carefully so that the edges do not rub off. Move the triangles away from each other in a stack and align them.
4. Use white plasticine to fill the veins between the orange triangles, and also make the middle and outline a thin edge.
5.Make a border from orange plasticine.
6.Mix orange with red so that the side of the orange differs in color from the middle and lay it out with several sausages.
7. Move on to the orange slice, fill it according to the same principle: first orange triangles, then white veins, then orange side. 8.Where the slice touches the half of the orange, we add additional volume, highlighting it and pulling it to the foreground.
9. Fill the leaves with green sausages from top to bottom. 10. Let's make a table - the surface on which the oranges lie. For this we need blue and white, mix them to get different shades. We place darker sausages next to the oranges - this is the shadow.
11. Fill the entire surface of the table.
12.The “Oranges” craft is ready.
Fascinated by this technique, Nastya and I decided to make a still life of several fruits. We chose this base template.
And they made the painting “Fruit on the Table”
We wish you the embodiment of your creative ideas, we hope our technology will be of interest to someone. Thank you everyone for your attention and comments.
We recommend watching:
DIY plasticine dragonfly Plasticineography for the senior preparatory group in kindergarten. Flowers. Master class with step-by-step application from plasticine for children 5-6 years old. Master class with step-by-step photos Plasticine applique for children 5-6 years old. Master class with step-by-step photos “Mushrooms”
Similar articles:
DIY pencil holder
Plasticineography. Floral motifs
Plasticine craft for children 3-4 years old. Aquarium
Craft for children 2-3 years old. Cheburashka
DIY plasticine roses step by step with photos