Bear cubs are popular heroes of fairy tales and cartoons, so the child will happily take on the creation of his favorite character. Knowing how to make a bear from plasticine with your own hands, you can create many different figures, focusing on the basic shape. For example, Winnie the Pooh, a panda, a polar bear, a New Year's figurine or a copy of the baby's favorite plush toy. Older children or even adults can try their hand at real sculpture and make a realistic copy of this animal.
- Step-by-step instructions on how to make a bear from plasticine
- Video on how to make a bear: master classes on modeling bears from plasticine
- Rules for sculpting small parts and recommendations for working with plasticine
- Applications on cardboard for beginners and kindergarten children
- Bear templates for appliques
- Making voluminous plasticine bears: ideas from simple to complex
- Teddy bear with cake
- Winter bear
- Winnie the Pooh
- Realistic sculpture
- Additional master classes
- Photo examples of finished crafts and paintings of teddy bears made from plasticine
Step-by-step instructions on how to make a bear from plasticine
Before you make a plasticine bear, you need to prepare the material. If you don’t have a brown bar of the desired shade, you can mix red with black or other dark colors. Beige comes from combining brown with yellow or white.
You shouldn’t mix all the plasticine at once; it’s better to try on small pieces first to make sure you get exactly the color you want.
Modeling a bear cub from plasticine step by step:
- Form a pear-shaped body from a brown piece and carefully insert a toothpick inside to hold the head.
- Roll a ball of the same color and attach it to the body.
- Form the legs based on the photo.
- Roll out two stick sausages and bend them a little, giving them a more natural shape.
- Sculpt a tummy from a beige piece and attach it to the body. If the head prevents you from making the little bear's belly neat, you can temporarily remove it.
- Glue the legs and arms.
- Sculpt a beige muzzle.
- Glue on the black nose.
- Shape the eyes as shown in the photo.
- Glue the heels and toes to the lower paws.
- Make a light-colored egg and wrap it with a yellow sausage - this will be a bee hive.
- Decorate the part with a green leaf and give it to the figurine.
- Using a stack, carefully shape the fingers, nostrils, eyebrows and the inside of the ears.
- Glue on a small brown ball-tail.
When creating crafts from plasticine, it is recommended to sculpt the largest parts first, and lastly, apply small decor.
Video on how to make a bear: master classes on modeling bears from plasticine
Summary of the “Bear” sculpting lesson for the senior group
Lyudmila Yudina
Summary of the “Bear” sculpting lesson for the senior group
Summary of a lesson in artistic creativity (modeling) for the senior group “Bear”.
Educational field – artistic
Target:
Form aesthetic tastes, develop creativity and thinking.
Tasks:
Learn to sculpt an object consisting of several parts, conveying characteristic features (ears, muzzle). Reinforce familiar sculpting techniques: rolling, unrolling, connecting parts using the technique of smearing. Develop independence, cultivate interest in modeling.
Integration of educational areas: cognition, physical education, reading fiction, artistic creativity.
Material:
plasticine; boards for modeling; images of a bear; toy bear".
Preliminary work:
Reading fiction “Teremok”, “Three Bears”; “Mashenka and the Bear”, a conversation about the wintering of the bear, its food products, its living conditions, looking at illustrations depicting a bear, solving riddles, watching the presentation “Wild Animals”.
Progress of the lesson:
Educator:
Guys, a guest will come to us today, but before he appears, we must guess who it is. I'll tell you a riddle, and you tell me the correct answer.
Clubfoot and big,
He sleeps in a den in winter.
Loves pine cones, loves honey,
Well, who will name it?
Children: Bear.
Educator:
Right! Listen, a short excerpt that talks about the bear “Who among us does not know a bear? Big, clumsy, club-footed. This is exactly the opinion we hold about this beast. But in reality the bear is not like that. He is very agile and dexterous. The bear is a formidable forest dweller who will not let anyone down if he is not in the mood. Belongs to the bear family. The bear is a predatory mammal that swims well and climbs trees. One blow and the bear can kill another animal. The bear's legs are thick, its head is massive with small ears and eyes, and the color of its fur is changeable. Although the bear is a typical predator, he also likes to enjoy plant desserts: berries, fruits, grains, grass, plant roots,” but don’t be afraid, our guest is very kind, he came to us from a fairyland.
(there is a knock on the door. The teacher brings in a toy). Guys, we forgot to say hello to our guests, how can we greet beautifully?
Children:
Hello, we are very glad to see you!
Educator: Bear told me that he is bored alone in the den in winter, how can we help him?
Children: Let's make little bear cubs.
Educator: But first we’ll play a game with you. The game is called “Teddy Bear”, you need to perform movements in accordance with the text. So, let's go to our clearing and stand in a circle.
A clubfooted bear is walking through the forest,
He collects the cones and puts them in his pocket,
Suddenly a cone fell, right on the bear’s forehead,
The bear got angry and stomped his foot.
“I won’t collect pine cones anymore,
I’ll get in the car and go to bed!”
Educator: It’s still too early for Mishka to go to bed, we’d better go to the table and see how our guys will sculpt the bear cubs.
Children: go to the tables and sit down in their places.
Educator: Guys, what parts does the bear consist of?
Children: torso, head, paws and tail.
Educator: How are we going to sculpt the body, what does it look like?
Children: oval body.
Educator: And the head?
Children: Round.
Educator: Please note that the bear has an elongated muzzle and has ears on its head! How many ears does a bear have? Let's count?
Children: 1 – 2. 2 ears
Educator: Yesterday I made a bear, would you like me to show it to you?
Children: Yes.
Educator: I stretched out the muzzle with my fingers, and made the ears by pinching plasticine. Which part of the body do you think we'll start working on? Explain why you think so?
Children: From the body, because we will attach all parts of the body to it.
Educator: What are we going to sculpt after the body is done?
Children: Let's sculpt the head.
Educator: We will have a torso and a head, do we need them?
Children: Connect.
Educator: In order for our head to hold firmly, we must use the technique of smearing. What remains for us to make so that the bear is ready?
Children: Paws and tail.
Educator: How many paws does a bear have, let's count.
Children: 1, 2, 3, 4 -4 paws.
Educator: We will make them from balls, but we will need 5 balls, what is the fifth one for?
Children: For the ponytail.
Educator: Guys, when you start working, I will play some music for you, it will help you unleash your creative abilities. There is plasticine on our tables, we need to divide it into 3 parts, one part should be a little larger, the other two parts should be the same. From the larger part we mold the body, from the other part - the head, and we need to divide the last part into 5 more equal parts, these will be the paws and tail. Let's get to work. (music is turned on, preferably sounds of nature)
During work, the teacher gives children advice and, if necessary, provides assistance.
Analysis:
Look, guys, what cute little bear cubs you have made.
(Ask the children whose work they liked and why, tactfully draw attention to the shortcomings in some works, offer to try to avoid them next time).
Guys, let's invite our guest to choose new friends. (The little bear happily selects all the children’s works and thanks the children for the gifts). The children invite him to come visit again.
The little bear treats the children to cookies and says goodbye.
Rules for sculpting small parts and recommendations for working with plasticine
How to make a plasticine figurine more neat:
- You should work only with clean hands, completely erasing the remnants of the previous color from them before moving on to a new one.
- To make the surface of the parts completely smooth, it can be leveled with wet fingers. Before gluing the craft, you need to wait for the water to dry.
- Wool and fur are drawn with a stack or a toothpick in one direction, trying to maintain the same depth of lines. To avoid smearing the applied texture with your fingers, place the part on a toothpick.
Eyes can be made from beads or small buttons.
Applications on cardboard for beginners and kindergarten children
Three-dimensional painting for the preparatory group of a kindergarten.
Plasticine applique “Merry Family”. The craft will look more voluminous if the background elements are painted.
Coloring pictures with plasticine is not difficult and is very useful for fine motor skills: you need to glue small pieces and smooth them out, trying not to go beyond the contours. The finished work can be decorated with three-dimensional elements.
Plasticine bear applique, suitable for little ones. The outline of the picture can be drawn or printed by the mother; the child will only have to fill it with balls.
For kids, you can prepare the plasticine parts themselves in advance.
Complex multi-level plasticine applique for older children. Before starting work, it is recommended to draw a sketch on paper and think about what colors and in what volume will be needed to create the picture.
Bear templates for appliques
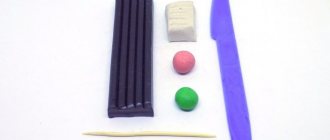
Materials
What you will need for sculpting:
- brown block of plasticine - main;
- orange (or beige), black and white - additional micro pieces;
- toothpick.
Photo examples of finished crafts and paintings of teddy bears made from plasticine
Knowing how to make a bear, you can collect figures of other animals based on the same pattern. To do this, just take a different color of plasticine and change small parts.
