Stage of preparation for the lesson “Child and kitten”
Before giving the figure any pose, you need to sculpt all the elements
Children continue to master the skill of creating stucco compositions on a plane, which they began in the middle group, that is, the figures rest on the base with individual parts of the body (legs, paws). At the same time, the proportions and volumes of bodies, as well as the relationship of all parts of the composition, are preserved.
Modeling methods
By the age of 6–7, children are quite confident in 3 ways of creating figures from plasticine, the development of which, according to regulatory documents, is part of the educational program of the kindergarten. The guys own
- constructive technique, that is, they are able to create a single whole figure from individual parts;
- sculptural - silhouettes are sculpted from a single piece of material;
- combined technique, when both sculptural and constructive methods are combined in one craft.
To create human and animal figures, it is convenient to use a combined technique, so that large parts (torso, arms, legs, etc.) are sculpted from one piece, and small parts (palms, paws, tail, etc.) are added separately.
Techniques
By the preparatory group, children have a good command of basic modeling techniques
In the preparatory group, children consolidate their mastery of 11 techniques for creating figures from plastic material:
- rolling (creating “balls”);
- rolling (making “sausages”);
- indentation (forming depressions on the workpiece with your fingers);
- flattening (creating “pancakes” from round parts);
- pinching (pinching a piece of plasticine and flattening it);
- pulling (pulling a piece from the workpiece);
- accession;
- smearing (placing elements on a base and then smearing the boundaries of their connection);
- pinching (pinching a piece, but without subsequent flattening);
- stretching (creating an elongated shape of elements while maintaining their proportionality);
- smoothing (formation of smooth transitions of elements into each other).
What can children do?
As already mentioned, the kids in the preparatory group have already become familiar with all types and techniques of modeling, so it’s time to “hone their skills.” In addition, in both the middle and senior groups they were already engaged in sculpting human and animal figures. In the preparatory room they combine these compositions into a single one. By the time they worked on the topic, the kids had already created
- static figure of a person/animal;
- they made a little man in motion (for example, they sculpted little soldiers);
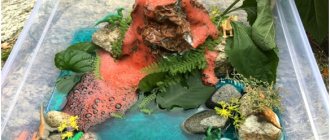
- created a single composition “Different animals in their habitat” (farm, forest);
- complemented the composition with a person with objects (“Boy with a ball”, “Girl with a jump rope”, etc.).
When creating a composition, children can independently determine
- shapes of parts (arms, legs, paws, heads, etc.);
- the pose of the figure in a specific composition (rotation of the head, movements of the arms, legs, paws, torso, etc.);
- color scheme for a specific composition;
- position of figures in space.
Composition options on the theme “Child with a kitten”
Instead of a kitten, children can sculpt a dog or other pet, depending on the topic they covered.
In addition to a child playing with a cat (kitten), the goals and objectives of the lesson can be realized when considering other topics. Among them
- “A girl and/or a boy are playing with a kitten”;
- “A child plays with a puppy”;
- “A child feeds the birds”;
- "Animal in motion";
- "Man on the move."
Additional materials
The methodological recommendations for working with plasticine in the preparatory group state that children should use as little additional materials as possible when working with figures of people and animals. This is due to the fact that when creating small parts, such as eyes, kids need to pinch off very small pieces of plasticine, which trains fine motor skills and the eye. But when using beads and rhinestones, such work is minimized. Nevertheless, you can add elements to the composition in the form
- sequins (for decorating clothes);
- ribbons (for background decoration);
- matches (if you plan to create the limbs of the figures in a constructive way and on a frame);
- beads (for eyes, nose), etc.
How to implement an individual approach?
As part of the work on sculpting human and animal figures in motion, the teacher provides an individual approach using various compositional tasks. So, for example, the task may vary in
- the direction of the figures’ movements (“The kitten looks to the left, the child looks to the right” or vice versa);
- pose of a person or animal (sitting, standing);
- attracting additional elements into the composition (sculpting a ball, leash).
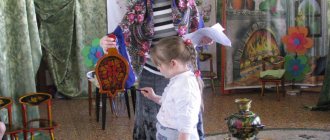
Node progress
-What kind of animal is playing with me?
Children's stories about their pets (habits, favorite activities, etc.)
_What benefits do cats bring to a person’s life?
— Today we will sculpt a cat .
What parts do we need to sculpt to make a cat ?
(head - round, body - oval, ears - triangular, 4 legs - “sausages”
, tail –
“sausage”
)
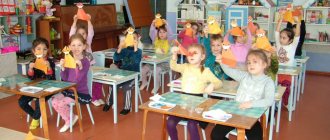
Modeling in the preparatory group: how to make the lesson interesting
Ways to motivate children
Children’s own drawings can be used as visual materials.
This is interesting. Russian Soviet writer, classic of Russian literature K.G. Paustovsky wrote: “The impulse to creativity can fade away just as easily as it arose if it is left without food.”
How effective the entire lesson will be depends on the way in which the teacher insists that children work. Techniques for motivating children can be different - an adult combines them depending on the specific modeling task, the level of development of the children, their temperament and interests.
Conversation and visibility
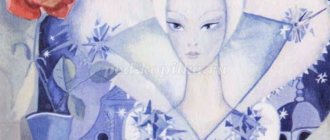
These two ways to interest little creators go together because without a visual image it is difficult for children to imagine a picture, and without dialogue it is impossible to rationally organize work. So, as visual materials you can use
- pictures and photos of kids playing with pets;
- individual images (can be enlarged) of animals, in particular, faces, figures of a boy/girl;
- presentations, cartoons showing moving objects;
- posters, toys, etc.
The conversation can be built solely on the basis of what is seen (“Who is shown in the picture?”, “What is the animal/child in the photo doing/in what position is it standing?”), but you can also preface it with a few questions regarding what type of animal the cat belongs to/ dog, do the kids have pets, what kind, do they like to play, etc. Kids can answer either individually or in chorus. The main thing is to stay within the time frame - you shouldn’t spend more than 5-6 minutes on motivation.
Poems
Children love to listen to poetry, since the structure of their memory is such that they memorize rhymed lines faster and easier than adults.
- No, it was in vain that we decided to take the cat for a ride in the car: the cat was not used to riding - he overturned the truck.
- Paws and a tail, and funny ears that stick out in corners on the top of the head, fluffy fur, mischievous eyes... Listen, you didn’t come running to us from a fairy tale? Again the ball unwound around the apartment - There is no better entertainment in the world!
- My cunning-eyed puppy, Woolen paws... Who is it that chewed on our brand new slippers? I see the answer in the eyes: No, it’s not me, no, no! The slippers went into my mouth on their own and accidentally came apart...
Songs
This technique not only motivates the children, but can also be a good accompaniment for physical education or finger gymnastics.
| SONG ABOUT KISSANKA Lyrics: B. Bryansky Music: L. Lyadova Performed by Maria Lukach 1 Kisanka, Kisanka, Purring Kisanka, You and I are together all day. We chase the ball, we play hide-and-seek, and we play “Cat House.” We watch TV together, we eat cutlets, we drink milk together. 2 We will become adults, We will fly for the stars, I will take you with me. How you want to become a pilot as soon as possible, But no one talks about it! We need to prepare first - Maybe even a whole month will pass or two!..> |
Scheme for developing lesson notes
The teacher must definitely think about how to seat the children so that they do not interfere with each other
In order for a modeling lesson on creating a figure of a person playing with an animal to be successful, drawing up a work plan should begin with the formulation of goals and objectives.
Goals:
- teach how to compose a complex composition consisting of 2 objects in dynamics;
- continue to work on developing the ability to maintain proportions;
- cultivate patience and independence.
Tasks:
- repeat the basic geometric shapes - the basics of blanks for figures;
- develop the ability to convey the movement of objects using design;
- continue to practice sculpting techniques;
- consolidate the skill of conveying the dynamics of the human and animal body in plastic material;
- continue to develop the skill of working with a stack to create relief of elements;
- develop fine motor skills and eye;
- cultivate aesthetic taste and accuracy when working with plastic materials.
The development of notes should include clear timing of each stage of the lesson.
- The introductory part (5 minutes) is the time to involve children in work, that is, for motivation.
- The main stage (20 minutes) is sculpting a composition, as well as finger gymnastics and physical education.
- Final stage (5 minutes). The teacher praises the children’s productive work, the kids exhibit their compositions at an impromptu exhibition, evaluate their crafts and the crafts of their comrades, answering a number of questions (“Did I work well?”, “What did I do especially well?”, “What figures do I like?” more than others?”, “Why?”, “What did I like/dislike during the lesson?”).
Examples of writing lesson notes
The first example describes how to create a craft in a constructive way. If a human figurine is made with its help, then parts of the body can be moved and given the necessary pose. The main thing is to adhere all the parts well to each other.
Mikheeva Nina “This is Masha.” Sculpting lesson notes. Parts of the human body" (fragment)
| <...Examination of the nature that the children will sculpt. On the board there is a picture of Masha - what Masha has: A big teddy bear rolls quickly from an icy mountain Keeps our Masha (fur coat) well warmed up Masha loves to dream When there is blue in the sky... And for this Our Masha needs... . (head) Masha takes berries, two or three at a time. And for this we need Our Masha. (hands) Masha runs cheerfully along the path towards the river. And for this we need Our Masha. (legs) Masha looks at the cat, at fairy tale pictures. And for this we need Our Masha. (eyes) Stage 3 Show what technical techniques to use We look at the example made by the teacher Masha - Guys, look at how we will sculpt Masha We take a large piece and sculpt a torso from it like a carrot The head is like a ball We make the arms from a flagellum We make the face into a stack And then we proceed to decoration of the head and long coat. Making a white collar. On the head is a hat with a white pompom. Stage 4. Carrying out work by children Under the pronouncement of actions by the teacher. Stage 5 analysis of work - What a great fellow you all are...> |
Glukhova Vera “Summary of productive activities in the senior group. Modeling on the theme: “Kitten” (fragment)
| <...So we got to our modeling table. We have already sculpted a horse. Let's remember where to start sculpting (knead the plasticine and divide it into parts). What shape is the kitten's body? Head? Tail? (oval, elongated head, long tail." We will sculpt from a whole piece of plasticine. Dasha, tell us how we will sculpt (we need to roll out a thick sausage, cut it into a stack on both sides - these are the legs. Then we roll out the ball - draw out the muzzle and ears. We attach muzzle to the body and smear it well. The tail should be thin and long). Guys, so that our hands warm up before work, we will do finger exercises. Cunning, little Kitten (the ball is squeezed between the palms) Just got out of the diapers, (palms open) He did a lot of things: (close his palms) ate a fish from a raccoon, (circular movements between his palms) started a fight with a hamster, (squeeze the ball in his right hand) Only got scared of the dog. (squeeze in his left hand) An ill-mannered child (circular movements on the table with one hand ) This little Kitten. (circular movements on the table with the other hand) Let's start sculpting. The children sculpt, the teacher helps individually as needed. During the lesson, physical education is held: Here the window opened (arms to the sides) A cat came out onto the ledge (cat's smooth gait) Looked the cat went up (he threw his head up) The cat looked down, looked to the left, followed the flies with her gaze, stretched, smiled, and sat down on the ledge. Well done guys, you all coped with the task. The teacher calls 2-3 children for analysis...> |
Preview:
Summary of direct educational activities on artistic and aesthetic development (sculpting)
in the preparatory group
on the theme “Child with a kitten.”
Educational field: artistic and aesthetic development (sculpting)
Integration of areas: physical development, speech development.
Teach children to depict a simple scene in modeling, to consolidate the ability to convey the proportions of a person and an animal. Strengthen the ability to use techniques: pinching, pulling, rolling, rolling, joining.
Developmental: develop techniques for creating proportions between humans and animals, a sense of composition, and imagination.
Educational: to cultivate hard work and accuracy.
Preliminary work: Familiarizing children with animals (based on the works of V. Bianki, S. Marshak, E. Charushin, M. Chizhikov, etc.), their appearance, habits. Reading fairy tales, stories about animals, about their friendship with humans. Looking at illustrations.
Individual work: Continue to teach Egor and Raibek how to perform sculpting techniques correctly.
Materials: Plasticine, modeling boards, illustration “Child with a kitten”, stacks, napkins.
Motivation: let the children determine for themselves what we will sculpt (show illustration)
Source
Sequence of work on the craft
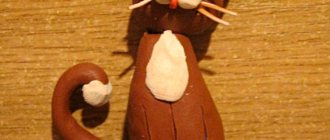
"The kitten arches its back"
In order for the craft to turn out neatly, first a muzzle is formed on the head, and then the entire structure is attached to the body
Instructions:
- “Guys, take a piece of black plasticine and roll it into a sausage.”
- “Using a stack, we make a cut for the paws at both ends, pull it out and smooth it.”
- “Now we give the shape of a curved back, pressing the front legs down, and the hind legs, on the contrary, resting on the plane.”
- “We roll out a piece of plasticine into a thin sausage-tail, give it a curved shape and apply it to the base.”
- “Let’s get to the head. Let's form a ball."
- “We make a face from a small piece of material by rolling it into a short and thick sausage.”
- “We attach the muzzle to the head.”
- “We pinch off pieces for the ears, giving them a triangular shape, and place them on the head.”
- “We roll small balls for eyes from white plasticine.”
- “On the eyes we show pupils made of green pancakes.”
- “The pink ball represents the nose.”
- “We make thin sausage-mustaches from yellow plasticine, attach them with two tufts on the muzzle.”
- “We glue the head to the body.”
"The kitten is lying"
Children can choose their own color scheme for the animal
This craft is made in a constructive way.
Instructions:
- “We roll a ball out of plasticine, then we form it into a cylinder for the body.”
- “We form 5 not too thin sausages, attach 2 of them in place of the front legs, 2 in place of the hind legs, and make one a little thinner by stretching it and attach it to the back - this is the tail.”
- “We bend the hind legs in a semicircle, secure the front legs parallel to the body - this is how we give the kitten a lying position.”
- “Let’s get to the head. Let's roll a ball."
- “We pinch off 2 pieces of plasticine, form each one into a ball, and then stretch it into a cone - these are the kitten’s ears. We attach them to our heads.”
- “We make eyes from small white pancakes, the pupils - also in the form of pancakes - are applied to a white base.”
- “We place the eyes on the muzzle.”
- “We show the mouth with a thin sausage made of pink plasticine, and apply slightly thicker and shorter strips to the back.”
"A boy is hiding from a kitten"
In order for the figurine to be stronger, it is necessary to use a frame in the form of matches or toothpicks for the legs.
For this craft we need frames for thin legs. You can use either matches (more convenient) or toothpicks.
Instructions:
- “We make a ball from a piece of brown plasticine, then roll it into a cylinder and flatten it slightly.”
- “From pieces of material of the same color we make 2 sausages for hands.”
- “We glue the arms to the body.”
- “We make a ball from a small piece of black plasticine, then a pancake, slightly widening towards the bottom - these are boy shorts.”
- “We cut the wide part a little to make 2 trouser legs.”
- “We glue the shorts to the body.”
- “We coat the matches with plasticine. To do this, we roll out a piece of material into a pancake, wrap a match in it and smooth out the layers.”
- “We make ovals from blue plasticine and insert legs into them.”
- “We wrap yellow sausages around our ankles and use small stripes to show the laces on our shoes.”
- “We make ovals for the palms from white plasticine, bend them in half and attach them to the brown parts.”
- “Roll a sausage for the neck.”
- “We make a ball for the head, “put” it on the neck, then attach 2 ear pancakes.”
- “We show our nose with a small ball.”
- “We use pancakes of different sizes to represent the eyes and pupils.”
- “We use a stack to make a slot for the mouth.”
- “We show eyebrows with thin black stripes.”
- “We make a pancake for a hat from black plasticine, “put on” the headdress, and apply it to the head.”
- “We use a stack to make a knitted pattern on a hat.”
- “We use yellow stripes to show the placket and collar of the shirt, as well as the sleeves.”
"The child is sitting"
To make the figure sit, you need to smear the parts of the body well together
This version of sculpting a child can be presented in several versions. So, the head of the craft can be a blank from a toy or made of plasticine, but the facial features are drawn with a pencil or paints (in this case, it is better to give the children a finished part in order to save time and the work is done carefully). Let's consider the progress of the torso and limbs. The sculptural method is used to make them.
Instructions:
- “Cut a piece of pink plasticine to the middle.”
- “We roll sausages out of two parts, point them down - these are the handles of the figure.”
- “We take a piece of yellow plasticine and also cut it.”
- “We roll two sausages, but do not bend them - these are the legs.”
- “We make ovals from brown material, press them in and attach the legs.”
- “We form 2 oval mittens from the orange color and attach them to the hands.”
- “We coat the parts of the body and bend them at right angles.”
Photo gallery: children's works made of plasticine
Children can make not ordinary babies, but, for example, aliens who have fallen to Earth and become acquainted with domestic animals. To create a figure with arms spread wide apart, the parts of the limbs must be carefully smeared onto the body
This craft is made in a constructive way
Instead of a kitten, you can sculpt a puppy - this is one of the ways to individualize your work on a craft.
The simplicity of the figurine is compensated by its small size - working with such a craft is quite difficult
Video: flexible plasticine cat
A simple sitting cat made of plasticine
The following instructions will tell you how to make a cat out of plasticine using simple steps. Despite the simplicity of execution, the finished product is surprisingly beautiful.
The first thing we will start with is choosing the color of the future animal. If you want a bright fluffy look, go for an orange shade. Fans of mystical murkas can choose black.
The list of materials for work does not change. We use a knife to separate the material into pieces and a board to protect the work surface. Now we’ll tell you how to make a cat from plasticine:
- Before you begin the main modeling, the material needs to be prepared for work. We warm it and knead it in our hands until it becomes completely pliable.
- Take the main color you chose for the cat and roll it into a ball. The finished figure needs to be given a conical shape. As a result, you should get the body of the future cat.
(Step 1) - We continue working with the main color. Make a big pea out of it. It is needed to make the head.
- Now we roll a thin worm. This is a wonderful tail. To make it look elegant, round it and sharpen it at the end.
- Decorate your cat with a beautiful bib. Roll into a ball, roll it out flat and cut out the bib. Make teeth along the edges so that the element looks like wool.
(Step 2) - To give the muzzle a natural look, you need to make four white peas. From these we will make the cat's eyes. We attach pupils of a different color to them, for example, black. We need the remaining white parts for the muzzle.
- Don't forget your nose. It can be made pink or orange. Give your nose a triangle shape for a more natural look.
(Step 3) - Let's take care of the ears. They need to be made in the form of thin triangles. You can make them from a color other than the main one. And, for example, from white. Inside each figurine we make we place an identical one, only with a smaller size and a different color.
- We finish working with the cat. We add dimples to his pupils, draw a mustache and toes.
The cat is ready. This plasticine modeling for children aged 3-4 years, like the previous one, is not complicated and interesting. All actions are elementary and with the help of adults, the cat will turn out natural and cheerful.
You learned how to make a cat from plasticine. Next, we will consider even more interesting manufacturing options.
Summary of the modeling lesson “Child with a kitten”
Narezhnaya Svetlana
Summary of the sculpting lesson “Child with a kitten”
Abstract on modeling on the topic “ Child with a kitten (with another animal)
»
in the preparatory group "Pochemuchki"
Program content. Teach children to depict a simple scene in sculpting ( a child plays with an animal , conveying the movements of human and animal figures. Strengthen the ability to convey the proportions of the body of an animal and a person. Practice using basic sculpting .
Material: Illustration “ Child with a kitten ”
.
modeling board , stack, napkin for each child .