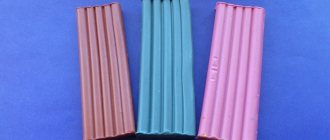
Options for what kind of flowers you can make from plasticine with your own hands
You can create a wide variety of flowers from plasticine with your own hands. Advanced masters offer to master several modeling options at once.
For example, spring flowers made of plasticine can be collected into a “seasonal” bouquet, and the composition will look logical and natural. You can also choose flowers that bloom in summer or autumn. The skills for making different varieties of flowering plants will be useful for both 1st grade children and older 3rd grade students. The following decorative flowers look great in “plasticine”:
Rose
Extraordinarily beautiful rose flowers will seem alive if they are performed using the following technique:
- petal blanks are molded from red or pink plasticine in the form of flat ovals of irregular, free shape (15-17 pcs.);
- the first petal is twisted into a tube, then the next petals begin to be fixed onto it in a circle (overlapping);
- for each subsequent petal the upper part is slightly bent;
- make 5 green triangle leaves and fix them at the base of the finished flower, decorate the receptacle;
- wire or hard wire is coated with green plasticine, imitating a stem;
- make a frame of leaves on the stem and sculpt their original shape.
The flower is attached to the trunk, and the veins on the petals and leaves are drawn in a stack.
Detailed instructions for sculpting beautiful roses are shown here.
Daisies
A wonderful white flower with a yellow center is created step by step:
- petals (16-20 pieces) of different sizes are molded from white plasticine in the form of flattened droplets, and they are added in stacks to give texture;
- make a yellow center out of a ball, flattening it at the top/bottom;
- the middle is decorated with petals, starting with smaller ones and ending with large ones;
- a thin plastic or wooden stick (twisted foil will also work) is coated with green plasticine - this is the stem;
- The receptacle is placed at the base of the stem and the collected flower is attached.
The leaves are fashioned into an appropriate elongated and ribbed shape and fixed to the stem.
Detailed instructions on how to make daisies are shown here.
Tulip
Making a delicate tulip flower is not difficult at all:
- on the wire in the upper part an “internal bud” is created from a green oval blank with a ball at the end;
- stacks give the bud texture;
- five black striped stamens are sculpted and attached to the bud on the pistil;
- create large petals (6 pcs.) from any tone - from the balls they form cakes with one pointed end;
- veins are drawn in a stack;
- attach three petals to the bud and give it an opening shape;
- then carefully fix the next three petals, creating a “naturalness”;
- they sculpt almond-like large and long leaves, then “plant” them on a plasticine green stem.
The craft is ready.
Detailed instructions for sculpting tulips are presented here.
Bell
Lilac
Volumetric bouquet of flowers
Applications on paper and cardboard
Flowers made from plasticine flagella
Carnation
Mimosa
Snowdrop
Violet
Gladioli
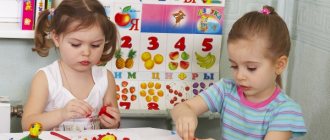
Modeling classes in kindergarten:
- They develop patience, perseverance, accuracy, the ability to plan and complete the work started.
- Lessons with plasticine, dough, and mass enrich children's sensory experience, develop fine motor skills of their fingers, teach them how to bring things to fruition, and allow the child to develop speech, attention, thinking, and imagination.
- They teach children to analyze, develop perception, because in order to visualize any object in sculpture, it is necessary to identify its main parts, their characteristics (color, size, shape, proportions, position in space).
- Develop the ability to plan your actions.
- Clarify and consolidate children’s ideas about objects in the world around them.
- Prepare your child's hand for more complex movements by using a pencil and brush in the drawing.
In modeling, the child tries to correlate the characteristics of the object with the characteristics of the material (modeling or plasticine), this leads to the memorization of sensory standards (color - yellow, red, green, blue and others, size - small, large, shape - round, oval, triangular, long – short, wide – narrow).
In addition, in sculpture, a child easily feels the shape of an object (it is easier for him to understand that the ball is round, it is a ball in a sculpture in which he himself rolls this ball, and not in a flat image in the picture).
For 3-4 year old children, more complex modeling classes are chosen than for younger ones. Their fingers are already more nimble, and their imagination allows them to create interesting images even without adult intervention.
Modeling in kindergarten for children 5-6 years old is useful because it helps strengthen the arm muscles. Writing skills can be learned through drawing and work on printed notebooks, but clay modeling cannot be compared to these activities in its comprehensive usefulness. When kneading a large piece of frozen plasticine, the child works all muscle groups in the hand, which has a positive effect on preparing the hand for writing.
From the author
For the harmonious development of a child’s personality, it is very important to introduce him to the world of beauty through visual activities (drawing, modeling, appliqué). Draw, sculpt and apply artwork to develop fine motor skills, shape thinking and develop children's artistic abilities and creativity. These classes are also one of the most important stages in preparing a child for school.
The year before school is a very important period in a child’s life, and all subsequent studies largely depend on it. If a child is ready, he will happily go to school, and it will be easy and pleasant for him to learn.
Children aged 6-7 years expand their knowledge in the field of fine arts, get acquainted with works of painting, small sculptures, and the works of book illustrators.
Modeling lessons reinforce the ability to convey shapes, proportions, poses, characteristic features and movements of depicted objects. Six-year-old children can sculpt sculptural compositions from two or three figures, united by a common texture, related by size, and make popular toys.
The appliqué class includes the ability to cut out parts of objects and entire figures from paper, the ability to cut out symmetrical parts from paper folded in half, and various objects or parts of them from accordion-folded paper. The ability to create a decorative composition from geometric and plant figures is enhanced. The ability to correctly place an applique on a sheet develops. The exploration of the possibilities of the art of ikebana and the technique of openwork carving continues. In teamwork, children learn to plan and coordinate their actions.
What else to read: Lesson notes “Production of didactic material.”
In this tutorial we offer samples of fun wood carving and appliqué lessons.
Classes are organized on a thematic basis: one theme unites all classes (around the world, language development, modeling, appliqué, drawing) throughout the week.
A sculpture or applique lesson is held once a week and lasts 25-30 minutes. Modeling and appliqué lessons do not have to be strictly alternated; for example, you can teach one modeling lesson, then three for appliqué, and vice versa. The manual contains 36 summaries of complex lessons (18 on modeling and 18 on application), designed for the academic year (from September to May).
Read the lesson content carefully in advance, and if something does not suit you, make changes; prepare the necessary material and equipment.
Preliminary work is also important (reading a work of art, becoming familiar with surrounding phenomena, studying drawings and paintings).
It is recommended that a sculpture or appliqué lesson be taught before children begin drawing on this theme.
Modeling lessons are based on the following approximate plan:
1. Creation of interest and emotional state (moments of surprise, poems, riddles, songs, nursery rhymes are used; acquaintance with works of art; memories of what was seen earlier; the appearance of a fairy-tale character in need of help; dramatic games; exercises for the development of memory, attention and thinking; outdoor games).
2. The process of completing the work begins with an analysis of the depicted object, the teacher’s recommendations and children’s suggestions for creating the work; in some cases, visualization is used using visualization techniques. Then the children begin to create their works. The teacher can draw their attention to a successfully started lesson; guiding the actions of children in need of support and assistance. When decorating a product with additional elements, children should pay attention to expressive means (correctly selected colors and interesting details).
3. Examination of finished works (in this case, the teacher gives only a positive assessment). The child should rejoice at the result, learn to evaluate his craft and the work of other children, notice new interesting solutions, and see similarities with nature.
In modeling lessons with children 6-7 years old, the following modeling methods are used.
1. Constructive: modeling an object from individual parts.
2. Plastic: The parts of the object are made of one piece.
3. Combined: a combination of different modeling methods in one product.
4. Relief sculpture: a three-dimensional image that protrudes above the plane that makes up its background.
Types of reliefs:
– bas-relief – bas-relief (the image protrudes above the plane by less than half (coins, medals));
– high relief – high relief (individual parts can completely protrude above the plane (walls of architectural structures));
– counter-relief – depressed relief (the image is recessed in plan).
We list the sculpture techniques that children 6-7 years old can use:
• rolling balls (any work begins with the use of this technique): a piece of plasticine is placed between the palms and makes circular movements with the palms;
• roll the posts by moving your palms back and forth along the board;
• flatten or flatten balls and columns between fingers or palms;
• pinch or pull: squeeze the clay with two or three fingers and pull lightly;
• remove individual parts from a single piece: with your thumb and forefinger, gradually press the plasticine from all sides (you can roll out the column only on one side and get a cone-shaped shape);
What else to read: Didactic games for children: development of speech, sensory, physical development. Do-it-yourself card index with goals
• pressing the groove on the surface of the mold with your thumb;
• connecting parts into one and smoothing the joints;
• flatten the lower part of the formwork by hitting it along the axis so that the boat becomes stable;
• draw on plasticine using the counter-relief method using pile or a sharp stick;
• decorating the boat with various additional and natural materials: sticks, straws, lion fish carved from maple or ash, buttons, pennies, woolen threads, etc.;
• decorating an object with small details cut out of plasticine;
• mixing different colors in a piece of plasticine: take 2-3 pieces of plasticine, turn them and knead them - you get multi-colored plasticine.
Secrets of working with clay Many adults do not really like working with clay, without understanding all its intricacies. Therefore, plasticine modeling lessons are often replaced with plasticine modeling. To understand the secrets of clay, carefully read the following tips: • The day before class, remove the film from the clay, wrap it in a damp cloth and place it in a bag. • Before class, knead all the clay well, then divide it into parts and distribute the plasticine to the children until ready - continue kneading. If the clay is too wet, it will stick to your hands. You need to knead it longer until it becomes plastic, easily separates from your hands and rolls into a sausage. If the clay is cracked - it is too dry - moisten it with a little water and continue kneading until it becomes soft. If this is not done, the craft will break when drying. Only plastic clay is suitable for sculpting, it is easily sticky and does not crack • Prepare a bowl of water in which you will moisturize your hands • Now you can sculpt your intended object on a wooden board! This is important because the plastic clay will stick too much and crack. • Clay joints should be moistened with water, otherwise the craft may break during drying. • Using wet fingers, smooth out any uneven surfaces on the boat. • If you did not finish cutting out an object during class, carefully wrap the unfinished work in a damp cloth and place it in a plastic bag. • Dry the product in clay, sculpted in a natural way, for 3-4 days. • After this, the craft can be fired in a muffle furnace at a temperature of 800 ° C. After firing, the clay will acquire a reddish-brown color • The finished product can be painted, for example, with gouache, gouache or watercolor and varnished • Wrap the remaining mass after modeling in a cloth and put in a plastic bag plastic bag. If the damp cloth begins to mold during storage, replace it with a new one and wash off the clay. • After work, wash your hands under running water and clean the work area with sponges. If there is no clay, then you can use soft dough and homemade plastic. You can prepare it in two ways: 1st method. Mix 0.5 cups of salt, 0.5 cups of flour, 0.5 cups of water and 1 teaspoon of sunflower oil. The dough is ready. 2nd method. Mix 1 cup flour, 1 cup water, 0.5 cup salt, 1 tablespoon vegetable oil and 2 tablespoons citric acid. Cook, stirring occasionally, for 2-3 minutes. Finished products must be dried on both sides and then painted with gouache.
We list the application methods that children 6-7 years old can use. • An applique consisting of cut-out parts of an object (the object consists of parts and is pasted onto paper) • An applique consisting of cut-out figures of objects (a composition is created from one or more objects and pasted onto a sheet of paper) • Decorative appliques from cut strips and geometric shapes – mosaic (small circles, triangles, squares or pieces of colored paper are glued inside the outline). • Tear the outline (colored paper is torn along the intended contour to convey the texture of the object; rolled into a ball) • Applique (identical in shape, but glued in different sizes, from largest to smallest), glued onto a sheet of paper). • Fabric applique – made from pieces of various fabrics. The desired item is applied • Application of cotton wool (a thin layer of cotton is spread on velvet paper and glued.) • Application of floss threads (threads are placed on velvet paper and glued) grains, sand, shavings from colored pencils or crushed eggshells (at the end of the work the shell can be painted paints)), imitation of a fresco of colored paper that can withstand • Weaving - strips of paper are pulled through a base cut into strips. For modeling from plasticine and plasticine you will need: – natural material: pumpkin seeds, sunflower seeds, chestnut fruits, acorns, tree branches, ash seeds, maple lion fish, pine cones, shells, beans, peas, spring onions; – additional material: shoe box lids, buttons, beads, matches, juice straws, polystyrene foam, white tracing paper, Kinder Surprise capsules. To work accurately with plasticine and clay you will need: lint, a wooden cutting board, a rag for wiping hands, cardboard stands for finished products, paper, double-sided colored paper, magazine paper, corrugated paper, colored napkins, white tracing paper, eggshells, fabrics, scraps, dental floss, woolen threads, candy wrappers, polystyrene foam, foil, cereals, pebbles, cotton wool, dried leaves, cocktail straws, jars of Rastishka yogurt, sheets of landscape paper, colored cardboard, pencils, markers, good blunt scissors, vinyl glue, oilcloth lining and rag. Perspectives on the skills and abilities of a child aged seven.
What else to read: Learning colors: how to teach a child to distinguish colors and shades
In sculpting: • knows how to sculpt objects based on images and from nature, conveying their characteristic features; • knows how to convey the character, proportions, poses and movements of humans and animals, sculpts sculptural groups of 2-3 figures; • can sculpt figures based on popular toys • can decorate a figure with relief • can perform decorative sculpting on a plate with sculpting and deep relief.
In the application: • knows how to correctly position the application compositionally; • knows how to create an image from life and presentation; • knows how to cut symmetrical shapes from paper folded in half; • knows the basics of multilayer and perforated cutting techniques; • knows how to create motifs on paper of various shapes; • knows how to create a decorative composition from geometric and plant shapes; • knows how to depict birds and animals based on folk arts and crafts.
We wish you success!
Description of a beautiful plasticine craft
For example, if we take plasticine, we always remember our school years. The teacher gives a clear task, or simply offers to work independently. Such an experience is often aggravated, since the opinion is firmly established that this material is a purely amateur thing. Of course, those who have already worked with him read this and involuntarily smile. He does this because he understands how erroneous this statement is. Today you can make a huge number of things from plasticine, be it just something for yourself, or even for sale.
An example of a finished craft - flowers
If you are a teacher and are looking for a lesson that will later be used in class work, then be sure to also use a sheet of cardboard. You can attach the resulting craft to it, and the kids can take it home. Since flowers are always a symbol of a gift, this craft can be prepared for any significant day. In addition to plastic material, we also need tools. Without them, alas, it will be difficult to make such beautiful work, since you will have to look for analogues in other objects. All shades are present in varying quantities in almost every set, even a small one. Because of this, absolutely everyone can do it, regardless of age and income.