Learning to play mosaic. Methodological development on correctional pedagogy (junior group)
Learning to play mosaic.
All parents want to see their children healthy, happy and successful in life. In order for a child to grow up as a harmoniously developed personality, it is necessary to make every effort for his upbringing and development. Games help us with this, because play is the main and leading activity of preschool children. Today there are a huge number of games. Among such diversity, I would like to draw your attention to a fairly simple and, at the same time, very useful game - “Mosaic”.
“Mosaic” is an original, exciting, educational game for children of all ages, combining elements of a construction set, a board game, a puzzle and a creativity kit.
- mosaic develops fine motor skills of the hands
- develops and improves sensory standards (color, shape)
- develops mental processes: attention, memory, thinking, imagination, fantasy, speech
- develops children's cognitive activity
- develops constructive abilities
- develops mathematical abilities in children:
- develops artistic taste in children
- Our task is to teach the child to play mosaic, through which he would develop himself independently.
- Let's start with the fact that before a child begins to develop while playing with mosaics, he needs to be captivated and interested in this game. After all, if you just put a mosaic on the table, he is unlikely to do anything interesting and will soon get tired of it.
- First, introduce your child to the game and its details. As a rule, a game set consists of a field (board, colored elements (chips) and pictures - instructions. Show the children the mosaic board, pay attention to the holes. Take one mosaic element, examine it with the children, show that it has a “hat” and “leg" (“like a mushroom”). The cap of a chip for children 2-3 years old must be hexagonal. Show how to take a chip, teach children to take chips with a pinch: with three fingers - middle, index, thumb, how to insert a mosaic element into the hole of the board. Insert 2-3 mosaic elements. Let the child first try to get the pieces out on his own, if he doesn’t succeed, help: from the back of the board, push the piece so that the cap rises a little. The child’s feeling of success is very important here. And then let him try to insert the elements into the holes.
Can be accompanied by the following game situations:
Game situation “It’s raining” - single placement (i.e. randomly across the entire field)
Game situation “Path” - laying out close to each other (horizontally and vertically)
Game situation “A duck is swimming in a puddle” - laying out close to each other (without gaps)
- Explore the colors of mosaic elements with your children. Lay out the mosaic pieces in front of your child and list the main colors. Pointing to one or another, name the color. You can ask them to sort the chips by color.
- Lay out a path of 3-4 elements in front of your child and ask him to make the same one below, under yours, that is, let him repeat the order of colors. It is necessary to lay out the path from left to right in order to orient the child to the correct letter.
- Gradually increase the number of elements and complexity of the compositions. At the same time, help your child if something doesn’t work out for him, but you shouldn’t assemble the mosaic instead of him. Guide him, suggest the sequence of actions. Be sure to praise your child for his efforts. Rejoice in your child's success with him. And most importantly, convince the child that he can do anything, that he will succeed. It is very important.
Fun "mosaic"
Didactic game. "Fun Mosaic"
Board game for children from 3 to 5 years old.
Purpose of the game:
develop fine motor skills, develop imagination and memory,
the ability to put together various pictures using prepared parts of different colors, repeat the names of colors and their shades, teach children to work independently, choosing pebbles of the required color for this.
Number of players:
2-3 children.
Equipment:
a mosaic set of colored glass, flat pebbles, a playing field, samples of execution or cards.
Material:
a candy box, white plastic bottle caps, PVA glue, multi-colored glass flat stones.
Description of work:
To make the playing field, glue the white caps to the bottom of the box in even rows, close together. The result is a playing field with cells.
Rule of the game:
You can start playing mosaic at 2-3 years old. During the game, be sure to ensure that a small child does not put a flat pebble in his mouth, as this is dangerous. The rules of the game are similar to playing a ready-made mosaic. First, introduce the children to the playing field and the chips - pebbles. Start laying out pebbles in cells with simple ornaments, and then the game begins to take on a creative character in children of middle and senior preschool age.
Tasks:
learn to lay out simple schematic images of objects; strengthen the ability to count within 20; assign names of colors and shades; develop imagination and creativity, spatial arrangement; cultivate patience and perseverance.
Progress of the game:
The teacher invites the children to use a mosaic to make a sun, which is shown in the sample. Next you will need one flat yellow pebble, which should be placed just above the center of the board. This will be the beginning of our sun edge, then we make a circle and fill it with yellow pebbles, then we make rays for the sun.
Options for placing balls in cells:
Laying out simple ornaments.
Laying out according to ready-made diagrams.
Playing homemade mosaics is fun and interesting. As if in between, fine motor skills and speech develop. Children learn perseverance and try to bring the work they start to its logical conclusion.
At the end of the lesson, it is necessary to sum up the results, praising each child for the work done, especially noting those details that were completed on their own initiative.
In the future, you can offer children a game of mosaic with the execution of an arbitrary plot, for example, a house under construction, trees with apples,
Using the “Fun Construction” mosaic constructor in educational work with preschoolers
Bibliographic description:
Matveeva, E. Yu. Using the mosaic constructor “Fun Construction” in educational work with preschoolers / E. Yu. Matveeva. — Text: direct // Questions of preschool pedagogy. — 2020. — No. 1 (28). — P. 35-37. — URL: https://moluch.ru/th/1/archive/150/4781/ (access date: 01/29/2022).
...Game is the spark that ignites the flame of inquisitiveness and curiosity
K. D. Ushinsky
What do children love most? Of course, play! Play for a preschooler is the leading activity. Through play, the child understands how everything should be arranged and learns about the world around him.
One of the options for an exciting, educational and educational game is the game “Fun Construction”. After all, this is not only a mosaic, but also, no less, a construction set. With its help, you can build not only flat figures (as when playing classic mosaic), but also three-dimensional ones. This is achieved due to the fact that the parts are connected both in the horizontal plane using grooves and protrusions, and vertically, sliding on one another. There is no field in this mosaic; it can be assembled on any surface. The game has advantages, and even unique properties that other mosaics and constructors do not have. From the puzzle set you can assemble flat figures that do not fall apart when picked up. Thanks to this, they can be moved from place to place. And you can build three-dimensional figures that can also be moved from place to place. Moreover, with the help of this game you can build multi-story buildings of any configuration. This feature makes this mosaic constructor stand out among other constructors.
“Fun Construction” is just a godsend for those children who love mosaics and LEGO-type construction sets, because this game combines the features of both. Playing with mosaics with a construction set is interesting and useful for children, it develops imagination, spatial and figurative thinking, fantasy, promotes the development of fine motor skills of the fingers, speech development, and cultivates attentiveness and perseverance in preschoolers.
Design is a creative process that is carried out through the independent or joint activities of the teacher and children, children with each other, allowing you to spend interesting and useful time in kindergarten. It is very important that the achievements of children’s creative activity can be clearly demonstrated: this increases self-esteem and has a positive effect on motivation for activity and knowledge. Children see the end result of their activities in the form of finished structures, and this elevates them in their own eyes and makes them want to improve their knowledge, skills and personal qualities. Children develop the ability to cooperate with a partner and work in a team. In a game like “Fun Construction”, children learn by playing. And play is a necessary companion for childhood.
I offer several educational games for children, which I use in educational work with my students.
1. “Who has the taller tower?” The goal of this game is that the building must be higher than that of the opponent.
Everyone takes turns throwing a multi-colored die and taking a puzzle of the corresponding color. If the same colors fall out all the time, then you won’t get a high tower.
2. “Collect beads
We lay out a picture from puzzles of a certain sequence. The child needs to complete the chain to make beads, and be able to find a pattern.
3. Creative game “Photo Frame”
We make a photo frame for the face, multi-colored or one-color. Tasks may be different. For example, those who have a frame need to depict an emotion in the frame using facial expressions, and the rest must guess what emotion the driver was trying to portray. Children love to sing a song while holding a frame or recite a poem.
4. Game “Spinner” This game is one of my students’ favorite games, which they invented themselves and actively use it in their independent activities. Once the spinner is built, the children spin it, launch it at each other, and organize competitions. For example, who will launch next? Or, who will spin longer? This game always brings a lot of emotions and joy to children. The game "Spinner" develops the eye and accuracy, and also has a beneficial effect on attention and the ability to concentrate.
5. Game “Doll Furniture” From a mosaic set you can construct various doll furniture: tables, chairs, benches, houses. This game is ideal for role-playing games and fairy tale therapy.
6. Game “Find the Angle” To fix the orientation on the sheet, the children and I also use a mosaic - the “Fun Construction” constructor. To do this, a field of one color is built. We use white color. And we insert the corners of the field with a different color. Puzzles can be changed or placed on top. For example, lay out the top left corner in green, the top right corner in yellow. The bottom left corner is red and the bottom right corner is blue.
The “Fun Construction” mosaic construction set has become one of the most favorite types of construction set for my students; they are happy to come up with something new and interesting. The flight of children's imagination is great: it's a flag, a flower, a number or a letter, or a real sword.
Let's play with children as often as possible. After all, play is an excellent source of a child’s physical, spiritual, and emotional well-being. Discover the world with your child. Together is always better than just next to each other!
Literature:
- Paramonova L. A. Children's design and creativity. — M.: Karapuz, 2018
- Feshina E. V. “Lego construction in kindergarten.” A manual for teachers. - M.: Sfera, 2014.
Key terms
(automatically generated)
: game, child, this, constructor, mosaic.
Games with mosaics: developing perseverance and motor skills
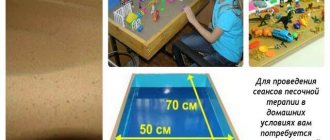
The reader of this article has probably been familiar with a wonderful creative game since childhood - mosaic. And although “in our time” the grass was certainly greener and the sky bluer, the toys were generally more primitive than modern ones. We had to be content with simple wooden or plastic sets of figures, from which even children with extraordinary imagination could put together no more than a dozen pictures. Today's children have much more choice, and adults, accordingly, have more opportunities to spend money on another gift for an occasion or just because.Let's play and develop
Teachers and psychologists unanimously classify mosaics as useful educational toys. Even if the child does not want to exercise his imagination, but only creates pictures that can be found as examples in the instructions for any play set, he still spends his time usefully. Fine motor skills, the subject of heated debate among advanced mothers, develop precisely through manipulation of objects that the child is able to hold with his still awkward fingers. Thus, the game goes well with arm training. Usually the box with the mosaic set indicates the age for which the game is intended. In this case, not only the complexity of the pattern is taken into account, but also the size of the individual parts. For the youngest players, sets with brighter and larger figures are produced, so that the little ones learn to distinguish and name colors correctly, and the game parts are more convenient to hold in their hands and, no less important, are more difficult to swallow.
Another useful property of playing with mosaics is the development of perseverance, to the delight of mothers and grandmothers who do not have the energy for active fun. Creative entertainment can really captivate a hyperactive child for a long time. Such activities will be especially useful during the period of preparation for school, because in class you will have to sit at a desk, and for fidgets this is real torture! Mosaic allows the future student to literally playfully become more attentive and concentrate on one lesson for a long time. Joint creative games are the best way to promote the rapid social adaptation of a “homemade” child who has never been to kindergarten for a day. To begin with, the company can be formed by one of the compliant parents, over time you can invite unfamiliar children to the game - in collective creativity it is easier to learn cooperation and interaction. The guys, without tears or resentment, begin to share mosaic figures, agree on who collects which color, etc.
The professional experience of teachers and psychologists is wonderful, but capricious children have a different opinion: even the most interesting, colorfully designed and expensive (unfortunately for parents) game eventually becomes boring. In the case of creative entertainment, nothing like this will happen, since these play sets are relatively inexpensive, so you can buy several sets at once from wood, plastic and soft materials and alternate themes. In addition, the opportunity to show off your results to your grandparents will also stimulate creative activity. Many modern mosaics allow you to fix the resulting picture on an adhesive or magnetic base and decorate a wall in the nursery with such a masterpiece.
So, the variety of assortments from toy manufacturers is impressive. Let's try to roughly classify the types of mosaics.
Wooden mosaic - classic toy
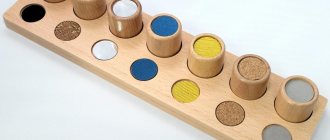
Volumetric and flat geometric figures made of sanded or painted wood in different colors - this is what a typical mosaic looked like at a time when the current older generation was interested in toys. Analogues of such rarities are still very popular today - they are primarily preferred by parents who lead a healthy lifestyle and buy goods made from environmentally friendly materials. In addition, children also like such toys, since the surface of the figures with smooth and rough edges opens up a whole new world of unusual tactile sensations.
Wooden mosaic with flat figures
Typically, such sets allow you to create angular and very abstract pictures that very vaguely resemble real flowers, vehicles or animals. But parents should not be embarrassed by this - this is the best way to develop children's imagination. Any kid can easily borrow his mother’s saucepan and immediately imagine it as a spaceship, because “let’s pretend it’s as if...” is a favorite childhood pastime.
Serious schoolchildren should not bother with baby figures, but they can be interested in... cubes! Nowadays, construction-style play sets with randomly colored wooden cubes that allow you to create abstract patterns or mandalas are very popular.
Wooden mosaic for older children
Plastic mosaic - cheap and varied
At one time, wooden mosaics were replaced by plastic ones. Many adults remember the typical Soviet play sets with multi-colored hexagonal pieces that were mounted on a round base with numerous holes. Modern manufacturers have adopted this simple, and most importantly, cheap technology and simply developed the idea. Some just vary the shape of the chips and the base, offer letters and numbers as mosaic details (as didactic material for preschoolers), but the principle remains the same.
Plastic mosaic with base and chips
Mosaic with chips and a fixing base is great fun, but it is not for everyone. Some kids just don't have the patience to insert the pegs of the figures into the corresponding cells. Such impatient people in a hurry will like magnetic sets, which are pieces of metal in a plastic shell. The game comes with a magnetic base that will hold the pieces attached to it even if you tilt or flip it. Some unscrupulous manufacturers glue metal to plastic figures poorly; it falls off at the very beginning of the game, and the child, naturally, gets upset. To avoid unnecessary tears, it is better to choose sets with figures that have magnets sealed inside the body. The ideal option is to play with flexible magnets, but wooden mosaics on magnets, which are more preferable from a hygienic point of view, rarely have a long service life, since the metal always tries to peel off from the wood.
Plastic magnetic mosaic
Another type of plastic mosaic is almost a complete analogue of the wooden mosaic discussed above - the same brightly colored geometric figures that can be laid out in patterns on a plane or built into turrets. Plastic sets are cheaper than wooden sets, and they are lighter, so little players who quarrel and start a fight will not hurt each other with the figures. If your baby brother joins in the peaceful fun, he will be able to contribute as much as he can and gnaw on a piece of the mosaic: plastic is a more suitable material for massaging gums than wood.
It’s certainly more convenient to play with chips at the table, but the large plastic mosaic just begs to be placed on the floor. To prevent grandmothers from clutching their hearts when they see a child playing on the bare floor, you can buy your baby a special floor mosaic made of soft flexible plastic. This toy consists of very large elements; when assembled, it looks like a colorful patchwork rug. On the side parts of the parts there are special notches and notches, characteristic of a relative of the mosaic - the puzzle. You can compose the pattern in any order, since usually each individual part has its own solid picture. If desired, a flat mosaic can be turned into a three-dimensional one: rectangular composite pieces can easily be converted into a giant cube. Playing with such cube mats is very educational: the baby learns letters, numbers, different types of animals and plants.
Floor mosaic mat made of soft plastic
Sets for children's art creativity
All of the types of mosaics listed above can be conditionally classified as utilitarian: the child makes a pattern, and when he gets tired of this activity, he puts the figures back in the box and puts them in his closet until next time. However, there are arts and crafts kits that focus on the outcome rather than the process. With the help of such fun, children learn to complete a task, and the effort is worth it, because the result is a beautiful craft created with their own hands, even according to the designer’s sketch. This way, the baby can decorate his own room with funny trinkets or give a gift to loved ones in the form of a small cute postcard or a large wall panel.
The so-called button mosaic is a subtype of game with a base and chips, but the listed components are connected to each other reliably, once and for all. The kit includes one or several blanks with a drawn conditional sketch; the child’s task is to fill in the lines or areas on the sketch with buttons of the corresponding color or shape. It turns out something like a coloring book or applique. Such mosaics for the little ones are, of course, very simple, but older children are offered reproductions of famous artistic paintings as a basis for filling with colored buttons.
Button mosaic with a pattern of medium complexity
If push-button mosaic allows you to make only pictures, then sticker mosaic is used even for decorating simple children’s jewelry, photo frames, boxes, handbags, decorative interior elements and Christmas tree decorations. Obviously, the kits for children's creativity do not include the usual office stickers; here we are talking about small cardboard figures on an adhesive base and coated with glitter. Typically, patterns are drawn schematically on the blanks to which colored sparkles are glued, and different shades are indicated by corresponding numbers. Of course, no one will forbid a child to show his imagination and experiment with colors, but in cases where the number of stickers exactly matches the ornament, it is better to follow the pattern so as not to spoil the whole work. This bright and cheerful type of mosaic with stickers will delight little girls, but will leave boys who are skeptical about sparkling stars and hearts indifferent.
Box-blank for sticker mosaic and complete stickers
Another interesting type of children's decorative art is thermomosaic. Such play sets consist of a base with pegs on which a pattern of beads is typed. When the work is completely ready, the mother, under the strict guidance of the baby, irons the drawing with an iron, and all the elements are glued together into a solid figure. A large picture can be hung on the wall, and a small one can be decorated as a magnet on the refrigerator.
Thermomosaic manufacturing process
01/30/2015 Pakhomova Irina
Game “Once a snowflake, two snowflakes”
While walking, the child watched snowflakes spinning and caught them. Try making snowfall at home. Let him choose 10–12 white fragments from the total mass of mosaic details for the game.
Remember with your child what you saw on a walk, look out the window, admire the snowfall, recite the rhyme: “The snow is fluttering, spinning, it’s white outside...”
Show him the prepared white parts: “Look what snowflakes I have!” Take one “snowflake” and attach it to the plate: “That’s how the snowflake flew!” Invite him to repeat your actions. Rejoice with your child, support him emotionally - exclamations, comments, clarifications.
As soon as all the “snowflakes” are on the plate, praise the child and look at the resulting picture with him: “Wow! How our snowflakes fly!” Touch one of the parts and say: “Oh, it’s cold!” The child will join your fun and carefully touch the “snowflakes.” Are your hands frozen? Rub your palms as if you are warming them, so that your child will repeat after you. Such exercises help develop the muscles of the hands.
MAGAZINE Preschooler.RF
Project on the theme: “Fun mosaic” for children of senior preschool age.Municipal budgetary preschool educational institution "Teremok " Bely Yar
Prepared by: Otegenova K.M.
Teacher 1st category
Project passport:
The origins of children's creativity and talent are at their fingertips. From the fingers, figuratively speaking, come the finest streams that feed the source of creative thought... the more skill in a child’s hand, the smarter the child
Sukhomlinsky V. A.
Project type: creative and informational.
Project duration: short-term
Project participants: children 6-7 years old, teachers, parents of students.
Relevance of the topic:
During the period of preschool childhood, the child develops his first ideas about the world around him, develops the ability to establish the simplest relationships and patterns about the phenomena of life around him, as well as independence in applying the acquired knowledge in accessible practical reality.
Children of the sixth or seventh year of life already have quite extensive knowledge about the world around them.
From observations in the daily life of preschool educational institutions, we see that interest in applications manifests itself in children already from early preschool age, and in older years it becomes more stable. Questioning parents, diagnosing and interviewing children helped to obtain more accurate information about what knowledge children have about the application, what is of greatest interest, and what is available for use. Analysis of the identified ideas about the application showed their partial or complete lack of ideas about its types and methods of working with paper.
After analyzing, I came to the conclusion that there is an urgent need to familiarize children with the world of paper, since paper takes up less and less space in everyday life every year, and the child uses it little. It is also necessary to develop and maintain interest in the application, using the capabilities of the preschool educational institution and the surrounding society.
An insufficient degree of development of technical skills inhibits the work of imagination, fetters children's initiative, and reduces the quality of performance results. Conversely, if a child successfully masters the technical skills of applique operations: tearing, creasing, rolling, twisting and folding paper, this leads to successful mastery of sensory standards; acquiring initial search skills; mastering basic teamwork skills; active communication with each other and the teacher, stimulating a creative attitude to work.
Developed skills and abilities in comparison and comparison, finding the same and distinctive, highlighting the main thing contribute to the accelerated development of analytical and synthetic processes, the ability to combine and transform, which is one of the components of a child’s successful education at school.
Applique classes with directed guidance and using age-appropriate methods and techniques have a great educational and developmental effect.
Project goals:
- Forming knowledge about the origin of paper, understanding the significance in people’s lives, and caring for it.
- Identification of technical skills and abilities in the application process.
- Development of didactic material that has a developmental effect and cognitive stimulation on preschool children.
Project objectives:
- To form basic ideas about paper in 6-7 year old children.
- Expand knowledge about the meaning of paper in human life.
- To develop cognitive activity and mental processes in children. Develop methods of visual and tactile examination of familiar objects.
- Teach technical skills and abilities. Synchronize the work of both hands, coordinate the work of both hands and eyes.
- Teach children to see a complete artistic image in the unity of visual and expressive means (color, shape, size, texture)
- Develop the creative abilities of preschool children.
- Activate and enrich children's vocabulary.
- Consult parents on the development of their children's appliqué abilities.
- To foster curiosity, initiative, interest in applications, independence, activity, and self-confidence.
Expected result:
Children should: gain an understanding of paper, its properties, purpose;
distinguish between types of paper; master technical skills in working with paper;
Development of fine motor skills of the hands; development of analytical-synthetic processes and communication skills.
Working with parents:
Consultations:
“The application helps the child develop”
“The Art of Applique” , “Development of Fine Hand Movements”
Parent meeting:
"Development of creativity in children"
PROJECT IMPLEMENTATION STAGES
1. Preparatory stage
July August
Questioning and interviewing parents and children
Drawing up a long-term work plan for project implementation
Development of criteria for assessing children's skills and abilities
2. Main stage
- September
- Work planning
- Formation of topics for classes
- Diagnostics of children
- Conducting classes
3. Final stage
- October
- Exhibitions of children's works
- Exhibitions of joint works of children and parents
- Photo-exhibitions “Talented Hands”
- Diagnostics of children.
- Project activity product
- Photos of classes
- Children's works
- Models of classes
- Multimedia presentation
FORMS AND MEANS OF WORK
Shapes:
- Classes
- Educational games that contribute to the implementation of the project
- Excursions
- Experiments
- Holidays and entertainment
Facilities:
- Quizzes
- Artistic word
- Music
- Dynamic breaks, physical exercises
- Finger games
- Film library
- Didactic games
Problem:
- Development of hand motor skills by working with different types of paper.
- Introduction to types of paper
- Production of manuals during the project implementation
- Photo bank
- Slide show
- Corner “Talented Hands”
- Album “Types of paper”
- Selection of artistic words for the implementation of the project
- Development of educational games
- Choose correctly
- Cutting pictures
- Paired pictures
- Where and what kind of paper is needed
| Next > |
Learning to make vertical images
Having mastered the linear (horizontal) arrangement of parts, begin laying out vertical lines. To do this, rotate the playing field 90 degrees. The plate will lie with the short side facing the child. With this arrangement of the playing field, you can lay out a flat vertical path. It’s better to start laying out the details along the very edge, it will be a visual support for the child.
To interest your child, tell him a story about a seed from which a stem grew, and then a flower blossomed. The day before, do not forget to examine the stem, inflorescence, and leaves of a real flower so that the child has fresh memories.
Prepare five green parts (for the stem), one red or blue (for the flower) and one yellow (for the sun). Attach a green piece at the bottom of the side edge of the playing field - a “grain”. “Kolya (use your child’s name) planted a seed. The sun came out in the morning." Attach the yellow piece on top. “It became light and warm, a stalk appeared from the grain and began to grow upward, towards the gentle sun.” Show your child where to attach the parts so that the “stem” grows upward.
Support the game situation with your comments: “The stalk grows higher and higher, reaching towards the sun itself!” When the child finishes laying out the green pieces, give the child a red or blue piece and let him attach it: “Look, what a beautiful flower has bloomed!”
It will be a pleasant surprise for the child if a butterfly, made in advance from colored paper, flies to the flower he has “grown”. Next time you can “plant the seed” not at the very side edge.
Game "Snowdrift"
Has your child learned to make snowfall on his own? Next time, show him how to make a snowdrift that gets bigger and bigger when it snows. To do this, place white parts nearby.
Accompany your child’s actions with the story: “Snowflakes are spinning and falling to the ground. Another snowflake fell, and another. So many snowflakes! This is what a snowdrift it turned out to be!” This is a completely new picture for a child: he has made something whole from a large number of disparate elements.
Don't forget about the game surprise. Prepare toys in advance to play with the mosaic picture. When a real game situation arises in front of him, many mosaic details will turn into a cold, fluffy snowdrift in which little bunnies are happily floundering, enjoying the white snow. Playing with the resulting mosaic picture is one of the conditions under which a child develops and develops an interest in mosaic activities.
Card index of didactic sensory games for children 2-3 years old
Didactic game “Put the pencils into cups”
Objectives: to promote the development of the ability to distinguish colors; combine a pencil with a glass; act purposefully, sequentially: from left to right; promote the development of fine motor skills of the fingers.
Equipment: Colored pencils, glasses of different colors.
Description of the game: children must put pencils into cups of a certain color.
Didactic game “Flower Glade”
Goals: to consolidate understanding of size; colors; promote the development of hand motor skills.
Equipment: Cardboard flowers (various sizes and colors)
Game description: complete the tasks: “Match the center of the flower”, “Wrap the largest center of the flower. The smallest one”, “Wrap the red center of the flower”
Didactic game “Place the eggs in your houses”
Goals: to promote the formation of the ability to distinguish and correctly name 4 primary colors; encourage to combine a testicle with a cell, to perform correlating actions (color guide); act purposefully, sequentially: from left to right, without skipping cells; promote the development of fine motor skills of the fingers.
Equipment: Testicles, cells of different colors.
Description of the game: children must arrange the eggs into houses according to their color, if possible name the color of the eggs and the color of the houses.
Didactic game “Ladybug find your clearing”
Goals: to encourage children to distinguish colors, to promote the ability to select objects of the same color. Equipment: Ladybugs and flowers made of cardboard of different colors.
Game description: ask the child to place the ladybug on a flower of the same color.
Didactic game "Mosaic"
Goals: to promote the development of fine motor skills of the hands, imaginative thinking, imagination, artistic taste of the child, the ability to navigate the plane of the playing field, the formation of the ability to distinguish and correctly name colors, and the manifestation of creative activity.
Equipment: Mosaic with multi-colored details. Description of the game: ask the child to fold a pattern, lay out a path of a certain color, etc.
Didactic game “Magic clothespins”
Goals: to promote the development of the movement of clenching and unclenching the fingertips of the right and left hands. Equipment: clothespins of different colors, stencils of objects (sun, cloud, hedgehog, etc.)
Game description: attach clothespins according to theme (rays to the sun, needles to a hedgehog, petals to a flower, ears to a bunny’s head...)
Didactic game “Place on plates”
Goals: to promote the development of children’s ability to distinguish colors and use the names of colors in speech, to understand the words “such”, “not such”, “different”, to consolidate the ability to recognize geometric shapes and name them (circle, square, triangle).
Equipment: 4 plates, circles, triangles, squares of different sizes and colors. Description of the game: we put geometric shapes of the same color into plates of 4 primary colors.
Didactic game “Roll the ball into the goal”
Goal: to promote children’s ability to match objects by color; ideas about the size of objects; introduce the concept of “round”; consolidate the ability to perform practical and playful actions with objects in accordance with their properties (shape).
Game description: roll balls of the corresponding color into the gates of 4 main colors.
Didactic game "Reels"
Goals: to introduce children to threads; tell about their purpose; encourage you to wind the thread around the template; promote the development of fine motor skills and the ability to perform actions with both hands at the same time.
Equipment: spool templates of different colors, threads of different colors Game description: wind threads of the same color onto a spool template of a certain color.
