Preview:
Notes on drawing in the middle group “My Street”
Integration of educational areas: “Artistic and aesthetic development”, “Cognitive development”.
Preliminary work: field trip through the city streets, conversations about the city, reading fiction, drawing rectangular and square objects.
Equipment: Luntik toy, photographs of city streets, views of the sights of St. Petersburg, colored crayons, A4 sheets.
Children are located at work places.
The teacher brings in Luntik's toy.
Luntik: Hello. Where did I end up? And who are you? (children's answers)
Luntik: I am Luntik. I fell from the moon. Where did I end up?
Educator: Hello, Luntik. We'll tell you everything.
Guys, what is the name of our city?
What street is our garden on?
Luntik: What an interesting name. Is your street beautiful? Tell us about her? (children's stories)
Educator: Well done children. Look Luntik, we have photographs of our city, let's take a look and find familiar places. (I post the photo on the board).
Let's go Luntik with the guys for a walk along our street.
Relaxation exercise “Walk”.
— Walking along a narrow path.
- Walking on toes.
- Walking on your heels.
- Let's swing on a swing.
Luntik: It was a good walk. You have a big, beautiful street, and how many houses... Why does a person need a house? (children's answers).
Educator: Smart girls. Guys, we all have houses where you live with your beloved family. Who remembers their home address? (children's answers)
Luntik: Why do people need an address? (children's answers)
Luntik: I would like to visit the children.
Educator: I think, Luntik, the guys will be very glad to see you as a guest. In the meantime, play with us.
Finger game “Building a house”
I knock with a hammer, I knock
I'll hammer a hundred nails,
We will build a house, a house,
We will live together in it.
Luntik: Guys, they told us on the moon that you have a lot of animals and birds on your planet. Which animal has which house?
Half of the children are given cards with pictures of animals and birds, and the other half are given houses. Everyone needs to find a mate.
Educator: Well done guys, played well.
Listen to B. Serikbaev’s poem “Home”
I will draw a multi-story house. Of course, it will be a little papery. Of course, it will not be very brick, but it will be white-walled, but it will be nice. Surely no one will ever drive a puppy away from this house.
Educator: Guys, do you want to invite Luntik to visit you? Then I suggest you draw your street and your house so that it is easy for Luntik to find where you live.
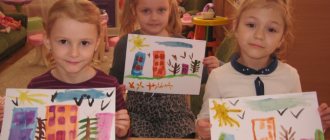
Children draw their idea of the picture with wax crayons.
They draw a street, tall buildings, various types of transport. The teacher provides assistance if necessary.
Educator: Children, today we talked about our city, about the street on which our garden is located. You drew good drawings. Which of you would like to tell us in more detail about your drawing? Luntik, did you like playing with us?
Luntik: Guys, I’m so glad I came to you. I learned so many interesting things. What wonderful drawings you drew. I will definitely now find your house and come to visit you. You guys are great.
Educator: Did you guys like it? What was interesting? What new have you learned? Let's say goodbye to our guest, it's time for him to return to the moon.
Source
On the topic: methodological developments, presentations and notes
Summary of the integrated lesson “Streets of the native city”. Secondary group. Educational area: cognition. Integration of educational areas: “communication”, “artistic creativity”, “socialization.
Studying traffic rules with children of the middle group.
Topic: “Safety on the street” educational area: Cognition Integration of educational areas: “Cognition”, “Physical development”, “Social and communicative development”, “Speech development.
Summary of direct educational activities on traffic rules in the middle group “Streets of our city.” Goal: Formation of the basis for safe behavior on the street in children of middle preschool age. Objective.
This summary will help you consolidate children’s knowledge about traffic lights, road signs, the purpose of special-purpose vehicles, develop thinking, memory, and the ability to navigate the environment.
Development of curiosity and cognitive interest of preschoolers in the process of forming knowledge about their city. street.
Source
LESSON 23. How to draw a city street
Welcome to my blog, aspiring artist!
In the last lesson on drawing a room from frontal perspective, you practiced the skill of creating a single vault point in the center of the drawing. Let's take this idea further and draw part of the city in frontal perspective , where buildings, sidewalks, roads are located and seem to dissolve into one point in the distance.
Take another look at the drawing of the city.
Looks very interesting, right? This is true! And drawing it is much easier than it seems. We will devote this lesson to strengthening a number of drawing principles: size, location, shading, as well as proportions, additional details and practice.
In drawing, the term "perspective" stands for "creating the illusion of depth on flat surfaces." The word "perspective" comes from the Latin word spec, meaning "to see."
1. Draw a horizontal line with an anchor point in the center.
2. Just as you drew guide lines to determine the position of the ceiling, walls and floor in the previous lesson, draw these lines to determine the location of buildings and the road.
3. Draw a vertical line where the buildings begin. Start on the left side. Then draw a vertical line where the buildings end, also on the left side. Make sure the lines are strictly vertical and parallel to the edges of your notebook. You can use a ruler if you want. When I draw a small frontal illustration, I usually don't use anything, I do it by hand. Try to draw this way and that, both with a ruler and by hand. Which method did you like best?
Get 10 free video lessons
Ten free video lessons from the Kalacheva School drawing school are available immediately after registration.
Using promo code REFPART
— 10% discount on all courses with teacher verification until the end of 2022!
Get
When you draw with a ruler, the drawing will be uncompromising and precise, whereas drawing by hand will not look as precise, but will reflect your personal style. It often happens that someone who begins to experiment with the triangle becomes dependent on this tool. It should be understood that a ruler is just another drawing tool, just like shading. However, you can draw perfectly well without them.
4. Now do the same on the right side. Draw vertical lines to indicate the position of the buildings.
5. Make sure the top and bottom edges of the buildings meet at the center vault point.
6. Draw horizontal lines corresponding to the horizon line from the top and bottom corners of each building on the left side of the drawing. This is the moment when your drawing becomes three-dimensional!
7. Now do the same on the right side of the drawing.
8. Draw the road and median. Shade the building shapes. Place the light source at the point of the arch and shade all surfaces facing the opposite direction.
LESSON 23: PRACTICAL TASK
In life, you yourself, without knowing it, encounter a frontal perspective . For example, when you cross the street or while shopping in a supermarket, you notice a neatly lined island of cans. It's really very exciting. ABOUT! Another great place for a frontal perspective is the library! All the books on the shelves are in neat rows. Pay attention to this the next time you're at the supermarket or library. This makes the idea of frontal perspective crystal clear!
Redraw the lesson again and add a few additional details. You can draw doors, windows, neighbors... Have fun! Draw canopies, a porch, perhaps a flower pot or two. True details are the spice of life!
LESSON 23: PRACTICAL TASK No. 2
Why stop there? Why not use the frontal perspective technique in reality and see how it works? Take your easel and go outside. Find a location that is visually interesting. Try to sit somewhere in a park, on a bench, on a pier... And repeat what you see.
You can also take a suitable photo and use it. Of course, this is not as interesting as walking, but it will still help you practice frontal perspective .
Here is one inspiring example:
Share your works in the VKontakte group in this album!
Link to next lesson!
Materials from the book “You can draw in 30 days” by Mark Kistler were used.
Book in Russian by Mark Kistler “You will be able to draw in 30 days.”
Drawing ideas for every day


