Summary of GCD for drawing in non-traditional techniques in the middle group “Good fire, evil fire”
Vasilkova Tatyana
Summary of GCD for drawing in non-traditional techniques in the middle group “Good fire, evil fire”
Summary of GCD on artistic creativity in the middle group “Fire-good, fire-evil” (non-traditional drawing technique).
Author: Vasilkova Tatyana Leonidovna, teacher.
Preschool teachers and additional education teachers can use this summary to conduct classes with children in the middle group of kindergarten.
Target. To consolidate children's knowledge about fire, both good and evil, to continue to introduce non-traditional drawing techniques.
Tasks. Continue to teach the difference between good and evil fire.
Learn to portray characteristic emotions.
Develop speech, imagination, fine motor skills
To consolidate knowledge about fire safety, the ability to use non-traditional drawing techniques.
To cultivate neatness, imagination, curiosity, and a caring attitude towards your life and the lives of others.
Materials and equipment . A4 landscape sheet, gouache, brushes, sippy cup, napkins, cards with the image of good and evil lights, bells according to the number of children, a bi-ba-bo kitten toy.
Preliminary work . Creating a little book “Fire is a friend, fire is an enemy”, holding thematic discussions on fire safety, reading fiction “Cat’s House”, “Confusion”, “The Tale of a New Fire Engine”, playing board educational games “Fire is kind” fire-evil”, “Emotions”.
Progress of the lesson.
Organizing time.
A plaintive meow is heard.
Teacher : I wonder who it is! The teacher and the children go out into the corridor and see a kitten with a bandaged paw.
-Hello, kitten, what happened to you?
-Hello guys. I was visiting my cat's aunt, on her birthday, everything was fun, we danced, hummed songs, drank tea, then they brought in a cake with candles, they burned so beautifully, and then one candle fell on the floor and the carpet caught fire. The fire started and was barely put out, and I burned my paw. I thought the fire was good, but it turns out to be so evil!
Educator _ Poor kitten! Guys, let's help our Kitten.
Children: Let's go!
Educator: Guys, let's tell our kitten that fire can be not only evil, but also good! I will show you a picture with different types of fire, and you will tell me whether it is a good fire or not.
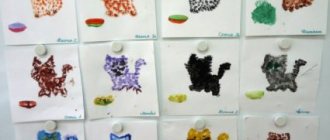
Didactic game: “Fire is good, fire is evil”
Children help choose the appropriate pictures.
Well done guys, see how different fire can be, kitten! Now let's remember the rules of conduct in case of fire:
Rule 1. Never touch dangerous objects.
Rule 2 . If you see a fire, immediately tell an adult, don’t be afraid, even if the cause of the fire is your prank.
Rule 3 . You cannot hide in far corners, under the bed, behind the closet - not only fire, but also smoke is dangerous.
Rule 4 . Remind your parents that firefighters are called by number “01.” Educator : Guys, do you know who firefighters are? (children's answers). That's right, these are people who put out fires and save people. To let them know that people need their help, they need to call the fire department at number “01”. But before they rang the bells so that everyone around them could hear: “There is trouble somewhere, help is needed!” Let's try to call the firefighters.
Dynamic pause.
Game "Bell"
Bells are heard to the children, music plays - the children run and ring the bells, the music suddenly stops - the bells fall silent.
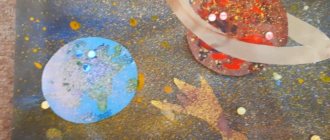
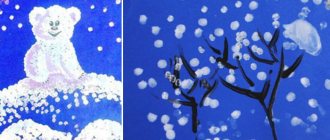
Drawing. - Guys, now let’s draw our lights! Only in an unusual way, with our palms. First, we will place our sheet horizontally in front of us, take red gouache and paint over our palm. When the entire palm is painted, carefully and firmly press it to the sheet, raise the palm - 1 light is ready. Then we draw another light next to it in the same way. Let's finish painting our lights with the firewood from which it flared up, for this we'll take brushes and brown gouache. Now choose which light will be evil and which will be good?
Kitty. Thank you guys for explaining everything to me, now I know that fire is good, and if you handle it carelessly, it will turn into evil! Now I’ll run to my brothers and sisters and tell them too about the good and evil lights! Goodbye!
Reflection. Let's remember what we did with you in our lesson?
— What did you like most?
- Who came to visit us?
-Let's remember the rules that will protect us from fire.
Depiction of fire in children's drawings
To easily learn how to draw a fire for children, you will need a simple pencil of medium hardness, which for sketch work should not be pressed hard on the paper in order to edit the work before coloring.
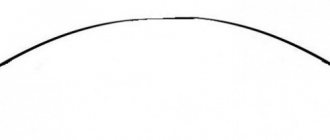
On a sheet of paper, in the place where the fire is supposed to be depicted, you need to draw a large circle using a compass. Inside the circle, several flames of different shapes and heights are drawn, so that the highest of them is in the middle.
The flame is drawn with smooth lines, narrowing each fragment of fire towards the top. The drawing must have at least two colors or tones to depict its moving flashes.
At the bottom, the stripes should turn out lighter or yellow in color, and at the edges and on top they reach their greatest intensity, becoming dark red.
The contours of the finished drawing can be outlined with a black marker or felt-tip pen for greater expressiveness.
Drawing fire with a pencil
In cases where coloring is not required, but it is necessary to draw the fire with a pencil, the drawing can also turn out to be quite realistic - for this it is not necessary to light a fire, but do it in stages, using the description:
- The work should begin with a schematic and light sketch of barely noticeable lines with a hard pencil. It should have the shape of a petal with a rounded bottom and a pointed, elongated top. There can be from one to several such petals, depending on the composition of the image.
- Beautiful lines are added inside the petals, repeating the contour, but in different variations, creating the impression of moving, living flashes.
- To make the drawing three-dimensional, each top of the flame must be outlined with additional sharp lines, which can bend in places, as a real flame does when the wind blows.
- When the main outline is ready, the extra light lines are erased with an eraser, and the final version is outlined with a softer pencil, you can begin shading the drawing. It should be taken into account that even in the drawing of a night fire there are the most shaded sides, as if light were falling on it. This artistic technique is necessary to give volume to the image of any object or natural phenomenon. The lightest spot should spread from the fire towards the compositional center, for example, to illuminate the face or figure of a standing person.
- Using light strokes of a soft pencil, the central part of the flame is first shaded. In the same translucent tone, light stripes rise along the middle parts of the tongues of painted fire.
- The outline of the fire is outlined with a soft pencil, and the greatest contrast between the darkest, sharpest lines and the almost white spot of light should be placed in the foreground to create perspective. The sharp ends of the flames can be carefully extended with sparks depicted using thin strokes.
After finishing the shading and emphasizing the shadow from the fire on one side, highlighting the highlights with an eraser or a pastel white pencil, the drawing can be considered ready.
Holiday card
During drawing lessons, students are given thematic tasks dedicated to holidays associated with military exploits and the eternal memory of heroes. The most symbolic thing in this case is the image of the “eternal flame” on a wall newspaper or postcard.
The ability to draw stylized flames can be useful for novice artists, especially when creating work to participate in school competitions or congratulate veterans.
On a sheet of paper you need to draw a five-pointed star, the foreground of which will remain visible in the final drawing, and the background will be covered by fire. For greater clarity, the star should be built completely so that it looks as realistic and correct as possible.
In the foreground, the height of the ends of the five-pointed star should be the highest, compared to the sides. You need to draw a flame on top, starting with an oval, in the center of which is the gas burner chute device.
In a circle there are flames of different heights with stripes of brightness inside, which can be emphasized with felt-tip pens.
To satisfactorily depict a flame in drawings, you need to arm yourself with theoretical knowledge, since even having the opportunity to observe live fire, it is difficult to draw it from life, especially for inexperienced artists.
A particle of the fire element will turn out to be the brightest and most realistic if you correctly construct the contours of the flames, and then do not spare bright colors.