Decorative drawing lesson “Decorating an apron” in the middle group
Lyudmila Zolotareva
Decorative drawing lesson “Decorating an apron” in the middle group
Topic: “
Decorating an apron ” (
decorative drawing ) in
the middle group
Zolotareva Lyudmila Yurievna,
Moscow, GBOU School No. 717, d/s No. 447
Program content: teach children to make a simple pattern from elements of folk ornament; consolidate the technique of dipping, the rhythm: left - right - between them; develop color perception; cultivate independent creativity; activate in children's speech: pattern, pattern element, touching, red and green colors.
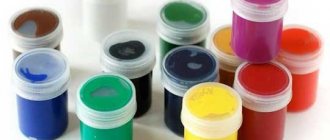
Equipment: apron , red and green gouache, water jars, napkins, brush stand (for each child, two samples of decorated aprons , Carleson, display board, equipment for displaying image techniques.
↑ Choosing fabric for an apron
For the simplest detail of a modern woman's kitchen suit, choosing the right fabric is not so easy; several important factors need to be taken into account.
- The kitchen is a place where the risk of getting clothes dirty increases many times over, and it is the apron that should protect it from possible stains, taking the blow on itself. The apron will have to be washed quite often, and stains on it can be difficult to remove, so it is desirable that the chosen material is durable and easy to clean, and can also withstand the effects of aggressive cleaning agents.
- The choice of color for an apron is determined by personal preferences, and there are no strict rules here. The housewife can choose the color of the fabric taking into account the overall style of the kitchen, or she can choose colors that, on the contrary, will contrast with the color scheme of the interior.
- Stains on a plain fabric are usually more noticeable than on a multi-colored one, therefore, even a dirtier apron made of colored fabric will look neater than a plain one, but this does not mean that you can wash it less often.
- Plain fabrics of dark colors will hide stains of dirt, but will make you so bored that kitchen work will turn into an unpleasant chore, and to prevent this from happening, it is not recommended to choose them only for practical reasons.
- The black color of an apron is ideal for dirty work in the kitchen, but it has a depressing effect on the people’s psyche. The white contrasting details of this apron make it not only attractive, but also flirty.
- Psychologists have determined that colors affect people differently. For example, the color red and its shades stimulate the appetite and lift the mood, which is why plain red, red with white checkered or polka dot aprons have been popular among housewives for many years. In addition, red suits many women.
All these rules apply mainly to those aprons that will play the role of an important decorative element in the kitchen. If we are talking about a means of protecting the housewife’s clothes, then you can simply take an old dress that no one wears anymore, but it would be a pity to throw it away. A good option could be an apron made from jeans that have already served their purpose.
Fantasy and the desire to be unique suggest original ideas for using old denim items. Guests will definitely pay attention to such workwear.
Square apron
A chef's apron is easy to sew from a square piece of fabric. On a flat table surface, lay the fabric at an angle facing you. The size of the side of the figure is measured in accordance with the selected length.
The lower triangle is trimmed with edging made of contrasting fabric, the upper corner is folded down and decorated with a triangle made of the same material. Sew a button in the center to hold the flap in place. Waist ties are not attached to the corners of the square, but slightly higher. The pocket is designed in the same style, with a triangular flap on top. The top tie from a strip of fabric is sewn on both sides at once and the apron is put on over the head. The product looks incredibly feminine, and the tailoring, as you noticed, is quite simple. The seams are made along straight lines, so even a novice master can cope with the work.
↑ Original ideas for the design of kitchen aprons
This apron only at first glance seems complicated; in fact, making it will not take much more time than sewing ordinary kitchen workwear
By making an apron from an old denim skirt, you can make your task easier - after all, the pockets and decorative stitching on the belt are already ready
This model is not difficult even for the most inexperienced seamstress, but well-chosen colors and contrasting pockets will delight the owner of the apron
The most common apron model will appear in a new light with the right choice of fabric colors and accessories
For her beloved assistant, a mother can come up with a very unusual design of kitchen work clothes
Source
↑ Ideas from old magazines or “Rabotnitsa” also wrote about this
If your own ideas on how to sew an apron do not seem so original, you can look for ready-made recommendations in old books on home economics or the Internet. For example, the idea of sewing an apron from four large handkerchiefs or bandanas is easy to implement, and the variety of colors of the source material will give you the opportunity to experiment with color combinations.
One of the simplest and cheapest options is to sew an apron from large handkerchiefs or small bandanas
Such an unusual silhouette should be obtained if we take the above diagram as a basis.
In those distant times, when careful housekeeping and economy were considered positive qualities of a housewife, when the passion for consumption was not yet so strong, many things found new uses and could serve usefully for some time. For example, after simple manipulations, a men's shirt can turn into an apron for the kitchen. Such ideas for using old items can be found in old magazines.
Did your husband say he won't wear this shirt again? Great! Let's make an apron out of it, let it also serve in the kitchen
Another option for turning an old shirt into a kitchen apron from an old magazine
In old publications you can find many aprons in a retro style, but they can hardly be called old-fashioned - such silhouettes are still relevant today
Tile
Create a mosaic backsplash with your own design using small tiles in different colors. For example, in this case, dark brown floor tiles were needed.
You can also create a mosaic pattern by breaking large tiles into smaller pieces before attaching them to the wall. The result is similar to the previous one, but more chaotic, without clear lines.
If you like more formal shapes and colors, then pay attention to this combination of small tiles in white, brown and gray:
When using very small tiles, it seems that the colors transform into each other and shimmer. In the example in the photo, a dark color scheme was chosen, but with such tiles you can experiment with even the brightest colors.
The shape of the tile has a great influence on the result, for example, taking a hexagonal tile instead of a square one immediately achieves an original effect. It is especially good to take hexagonal tiles, which have some color transitions, like here from white to gray:
Using tiles you can achieve a 3D effect. To do this, lay the tiles not side by side at the joint, but overlapping each other, creating volume. For example, like in this case:
Painting with stencils
Painting is a quick and easy way to update a kitchen wall. You can paint it in one or more colors. The last option is convenient and easy to implement using stencils. With their help, you can make a beautiful pattern or inscription, creating your own style.
For example, here the wall was painted black, and then the inscription was applied in white using a stencil.
You can also create geometric patterns. Moreover, in this case, you can make the stencil yourself using masking tape.
Master class on how to make patterns and drawings on the walls
And another option for stencil painting:
Also, painted walls can be decorated with additional decorative elements. For example, this kitchen apron was painted using stencils, and then hearts were glued on top, which go wonderfully with the chosen pattern:
Love the tile pattern but don't want to bother laying the tile? Then try options to imitate it. For example, here is a wonderful example of painted white tiles. All you need is paint and precise markings of the wall.
One-piece option
The kitchen apron pattern is made on fabric folded in half. This is the simplest option for doing the job, which is often used when sewing professional aprons for chefs in restaurants and cafes. It is worn by both men and women. This is a strict option that is easy to cut.
Consider the sample pattern of a kitchen apron of this style presented below. The length of the product may vary depending on the height of the person. It is advisable to take the measurements yourself.
Using a flexible meter, measure from your solar plexus to your mid-thigh. If desired, such an apron can be sewn to the knee. The width of the product should cover the front of the body and cover the sides. The height of the sides should reach the waist. When the main measurements are taken, all that remains is to find out the width of the upper narrow part. It can also be different - cover the entire chest or have a narrower upper part (optional).
When the main drawing is completed, think about the design of the ties. You can use satin ribbons or strips of the same fabric in the form of an edging around the entire perimeter. If you do not want to decorate the piping, then leave 1-1.5 cm on all sides for the hem of the fabric. You can leave 3-4 cm on top and strengthen the thin part with a wider fold of fabric.
Progress of the lesson:
1 part. Introductory
Educator: Hello, guys. Mishutka and I are waiting for you. Mishutka, but why are you so sad, aren’t you happy to meet the guys?
Mishutka: What do you mean, I really like to come to visit you and meet the guys. But guests are supposed to come to me tomorrow, I will be preparing a treat and I’m very afraid of getting my fur coat dirty.
Educator: Come on, Mishutka, let’s ask the guys what needs to be done so as not to get dirty?
(Children's answers)
.
That's right, guys, you need to put on an apron . aprons we have .
Mishutka: I see, but they are not decorated .
Educator: The guys and I will help you decorate them . Do you guys agree? (Children's answers)
.
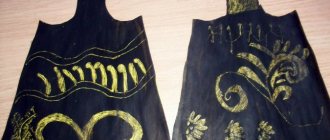
I have aprons with different patterns . Let's take a look at them. What is this apron decorated with ? (Children's answers)
.
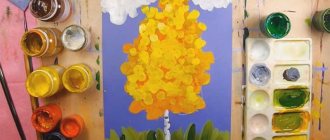
That's right, stripes. are the stripes located on ? Below the apron . Do you know how to draw ? You need to attach the brush with all its bristles to the paper and remove it - the leaf is ready. How to draw flowers ?
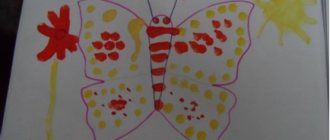
Okay, let's draw a circle and fill it in. Guys, you know, you can draw with a colored finger : put paint on your index finger and apply it to the paper - the flower is ready. Then we wash our finger and dry it on a napkin. What is the pattern between the stripes? That's right, leaves and flowers. How are they located on this apron ?
Well done, of course there is a leaf on the right, another on the left, and a flower between them. What do the flowers look like?
That's right, into circles. What color are the leaves?
Well done, green ones. And the flowers?
Wonderful, well done, the flowers are red.
Let's look at the second apron . What changed?
That's right, guys, this apron has a different pattern . Three leaves on the left, right and between them, flowers next to them and again three leaves. Let's take a look at both aprons . How are they similar? That's right, the elements of the pattern are the same: leaves, flowers and stripes.
Tell me, where should we start decorating our apron ? That's right, from the stripes, then between the stripes we will draw a pattern of leaves and flowers. We draw stripes from left to right, without stopping with one movement of the brush. Don't forget to leave room for the pattern.
Think about how you will arrange them: leaves and flowers. Who has already come up with a pattern, start drawing . Keep your back straight.
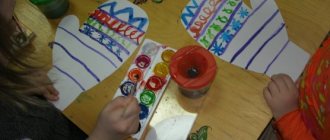
Part 2. Independent activity of children.
Educator: Mishutka and I will watch you draw.
Individual assistance, verbal instructions, showing in your silhouette, encouragement, reinforcement. (What element are you drawing? What color? Where are they located? How to “bathe”
brush)
Part 3. Analysis of children's works.
Educator: Whoever has already decorated the apron , bring it to our shelf. Let's take a look at them. And look, Mishenka. Katya, find an apron with an even pattern . Why did you choose this apron ? Well done, because the stripes are drawn evenly and the pattern between them is neat. The leaves are drawn on the left , on the right, and between them are flowers.
Educator: Misha, do you like our aprons ?
Mishutka: Of course I like it.
Educator: We give them to you so that you don’t get your fur coat dirty when you treat your guests. Guys, let's say goodbye to our guests. Now we need to clean up our workplace. Well done guys, you did a good job.
Summary of a drawing lesson in the middle group “Fox” Program content: 1. Visual task: draw a fox based on an oval and a circle, convey the structure, name the color orange.
Notes on drawing in the middle group “Decorating an apron for a nanny” Program tasks: Strengthen the ability to paint. Teach children to make a simple pattern using elements of folk ornaments on a strip of paper.
Summary of the drawing lesson “Firebird” in the middle group Date: 02/13/2019 Topic: Drawing. "Firebird" Cultural practice: productive activity. Form of presentation of the goal: work according to the model.
Summary of the lesson “Decorating a duck” on decorative drawing in the middle group Decorative drawing. Topic: “Duck Decoration” Program content: Continue to get acquainted with the Dymkovo toy, the features of the pattern;
Summary of a drawing lesson in the middle group "Bus" Summary of a lesson in visual activity in the middle group "Alyonushka" Drawing "Bus" Prepared by: teacher A.N.
Summary of the lesson on drawing “Butterflies” in the middle group Hello dear colleagues! I bring to your attention a summary of a lesson in the middle group on unconventional drawing: klyasography, etc.