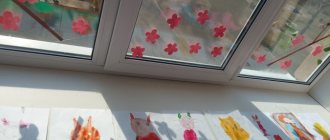
— Did you like our exhibition? How? (bright colors, flowers, beautiful horses, like in a fairy tale, etc.)
-What do Gorodets masters draw on everyday objects? (Children, following the teacher, find a horse, birds, leaves, roses, bushes, buds, daisies and name them.)
Let's play: “I will show you pictures. If the picture shows a Gorodets painting, then clap your hands, if it’s something else, then stomp your feet.”
— What material are all these products made of? (made of wood)
Yes, Gorodets painting is done only on wood.
— What paints do the masters of Gorodets painting use? (green, shades of red, shades of blue, yellow, white, black).
Guys, do you want to become master artists? Come to our workshop.
Gorodets patterns
What a joy for the eyes
Craftswomen are growing up
Maybe among us too.
(Children come to table No. 4 with blank cutting boards)
Nowadays, the natural yellowish color of the tree is used as a background, just like your leaves.
On the tables you see blank cutting boards. But the pattern on them is not complete. Something is missing. We will try to decorate them,
Riddle: She won't feel hot in the heat. She is in the water, she is ... (bathing). (Show picture)
Let's try to draw it?
What colors will we use? To draw a kupavka you need to draw several stages. Let's go to the first table.
First stage: underpainting. We will mark this stage in pink.
First you need to draw a circle of any color - underpainting. Educator: Look at your colors. Do you have all the necessary paints? What colors are missing?
Children: Pink
Educator: What should we do?
Children: We need to mix the paints.
Educator: What colors need to be mixed to get pink?
Children: Add a little red paint to the white paint.
(work with the palette, repeat the rules of working with a brush)
In order for our circle to turn into a beautiful flower, we move on to the second stage.
Second stage - Tenevka
Our underpaintings are dry. The brushes are thin.
On the top of this flower you need to draw a small ball and draw a sickle (arch) inside.
To get an arc of a beautiful shape, you need to start painting with the tip of the brush, lightly touching the surface. Towards the middle of the arc, we gradually increase the pressure and finish drawing again without pressure
Next we begin to draw the petals of our kupavka
We draw petals - arches. We start with the central petal (in the center of the crescent) and symmetrically draw the remaining petals. We mark this stage in red.
Physical exercise “Flower”
The last stage is Revitalization. The paint has dried and there is white paint on your table.
When everything dries well, you need to paint a white color with a thin brush.
We mark this stage in white.
So we have a smart swimsuit. What three stages did you go through to draw this flower?
Now let’s go to our boards and paint them, place our beautiful bathing suit and complete the pattern
- What wonderful work you have done!
We painted flowers
Unprecedented beauty.
There is no end to that beauty
That's all for Gorodets.
“Now, my young masters, I ask you to stretch your hands over your work and make a movement as if you were rolling a ball.” Now put it to your heart and repeat after me: “We take with us everything important that happened to us today, everything we learned.”
Reflection.
-What did we draw today?
— What colors were used in stage 1? In the second? In third?
— A revival is applied to wet or dry paint.
We went through many stages and drew beautiful swimming pools. I think that the knowledge you gained today will be useful to you.
Exhibition of works.
You will turn around yourself and turn into teachers.
Thanks everyone for participating.
Tasks, techniques and features of decorative drawing in the preparatory group
Decorative drawing - creating abstract rhythmic patterns and compositions to decorate objects. Drawing ornaments has a beneficial effect on the development of creativity, fine motor skills, imagination and fantasy, abstract and spatial thinking, sensory perception and the child’s intellectual abilities for synthesis and analysis.
Tasks
- develop a sense of color, learn to find an interesting and harmonious combination of colors;
- consolidate the ability to draw according to a model, teach drawing patterns based on a free design;
- improve technical skills in using a pencil and brush: draw dots, curls, wavy, straight, rounded lines with the tip and entire surface of the brush;
- freely change the direction of brush movement;
- be able to adjust the paint set and mix different colors to obtain the desired shade
Techniques
- A line can be straight, broken, wavy, twisted into a spiral, can be of different lengths, thicknesses and rhythms and helps create the basis for a pattern and draw decorative elements.
- Hatching with colored pencils is a simple, but expressive and effective way to convey the rhythmic image of a floral or geometric pattern. In addition, drawing with strokes helps develop fine motor skills, which is very important for solving the problem of preparing the hand for writing.
- Shading - helps to achieve different degrees of color saturation depending on the degree of pressure of the pencil. It should be explained to children that drawing the pattern grid and decorative elements requires more pressure than painting the background.
- A point with the tip of the brush, a rhythmic stroke, brushing the entire surface with the brush.
Peculiarities
- The main material for painting is gouache, since its overlapping ability allows you to apply a drawing to a tinted background surface. Drawing techniques with watercolors, wax crayons and felt-tip pens are also used, in addition, combined and non-traditional ones, for example, finger painting, salt painting, monotype, scratching, nitkografiya.
The works were performed using the grattage technique (scratching a pattern onto a surface primed with ink or black gouache) - Children of senior preschool age can use colored pencils in decorative drawing, since their level of mastery of shading techniques allows them to obtain an even and bright color effect. In addition, using shading techniques, children can create a pattern with one color, alternating different degrees of pencil pressure, conveying, for example, a transition from a brighter shade to a more delicate one, sketching the petals of a flower.
- In addition to previously mastered circle and square shapes, children are introduced to pattern construction on rectangular and polygonal geometric shapes, as well as on the silhouettes of various objects (jugs, cups, spoons, hats, etc.). Objects of irregular geometric shape are decorated both with a linear ornament, for example, for edging the neck, and using a pattern from the center on a round part or a pattern from a corner on a rectangular shape.
- Older preschoolers study symmetrical mirror image, when a drawing consists of two identical parts arranged in opposite ways.
- In the preparatory group, they are taught the technique of filling the entire space of a form with a so-called mesh pattern, which is built on the principle of alternating elements in a checkerboard pattern.
- To create patterns and paint toys or dishes, elements of floral patterns and folk applied art are used (curls, small grass patterns, color combinations of Dymkovo, Zhostovo, Khokhloma painting).
Children's decorative painting works (photo gallery)
Subject composition in the style of the Dymkovo tradition
Decoration of the product with floral patterns (rowan branch) Golden Khokhloma
Painting with decorative elements (berries, curls, stripes, dots)
Painting with floral patterns (strawberries, grass, leaves)
Fiery colors of Khokhloma (berries, curls, grass)
Drawing curls and grass on a tall product
Decorative painting with floral patterns

