Drawing with young children. Yanushko E.A
1. E.A. Yanushko Drawing with young children (1-3 years old). Methodological manual for educators and parents. – M.: Mosaic synthesis, 2006 – 64 pp. 2. Margret Rettich Drawing lessons in verse. Publisher: Potpourri, 2006. Paperback, 128 pp.
Lesson 1. Hide the bunny from the fox!
Purpose of the lesson:
Learn to hold a pencil or felt-tip pen correctly; draw (sketch) yourself; developing interest in drawing.
Material for the lesson: pencils (wax crayons are possible) or felt-tip pens. Paper.
Progress of the lesson:
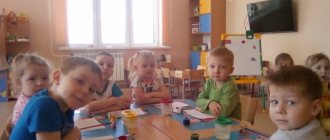
(It is better to conduct the lesson at the children's table, but you can draw while sitting on the carpet).
Offer your child a piece of paper with a picture of a hare. Hares can be like this:
For the first lesson, the picture should not be very large (so that the child’s pen does not get tired, and he himself does not get tired of painting).
Give the child one pencil or felt-tip pen, the color of which will match the color of the outline of the drawing (so that after painting the hare is not visible - he is hiding). Show your child how to hold a pencil correctly. (do not allow your child to hold a pencil in his fist; relearning is more difficult than teaching)
Look who came to visit us? That's right, it's a bunny. A fox is chasing a bunny, she wants to catch him. Let's help the bunny hide .
Show your child how to hide (draw) a hare by drawing lines up and down:
If your child can’t do it on his own, take his hand with a pencil in yours and draw a few lines together.
When the entire bunny is painted over, play:
Well, now the fox will not be able to catch up with the bunny. What a good fellow you are, you helped the bunny!
This exercise can be repeated several times. You can use the bunny again, or you can use other characters. You don't have to save someone, you can just play hide and seek.
Images for this and subsequent activities are included.
_________________________________________
The following book was used to prepare the lesson:
E.A. Yanushko Drawing with young children (1-3 years old). Methodological manual for educators and parents. – M.: Mosaic synthesis, 2006 – 64 pp.
Lesson 2. Doodles Purpose of the lesson: To teach the child to hold a pencil or felt-tip pen correctly; see objects in lines and intersections; developing interest in drawing. Materials for the lesson:
pencils (wax crayons can be used) or felt-tip pens. A sheet of paper of any size (you can even use Whatman paper).
Progress of the lesson:
It is best to draw where the child will feel comfortable and relaxed. (It is advisable to wait until the child himself says or lets him know that he wants to draw).
- Look what I prepared? – correctly, this is paper (leaflet) and pencils (felt-tip pens). - What are we going to do with you? – we will draw correctly.
Let the child draw as much time as he wants, don’t stop him. When the drawing is finished ask him what he drew. If the child himself does not know what it is, offer him several options:
— Maybe it’s raining? – let’s finish drawing the cloud (finish it yourself). - Or maybe this is a house? - let's finish the roof. - Or maybe it’s a fish? – let’s draw her eyes, a tail, etc.
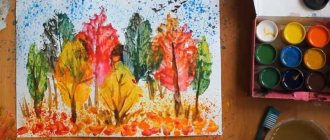
Here's what might happen:
* The purpose of such activities is to teach children to see images in lines and their intersections. Such activities will help the child move to another stage of drawing. Otherwise, children can stop at the scribble level for a very long time - they are satisfied with the way they draw.
Lesson 3. Drawn stories
[ ]
01.05.2008, 17:44
Purpose of the lesson:
Teach your child to see an image on paper.
Develop an interest in drawing. Material for the lesson:
pencils (wax crayons are possible) or felt-tip pens. Paper.
Progress of the lesson:
It is better to conduct the lesson at the children's table, but you can draw while sitting on the carpet. In this lesson you will draw more, commenting on each stage of drawing. The child will observe and prompt. And if he wants, he will draw with you. Invite your child to draw and choose any subject together. The plot must be close to the child and interesting to him. Your baby can take part, telling you what to draw and which pencil to take.
You can use poetry when drawing, for example:
But here are the four sides - we drew the Square. From the square we will now have a House.
Well, what is a house without a roof! Here it is lower, here it is higher. If the house has a fireplace, the Turret is visible above it.
To make our house bright, let's draw windows in it.
Draw the door, my friend - You can now enter the house. And of course, we will certainly build strong walls.
Draw the roof quickly, And then - a chimney on it, Above the chimney - a column of smoke, We cover the house with tiles.
Let's draw windows in the house, a beautiful entrance door. There is a sign on the door to know who lives here.
So, smelling the aromas, the guys gathered in the kitchen. We can draw skillfully! Here is a stove, and in it is an oven.
On the panel there are knobs and buttons, on top there are round burners. Now, to the delight of everyone, the slabs are completely flat.
In the kitchen there are forks, spoons, teapots, plates, bowls, cups, saucers and knives... What have you forgotten? Tell me!
House by house... Look - the city has grown on the page! Margret Rettich
***** I draw walls, roof, windows, vents, porch... They shout to me, but I don’t hear, I draw a ring pond. The garden is closer to the water, there is an apple orchard nearby... They shout to me, but I don’t hear, I’m painting the heavens. And then in the corner, higher up, I’ll draw a red circle... They shout to me, but I don’t hear, I paint the meadow. They shout at me, but I don’t hear. That is, I hear, but I am silent. I draw what I see - I don’t want to be distracted!
Lesson 4. Sticks.
[ ]
20.05.2008, 21:02
Purpose of the lesson:
Teach your child to hold a pencil (felt-tip pen) correctly in his hand;
draw sticks - straight vertical lines. Develop an interest in drawing. Materials for the lesson:
pencils (wax crayons can be used) or felt-tip pens of different colors, a sheet of paper. Various sticks.
Progress of the lesson:
It is better to conduct the lesson at the children's table. Prepare several different sticks in advance to show your child. These can be twigs, counting sticks, Chups sticks, cocktail tubes.
- Look what this is? - These are sticks. - Look how different they are: long and short, thick and thin. But they are all straight and even. - Let's try to draw a stick in the air.
(take the child’s hand and draw a line in the air).
- Now let's draw a stick on a piece of paper.
- Look how I draw. First, draw a stick on a piece of paper and let your child look.
- Now take the pencil you like and draw a stick too.
(For a child to learn to draw correctly, you need to show the process of drawing a stick by moving his hand).
- Now let's draw only short sticks.
- And now the long ones. - And now only blue (red, yellow, etc.) If the child is not tired, invite him to draw lines connecting the dots.
________________________________________
Lesson 5. Mushrooms.
[ ]
04.06.2008, 16:00
Purpose of the lesson:
Teach your child to hold a pencil (felt-tip pen) correctly in his hand;
draw sticks - straight vertical lines; do not go beyond the border of the drawing; develop an interest in drawing. Materials for the lesson:
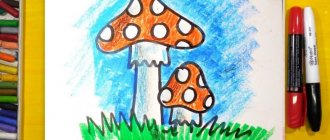
pencils (wax crayons are possible) or felt-tip pens of red, orange, brown colors; toy mushroom or cut out of cardboard; sheet of paper: a straight horizontal line is drawn at the bottom of the sheet - this is a path; above, at a distance of 5-7 cm from it, semicircles or triangles of red or brown colors are mushroom caps. (see picture)
Teaching methods:
Drawing with an adult; finishing the details.
Progress of the lesson:
It is better to conduct the lesson at the children's table, but you can draw while sitting on the carpet.
Show your child the fungus.
- What is this? That's right, it's a mushroom. Look, this is a hat, and this is a leg. - Now show me: where is the mushroom’s cap? - Now show me where the leg is?
(help if the child finds it difficult to show)
- The leg is straight, like a stick.
(together with your child, draw a straight line in the air with your hand) Show the child a sheet with a blank for the drawing, explain what it is.
- Look, there are mushrooms growing in the clearing on the path.
These are mushroom caps. -Where are the legs? - no legs! - Now I’ll finish drawing the legs of the mushrooms - like this! - Now try to finish drawing the legs of the mushrooms. Give the child a pencil (felt-tip pen) and help if the child can’t do it.
- What a great guy you are!
Now listen to the poem: Hat and leg, Not tall, Next to the path Grew up... (fungus)
_________________________________________
Lesson 6. Spatulas.
[ ]
07.06.2008, 00:42
Purpose of the lesson:
Teach your child to hold a pencil (felt-tip pen) correctly in his hand;
draw sticks - straight vertical lines; control the length of the line, its beginning and end; develop an interest in drawing. Materials for the lesson:
pencils (wax crayons are possible) or felt-tip pens; children's spatula; sheet of paper: a row of semicircles is drawn at the bottom of the sheet - this is the tip of the blade. To make it easier for the child to determine from which point to start drawing lines, indicating the handle of the scapula, you can draw points at a short distance above the semicircles.
Teaching methods:
Finishing the details.
Progress of the lesson:
It is better to conduct the lesson at the children's table, but you can draw while sitting on the carpet.
At the beginning of the lesson, show your child the shovel. - Look what I brought. What it is? - That's right, it's a spatula. - Look, the spatula has a handle to make it comfortable to hold. - What is a spatula for? - That's right, to dig. - What can you dig with a shovel? - Sand, earth. - Let's draw a shoulder blade.
Draw a semicircle on a blank sheet of paper. - Look what I drew? - This is a spatula. - Do you think she will be comfortable digging? - Of course not. — The spatula is missing something. What do you think? - Of course, pens. - Look, I’ll finish drawing the handle now. The handle is straight, like a stick. - Well, now it’s a real spatula. - Now try to draw handles for the spatulas.
Give the child the blank. Help if the baby can't do it. You can draw the shoulder blades and handles of the same color, or you can draw them in different colors. As you draw, pronounce the names of the colors.
Read the riddle poem:
I walk next to the janitor, shovel the snow all around, and help the guys make a slide, build a house. (Shovel)
_________________________________________
Lesson 7. Flowers.
[ ]
07.06.2008, 01:06
Purpose of the lesson:
Teach your child to hold a pencil (felt-tip pen) correctly in his hand; draw sticks - straight vertical lines; do not go beyond the boundaries of the boundary line - “grass”; develop an interest in drawing.
Materials for the lesson:
pencils (wax crayons can be used) or green markers; flower on a stem; sheet of paper: at the bottom of the sheet there is a green line drawn - this is a clearing, above at a distance of 5-6 cm there are flowers arranged in a row.
Teaching methods:
Finishing the details.
Progress of the lesson:
It is better to conduct the lesson at the children's table, but you can draw while sitting on the carpet. Show your baby a flower on a stem.
- Look what a beautiful flower. This is the head of the flower, and this is the stem [/b ](accompany the story with a demonstration).
On a blank sheet of paper, draw a green line.
- Look, this is a clearing.
Above, draw some flowers.
- These are the heads of the flowers, but where are the stems? The stems need to be drawn - like this.
(Show your child how to draw the stems.)
Give your child a blank sheet.
- Look, there’s a whole meadow of flowers here. Only they don't have stems. Let's plant some flowers in the clearing and draw stems for them.
Read the poems:
My flowers.
The groves are turning green, everything is green all around, the flower bed is turning green under my window.
How many yellow and blue flowers are there! It was I who lovingly raised them.
She planted a flower in the ground behind a flower. In the summer I watered every petal.
For me, there are no sweeter flowers in the world. Even the sun in the sky is shining more cheerfully.
_________________________________________
Lesson 8. Threads for balls.
[ ]
28.06.2008, 18:05
Purpose of the lesson:
Teach your child to hold a pencil (felt-tip pen) correctly in his hand; draw sticks - straight vertical lines; adjust the length of the line, do not go beyond the boundaries of the sheet of paper; develop an interest in drawing.
Materials for the lesson:
pencils (wax crayons can be used) or felt-tip pens of different colors; a balloon with a thread tied to it, a sheet of drawing paper with a blank: a number of circles of one or more colors are drawn on the top of the sheet of paper. For the first lesson, it is better to offer a blank with “tails” on the balls. (Polina likes the balls with tails). And during repeated lessons, you don’t have to draw “tails”.
Teaching methods:
Finishing the details.
Progress of the lesson:
It is better to conduct the lesson at the children's table, but you can draw while sitting on the rug. Show your child the balloon.
- Look, what is this? - That's right, it's a balloon. — Do you like playing with balls? - What is this on the ball (point to the string)? - That's right, it's a thread. - Why does the ball need a thread? So that he doesn't fly away. - Hold the ball by the string. It is very convenient to hold the ball by the string.
Draw a series of circles - balls - on a piece of paper. These are balls, and so that the balls don’t fly away, we’ll draw strings for them - like this.
Give your child a sheet of paper and markers. — You also have balls drawn on your piece of paper. Oh, they're about to fly away, they have no strings. Draw strings for the balls.
_________________________________________
Lesson 9. Grass.
[ ]
28.06.2008, 18:08
Purpose of the lesson:
Teach children to hold a pencil (felt-tip pen) correctly in their hand; draw sticks—straight vertical lines; control the length of the line, its beginning and end; develop interest in drawing.
Materials for the lesson:
Green pencils or markers;
a sheet of paper for drawing in a format with a blank: a horizontal brown line is drawn at the bottom of the sheet - this is a clearing, and at the top of the sheet there is a yellow sun. Teaching methods:
Drawing details.
Progress of the lesson:
It is better to conduct the lesson at the children's table, but you can draw while sitting on the rug. Draw a yellow sun on a piece of paper.
- Look, in my picture the sun is shining, it’s warming up, warming the earth.
Then draw a horizontal straight line in brown at the bottom.
- And this is a clearing.
Now draw vertical lines of green color - the grass.
— But green grass grew in the clearing.
Give your child a sheet of paper and a green pencil or marker.
- Look, the sun is shining in your picture too. Draw green grass.
* All of your child’s work can be hung on the wall; children really like it.
Lesson 10. Rain.
[ ]
24.07.2008, 16:42
Purpose of the lesson:
Teach children to hold a pencil (felt-tip pen) correctly in their hand; draw sticks - straight vertical lines; do not go beyond the boundary line; develop an interest in drawing.
Materials for the lesson:
Blue or light blue pencils or markers; a sheet of paper for drawing with a blank: at the top of the sheet of paper a blue cloud is drawn, and at the bottom there is a horizontal line - “earth”, so that when drawing rain, children do not go beyond the lower boundaries of the sheet of paper.
Teaching methods
: Finishing the details.
Progress of the lesson:
It is better to conduct the lesson at the children's table, but you can draw while sitting on the rug.
Before starting class, read a poem to your child.
— Listen to the poem:
Rain, rain, have fun! Drip, drip, pour water. On a flower, on a leaf. Drip, drip, drip! On the path, on the meadow, Drip, drip, drip! A cloud in the sky is blue - Drip, it’s raining heavily! Drip, drip, drip...
-What is this poem about? That's right about the rain.
Draw a cloud of blue cetus on a piece of paper.
- Guess what it is? That's right, it's a cloud.
Then start drawing horizontal lines, accompanying them with the words: “Here it’s raining: drip, drip, drip!”
Give your child a sheet of paper and a pencil or felt-tip pen.
- Look, you also have a cloud drawn in your picture. Draw rain!
While the child is drawing, you can tell him a short folklore poem:
Rain, rain, more rain, I’ll give you some grounds, I’ll go out onto the porch, I’ll give you a cucumber. I'll give you a loaf of bread and water it as much as you want!
You can draw heavy (solid lines) and light rain (dashed lines). Encourage your child to vocalize the “drip, drip, drip” pattern. You can draw puddles on the ground.
* All of your child’s work can be hung on the wall; children really like it.
Lesson 11. Paths.
[ ]
24.07.2008, 16:57
Purpose of the lesson:
Teach your child to hold a pencil (felt-tip pen) correctly in his hand; draw “paths” - straight horizontal lines; develop visual perception of space; develop interest in drawing.
Materials for the lesson:
Black (or gray) pencils or felt-tip pens; small toy car; sheets of paper for drawing with a blank: a car is drawn in the upper left part of the sheet (in the next lesson you can draw a walking man).
Teaching methods:
Drawing in the air; drawing with an adult; finishing the details.
Progress of the lesson:
It is better to conduct the lesson at the children's table, but you can draw while sitting on the rug.
In class, play out the situation with a car: draw a road for it on a piece of paper (two straight parallel lines at a distance of 6-8 cm), roll a toy car along the drawn path. Invite your child to drive the car without driving over the edges of the path.
- The car is moving - beep! This is the road we have, now the car is driving along the road.
Invite your child to run his finger along the “road” and draw a “road” in the air. Then draw horizontal lines—the “road”—on a piece of paper.
Give your child a sheet of paper and markers.
- Look, you have a car drawn in the picture. Draw a straight path! The cars drove along the paths. Draw more paths!
* All of your child’s work can be hung on the wall; children really like it.
Lesson 12. Circles.
[ ]
31.08.2008, 18:10
Target:
Teach your child to hold a pencil (felt-tip pen) correctly in his hand;
draw circles, place them evenly on a sheet of paper; develop an interest in drawing. Materials:
Pencils or felt-tip pens of different colors; blank sheets of paper.
Teaching methods:
Drawing in the air; drawing with an adult.
Progress of the lesson:
At the beginning of the lesson, explain to your child that they will be learning to draw circles. First, draw a large circle in the air with your index finger and ask your baby to guess what you drew and repeat the movement after you. Then draw a small circle in the air.
— Guess what I drew in the air? (Big circle.) Now draw a big circle in the air, like I did. Well done! - Now what did I draw? Yes, a small circle. Draw a small circle in the air. Now we will learn to draw circles on paper.
Show your child how to draw circles - draw on an easel or on a piece of paper. Draw your child’s attention to the fact that circles can be large or small, use different colors. You can suggest tracing a plate with your finger along the outer edge and a hoop along the inner edge.
Give your child a piece of paper and ask them to choose one pencil or marker. Show your baby how to draw circles by moving his hand. From the starting point you need to draw a circle clockwise or counterclockwise and return. In the future, encourage your child to draw circles on their own.
To reinforce the skill, ask your child to complete this task several times. To make it interesting for your child, diversify the tasks: ask them to draw large, medium, small circles, only red or only blue, or multi-colored. _________________________________________
Lesson 13. Balls.
[ ]
03.09.2008, 17:01
Target:
Teach your child to hold a pencil (felt-tip pen) correctly in his hand; draw circles of different diameters, place them evenly on a sheet of paper; develop an interest in drawing.
Material:
Pencils or felt-tip pens of different colors; a blank sheet of paper for drawing; toy balls of different sizes.
Teaching method:
Collaborative drawing.
Progress of the lesson
Start the lesson by reading a poem. — Listen to the poem:
My cheerful, ringing ball, where did you run off to? Yellow, red, blue, Can't keep up with you!
Then show your baby the toy balls. Please note that balls can come in different sizes and colors. - Look at my balls. This one is big, but what is this one? That's right, little one. This ball is red. What color is this ball? - Let's draw balls.
Give your child a piece of paper and pencils or markers of different colors. - Let's draw a lot of balls to make it fun to play!
Remind your child how to draw circles by moving his hand. From the starting point you need to draw a circle clockwise or counterclockwise and return. In the future, encourage your child to draw the balls themselves.
Lesson 14. Balls.
[ ]
25.10.2008, 17:01
Target:
Teach your child to hold a pencil (felt-tip pen) correctly in his hand; draw circles; develop an interest in drawing.
Material:
Pencils or felt-tip pens of different colors; a blank sheet of paper for drawing with a blank for drawing: threads for balls; balloon.
Teaching method:
Finishing the details.
Progress of the lesson
Start the lesson with a riddle (you can ask one or two riddles):
- Guess a riddle:
I held your tail in my hand, you flew - I ran. (Air balloon)
Today everything is rejoicing! In the hands of a child. Balloons are dancing with joy... (Balloons) - You and I also have a balloon. Here he is! Let's play with him. I'll throw it, and you catch it.
After the baby has played enough, invite him to sit at the table.
- Now let's draw a lot of colorful balls on strings. Look, there are already strings on the piece of paper, and you need to draw a ball for each string.
Remind your child how to draw circles by moving his hand. From the starting point you need to draw a circle clockwise or counterclockwise and return. Next, invite your child to draw the balls on their own. _________________________________________
Lesson 15. Apples.
[ ]
25.10.2008, 17:28
Target:
Teach your child to hold a pencil (felt-tip pen) correctly in his hand; draw small circles; arrange the circles evenly, do not go beyond the contour; develop an interest in drawing.
Material:
Pencils or felt-tip pens in red, yellow and green colors; apple; a sheet of drawing paper with a drawing blank: outline of a tree.
Teaching method
: Finishing the details.
Progress of the lesson
At the beginning of the lesson, hide the apple in the box.
Start the lesson with a riddle
- Look at the box I have. Are you wondering what's in it? Then guess the riddle:
Round, rosy,
I'm growing on a branch.
Adults love me
And little children.
(Apple)
- Of course, that's right, it's an apple! And listen to the poem:
The apple is ripe, red, sweet,
The apple is crunchy, with a smooth skin.
I'll break the apple in half
I'll share an apple with my friend. (Ya. Akim)
- Now let’s open our box and see what lies there.
If the child has a desire, you can give him an apple to eat.
Talk to your child about where apples grow. Remember that an apple is a fruit. Remember what color apples are. What do they taste like?
Offer your child a piece of paper with a blank and markers.
- Look what you have drawn on a piece of paper?
- That's right, it's a tree. Do you know what it's called? It's called an apple tree. What grows on an apple tree?
- Well, of course apples. Only for some reason there are no apples on our apple tree. Let's draw?
— There will be a lot of apples on our apple tree. What color do you want the apples to be?
— The apples are hanging on the branches, and some have already fallen to the ground.
Summary of educational activities in the early age group “Snowflakes”
Summary of educational activities in drawing in an early age group Natalya Sergeevna Sergeenko, teacher of MBDOU "Kindergarten No. 19 "Kapelka" of the city of Obninsk
Summary of educational activities for drawing “Snowflakes” (non-traditional drawing technique) with young children Goal: creating conditions for children’s creative activity. Objectives: - teach how to draw a snowflake in an unconventional way - with a cotton swab - clarify and supplement children’s knowledge about snow and its properties - develop play activities, cultivate friendly relations between children; -Expand words knowledge; -promote the development of children through finger gymnastics, play exercises, and outdoor play. Preliminary work: Observing seasonal changes in nature in winter, conversations about the characteristic signs of winter, reading poems about winter, looking at illustrations. Materials and equipment: Sheets of blue paper, white gouache, cotton swabs, a chest, a snowflake. NOD move: - Children, look outside the window, how much snow there is. Today I invite you to go on a trip to the winter forest to a forest clearing. Game exercise “Big feet walked along the road” (to music). Goal: Development of coordination of words and movements, work on tempo and rhythm. Hold hands and walk in a circle, sometimes slowly, loudly stamping your feet, sometimes speeding up and frequently moving your feet. Big feet Walked along the road Top-top, top-top Little legs Running along the path Top top top top top, Top top top top top Finger game - Bend one by one the left hand, starting with the little finger. The goal is to switch attention, improve coordination and fine motor skills. It is very cold in winter, but we will go for a walk with you. I’ll put on a fur coat, I’ll put on a scarf, And another scarf, And then I’ll put on beautiful, warm fluffy, crumbly mittens on my arms. - So we came to a snowy clearing. Quiet in the winter forest. Light, fluffy snowflakes swirl in the air and fall smoothly to the ground. You hear? I think someone is coming. Surprise moment (the teacher comes out dressed as a snowman) - Hello, guys! Did you recognize me? - I brought you a chest. And to find out what lies in it, guess the riddle: They fall from the sky in winter and circle above the earth. Light fluffs - White .... (snowflakes) Educator: - Snowman, and we know poems about snowflakes! Kids read poetry. A fluffy snowflake flew into our house and suddenly sat down on the decorated Christmas tree to rest.
The hedgehog looks into the sky: What kind of miracles are these? Hedgehogs fly in the sky, and if you take them in your hands, they melt. Hedgehogs White snowflakes. Snowman: -Children, look at my Snowflake! It is not simple, but magical, because it does not melt. Can you draw your own snowflakes for me? Kids: - Yes! Educator: Let's draw snowflakes for our guest. To draw beautiful snowflakes, you need to warm up your fingers. Finger game "Snowflake". A small snowflake landed on the palm (children show the snowflake) I’ll catch it, sit for a while (cover it with your palm) One, two, three, four, five (bend your fingers) I let it fly (blow on your palm) - You and I will not draw snowflakes with brushes , and with cotton swabs. You need to dip a cotton swab in white gouache and leave an imprint on the sheet (display on the board). Kids draw a snowflake with cotton swabs. Educator: Well done! The snowflakes for the snowman turned out great. Physical education Snowflakes are spinning (spinning on their toes) in the frosty air. Lacy stars fall to the ground. (slowly squat) One fell. (they catch the “snowflake” in the palm of their hand) Oh, don’t hide it, snowflake, (carefully “cover the snowflake” and blow it away) Wait a little. “Winter” Result: The teacher asks the children: -Did you like our trip? -Who came to us? -What did he bring us? -What did you draw? -What did you use to draw snowflakes? -What color are the snowflakes?