Applications from cereals and sand
I talked about applications made from cereals in an article about games with cereals.
Essentially, it’s two in one: drawing and appliqué.
Print out coloring pages for kids. Invite your child to apply glue to the coloring book and sprinkle it with rice, corn grits, semolina, etc.
Semolina can be painted beautifully with gouache (just don’t add water), or you can leave it white and create winter-themed masterpieces.
The rice can be easily colored by the child himself. This is a separate useful entertainment.
colored sand for creativity on sale
Squirrel from dyed semolina:
And this is a sunflower made from buckwheat, corn grits and dyed rice:
You can also study letters and numbers by making appliqués from semolina.
Simple applications with a chaotic arrangement of elements
This is the first stage in mastering the art of appliqué.
Here you also need to print (or draw) and cut out the base for the applique in advance, and cut out the remaining elements. Let the child decide for himself where exactly he wants to glue this or that element. Here are some ideas:
- Salt cucumbers, tomatoes;
- Cut out the frying pan and bake pancakes in it;
- Cook jam, mushroom soup;
- We draw a plate and feed the rubber animals with oranges, cabbage, carrots, etc.;
- We decorate the Christmas tree, hat, mitten, boot;
- We glue leaves, apples, pears to the trees, and plant vegetables in the beds;
- We put fish in the aquarium, ducklings in the pond;
- We collect mushrooms in a basket;
- We cut out a thin strip - a road for cars and glue the cars.
You can also make ice from foil:
And so on ad infinitum.
Applications from geometric shapes
At 1.5 - 2 years old, applications can become more complex. Print or draw outlines of the elements on the base. Invite your child to glue the appliqué elements onto these outlines.
I print out the template, cut out the geometric elements, trace it on colored paper and cut it out.
This makes it convenient to make appliqués not only from geometric shapes, but also from any other shape.
What to make applications from
To diversify your classes, it is useful to alternate materials . Ideal for making appliqués:
- colored paper: plain, double-sided, velvet,
- napkins,
- stationery stickers,
- stickers,
- magazine clippings,
- foil,
- felt,
- textile,
- cotton wool and cotton pads,
- plasticine,
- natural materials,
- cereals,
- sand,
- salt,
- insulating tape.
Try to use cardboard or thick paper as a basis. We most often use A5 format in our works, sometimes A4.
Where possible, it is better to color the base template and cut it into the desired shape (Christmas tree, vase, etc.) - it’s more interesting for the child.
As for glue, you must have both a glue stick and regular PVA. Now, at 3 years old, Antoshka suddenly began to disdain to pick up a piece of paper with ordinary glue, which he applied with all his heart. And we temporarily switched exclusively to glue sticks.
Applications without outlines
This is a complicated version of the previous type of application. The difficulty is that there are no ready-made contours .
First, the child, together with you, lays out the elements of the application on the base to see what should or can happen. And only then glues it.
There is simply an endless number of options here. If the child is small, then it will take a little time to prepare. But closer to three years, you will want to do something original, and then you will have to spend time both searching for ideas and preparing.
The simplest option:
A little more complicated:
A child can make such applications by the age of three. Here we also study the numbers:
How to make appliques with children
Classes should bring joy to both the child and the parents.
Moms usually have two difficulties : lack of ideas and lack of time to prepare.
In this article I’m just sharing applique ideas for kids.
As for the second difficulty, I believe that preparation for any classes and not only appliqué should take a minimum of time. There is no need to pervert and come up with everything extraordinary and complex.
Neat appliqués made using complex techniques look beautiful in Instagram photos, but in reality, if the child is small, everything turns out not so colorful. Either the entire sheet is covered in glue, or the elements are glued crookedly, or even in a different place altogether. And this is wonderful - it means that it was the child who did this appliqué (under the strict guidance of his mother, of course, and not with her hands).
Take simple ideas, draw, cut from what you have in minutes. You are not preparing for an exhibition, but doing one of the hundreds of crafts with your child that he still has to do.
And only later, when these activities become commonplace, complicate the technique, come up with something new.
As for children, here you need to remember the following:
- The application is, first of all, a game, which means we weave in an interesting and understandable plot for the child;
- Applications should be simple and accessible for his age;
- No coercion;
- The lesson should take no more than 5-7 minutes with kids and 15-20 minutes with older children. And with some fidgets, even 3 minutes will be enough;
- There should be nothing unnecessary on the table - only glue and paper (or other material that you use);
- Alternate the materials from which you make the applique: variety is important for a child;
- If the child is patient enough, then you can cut out the details in front of him. So the child will become interested in scissors. And closer to three years, if desired, he will be able to cut out simple parts himself;
- If the child is impatient and gets tired quickly, prepare everything you need in advance;
- Classes must be regular. We do appliqués about once a week.
On many crafts we write the date and age and put them in a folder.
I find most of the ideas in Elena Yanushko’s book “Applique with Young Children” (Labyrinth, My-shop). A wonderful guide that presents a methodology for conducting appliqué classes with young children.
A huge number of ideas with detailed descriptions of each activity, including what you should tell your child while doing the appliqué. In general, I recommend everyone to read it.
Applications from magazines and ready-made pictures
In order to make appliqués, you don’t even need to have colored paper. Use old magazines , catalogs .
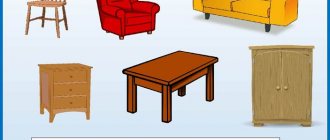
Here Antoshka and I filled the refrigerator. I cut out products from the catalog of the nearest supermarket, and Antoshka placed them on the shelves.
Using the same principle, you can arrange toys on shelves, fill baskets with fruits and vegetables, hang clothes in the closet, etc. Drawing the base will take you no more than a minute. All that remains is to cut out food or other things.