Summary of educational activities for the application senior preschool age “Birds of Migratory”.
Next we move on to the main part of our work. We are carving birds.
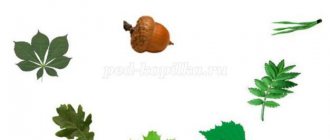
Look: I take a white rectangular sheet and fold it in half. Next, I apply the bird stencil to the fold, carefully trace it with a pencil and cut it out. I need to cut out six of these birds, because our birds fly in a wedge. I take a stencil of the sun, apply it to a sheet of paper, trace it and cut it out. I cut out clouds in the same way. Next, I place everything on a sheet of tinted paper and glue it.
But before we begin, let's prepare our hands for further work.
Finger gymnastics:
"Ten birds flock"
.
Sing it, sing it, sing along:
Ten birds are a flock. (Clap our hands)
This bird is a nightingale,
(We bend the fingers on the right hand one by one, starting with the little finger)
This bird is a sparrow.
This bird is an owl, a sleepy little head.
This bird is a waxwing,
This bird is a crake,
This bird is a little gray feather.
(We bend the fingers on the left hand one by one, starting with the little finger)
This one is a finch.
This one is a swift.
This one is a cheerful little siskin.
Well, this one is an evil eagle.
(Raise both hands up, fingers in the form of claws)
Birds, birds - go home!
(We wave our arms like wings, join our hands above our heads - the roof)
.
Repeat with children the rules of working with scissors
The scissors should be closed on the table.
They should be passed in rings forward, holding them by the closed blades.
When cutting paper in a straight line, the scissors are not spread wide and the ends are not brought together.
When making cuts, you must use the tips of scissors.
When cutting the sheet with scissors, do not tear it too far from the table.
When working with scissors, turn the paper or other material, but not the tool.
Small parts are not cut out from a large sheet of paper - this is inconvenient. It is better to cut a piece of the required format.
A cut in the shape of an acute angle is made in two steps.
If you make a cut along the fold line, then first unroll the paper.
Round parts are cut counterclockwise.
Now we can get to work.
Educator: take rectangles of white paper, fold it in half. Take the bird stencils, place them correctly on the fold of the rectangle and trace with a pencil. Then carefully cut it out. Let's open it up and see what happens. We make 5 birds. Next, take a small square of white paper and a circle stencil, apply it to the paper, trace it and cut it out. This is our sun. We take the cloud stencil, apply it to the paper, trace it and cut it out. We place our parts on a sheet of colored paper. Let's create a composition. Carefully glue the elements. Add the beak to the birds (with a red felt-tip pen)
and eyes
(with a black felt-tip pen)
.
MAGAZINE Preschooler.RF
Lesson on application (collective composition) “Migratory birds are flying” (Based on the fairy tale by V.M. Garshin “The Frog Traveler”)Goal: To teach children to collectively create a plot based on a familiar fairy tale. Develop a sense of collectivism, create an emotional mood for children.
Tasks:
- Learn to classify birds; exercise the ability to classify birds according to the “wintering-migratory” .
- Develop fine motor skills of the hands, consolidate techniques for using scissors; learn to cut out symmetrical figures of birds from paper folded in half, conveying simple movements (flapping wings), changing the static position of body parts (raised wings).
- To consolidate the ability to show simple semantic connections and spatial relationships between objects when creating a plot.
- Develop aesthetic senses: a sense of shape, size, color, proportions.
- Develop artistic creativity skills, jointly plan upcoming work, and carry out plans together.
- Foster a love of nature and respect for birds.
Material: Frog toy; illustrations for a fairy tale; lake with water lilies; scheme; whatman; duck patterns; sample; sheets of paper, A4 size (white), sheets of colored paper for cutting out ducks; glue; brushes; scissors; colour pencils.
Preliminary work: Conversation about migratory birds. Reading a fairy tale by V.M. Garshin "Frog Traveler" . Looking at illustrations for a fairy tale.
Progress of the lesson:
Educator: Autumn has come... It’s a sad time, it’s starting to get colder, the leaves are falling, the animals are preparing to hibernate, and the birds are flying south.
The birds took to their wings and began to shout in the gloomy sky To a distant land, where it was warm, They flew in a long flock.
“The cold weather is coming,” the birds say with a cry. -We're not flying forever. -We'll be back, we promise.
- Goodbye, dear land: - We're flying away! Let's fly away! Behind the veil of heaven, birds melt in the gray sky.
You and I have read and watched many fairy tales about migratory birds, please name them. Children call fairy tales.
The teacher asks a riddle:
Beauty is a maiden, a master of singing. Lives in a swamp in a green hood,
Eyes are like bowls: Beware, midges!
It is necessary to draw the children's attention to the frog sitting on the water lily. Next, create a game situation by asking the question: What fairy tale did we read about a frog? ( "Frog traveler" ).
- Guys, let's remember who wrote the fairy tale? Did our frog travel alone? What did the frog come up with? What did the frog look like to you? Do you think it will be easy for two ducks to carry a frog?
-That’s right, I think so too, it won’t be easy for two ducks to carry a frog. How can we help? What can we do? That's right, let's cut out a whole flock of ducks like these from paper and glue them onto the panel.
Exercise “Guess, sit down and clap”
- Guys, now I will name migratory and wintering birds, if you hear the name of a wintering bird, then sit down; and if the name is migratory, then clap your hands. Crow, nightingale, woodpecker, magpie, dove, swallow, tit, rook, starling, bullfinch, stork, crane, sparrow, heron, ducks, etc.
Educator: Look how we will cut out ducks. Fold a sheet of paper in half so that the fold line is located at the bottom. We apply the template close to the fold line, trace it with a pencil and cut out the duck along the contour. Next, we cut the wings and tail with scissors or use our fingers to make it look like feathers. The eye and beak can be completed.
- Guys, tell me how to glue the duck so that it can be seen that it flies and flaps its wings?
After the children answer, show two options for gluing the duck:
A. the entire body, except the wings, is glued to the background;
b. the body and one wing are glued to the background.
Fizminutka
A flock of birds flies south, the sky is blue all around. (Children wave their arms like wings.) In order to fly faster, you need to flap your wings. (Children wave their hands more intensely.)
Independent work of children. Remember safety precautions when working with scissors and glue. Individual assistance if necessary.
Educator: Guys, show the ducks what kind of ducks you got. Now glue them to the “sky” so that you get a flock. The ducks should fly in one direction and not interfere with each other. And don't forget that ducks flap their wings.
- Guys, now let's remember when the frog flew with the ducks across the sky, what did she see below? What were they flying over? And when the frog flew with the ducks across the sky, what did everything on earth seem like to her?
So guys, look what a beautiful picture we have. What worked best or what didn't work out? What was the most interesting part of the lesson? Did you like the lesson or not? Did you get an emotional charge or not? Did you learn something new or not? Thank you for your work and helping the frog!
| Next > |
Application “Migratory birds” made of paper and leaves using do-it-yourself templates
Every year we see birds gather in flocks and fly south. Traditionally, the application “Migratory Birds” is included in a set of creative activities for kindergarten. At such lessons, children not only learn more about migratory birds, but also get acquainted with new appliqué techniques, for example, making crafts from leaves, from bird feathers, and so on.
The various possibilities of applications on this topic will allow you to use it for classes with children of different ages: younger children will be interested in gluing the prepared elements. Children in the senior group will enthusiastically cut out different shaped wings and tails of bird figures on their own, and in elementary school I can easily come up with compositions for appliqués on my own, without using templates.
This article presents a master class on creating applications with children on the theme of migratory birds using different techniques.
Feather birds
Feathers also make great bird crafts! For example, a craft made from a pine cone, paper and feathers will be an excellent interior decoration.
In order to make such a craft, we will need:
- Cone;
- Multi-colored feathers;
- Thick paper for making the head and paws;
- Glue gun.
Before starting work, the pine cone must be dried in the oven for 20-30 minutes. This will get rid of excess moisture and insects inside.
The dried cone can be painted with paints, or you can leave the natural color and texture. We glue the cut out parts of the paws to the bottom of the cone, and also glue the head to the pointed end of the cone. You can glue toy eyes to your head, or you can draw them yourself. Now all that remains is to attach the feathers. We carefully place them on glue. The more feathers there are, the more magnificent the bird’s “hair” will be.
Related article: How to weave a paracord brush with your own hands with photos and videos
There is also another way to make a bird from feathers.
We will need:
- 2 sheets of cardboard (white and any color);
- Glue;
- Scissors;
- Feathers.
Cut out the silhouette of a bird from white cardboard. In our case, this is the firebird. The silhouette, starting from the tail, must be covered with feathers. You can stick them on top of each other. Then we glue the cutout with feathers to colored cardboard. The painting can be framed and will be a great decoration for any room in your home!
Leaf craft
Making a firebird from leaves is not at all difficult, just take:
- Dry leaves;
- Glue;
- Paints;
- Glue gun;
- Cardboard for the base.
The first step is to prepare the cardboard for the base. You can paint it the color you want or choose a pre-colored one.
Next, prepare the leaves for the tail. To do this, select leaves that are suitable in color and shape, carefully place them on paper, paint each leaf with paint, and leave them until completely dry.
When the paint on the leaves has dried, glue them to the base. Apply a thick layer of hot glue to the cardboard, and also put dots on each leaf so that it sticks well. We lay the leaves on the cardboard as intended and press well. You can use a napkin to remove excess glue.
It's important to remember that hot glue hardens very quickly, so if there are visible marks left, you can paint them with the same paint as the leaves to help the colors blend together.
The next step is to create the body of the bird. For it you will need a dry leaf, different in color from the ones we chose for the tail. We glue it on top of the tail, and also press it tightly with a napkin so that the body sticks well to the leaves.
Related article: How to sew a poncho with your own hands for a child?
Cut out the legs and eyes from a dark piece of paper or cardboard and glue them to the body of the firebird.
Lesson summary on appliqué in the middle group “Birds”
Lesson summary on appliqué in the middle group “Birds”
Target:
teach children to make an applique in the shape of a bird.
Tasks:
educational: to consolidate children’s understanding of the diversity of birds, their structural features, and distinctive features; strengthen the ability to carefully use glue;
developmental: develop fine motor skills of fingers; develop attention, observation, perseverance;
educational: to cultivate friendly attitudes towards nature and its inhabitants.
Material and equipment:
Audio recording “Bird Voices”
, templates made of colored paper: circles 5 cm and 3 cm, 3 semicircles, a colored sheet of cardboard, felt-tip pens, glue, napkin.
Preliminary work:
Reading the fairy tale “Wonderful Houses or a Tale of Winter and Birds”; looking at illustrations of birds.
Progress of the lesson:
-Guys, today we will go on a trip to a forest clearing. We'll go by bus. So, sit down and let's leave together. (Children enter a group that is decorated with images of birds and sit on chairs.)
-Listen, guys, who sings so beautifully? (Children's answers.)
-Where did they hide? Let's find them and see who flew to us today. This is a magpie. Her sides are white. This is a sparrow. A fast jumper.
-What kind of bird is this in a red cap, knocking on a tree with its sharp beak? (Children's answers.)
-And this is a tit, she has a yellow belly. All these birds live next to us both in winter and summer.
- But this bird flew to us from the south. This is a swallow. It flies quickly, catches mosquitoes and other harmful insects.
-Look, guys, what is this unusual bird? I think I know: this bird was made by children from another kindergarten and sent to see the world. Is it really beautiful?
-Yes!
- Do you want me to teach you how to make the same beautiful birds? Just first let’s say what parts our bird consists of. I will show, and you name these parts. (Children's answers.)
Physical school:
Birds are jumping, flying (Children are jumping) Birds are collecting crumbs. (“Peck”) Feathers have been cleaned, Beaks have been cleaned (depict) Birds are flying, singing (waving their arms) Grains are pecking (leaning down) Then they flew and sat down (fly away, sit down) tables)
-Look at what lies in front of you: circles for the body and head, semicircles for the wings and tail.
-Let's stretch our fingers.
Finger gymnastics “Bird feeder”:
We hung feeders,
(Children imitate movements)
Grain was poured into them.
(Imitate movements)
For hungry birds in winter
It's very tasty.
Come to us, tits,
(They bend their fingers one by one, listing the birds)
Pigeon, crossbill and sparrow!
And, of course, we are waiting for your visit
Paper birds
You can make an applique of migratory birds from paper using:
- Colored paper;
- Scissors;
- Glue;
- Paint;
- Cardboard for the base.
First, let's prepare the background. It will be blue skies with some clouds. To do this, take blue and white cardboard. We cut out small clouds from white cardboard and glue them to the blue background.
Next we make birds from paper. To do this, first draw silhouettes of flying birds on paper as shown in the pictures. The birds for your application can be anything - starlings, swans or others.
When the birds are cut out of colored paper, glue them to the cardboard. The finished picture can be supplemented with trees below, cut out of paper or drawn by hand.