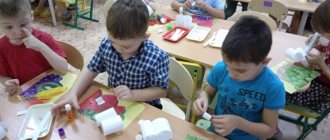
Binoculars
You will need: yellow cellophane, 2 sleeves, scissors, tape, black paint, brush, green and black paper, glue, rubber band, wine cork, string or elastic band.
Master Class
- Cut out 2 circles of yellow cellophane and tape them to the circumference of the sleeves as binocular lenses.
- Paint the circumference of the wine cork with black paint and cover it with green paper.
- Cover the bushings with green paper and glue the black stripes as shown in the image.
- Glue the bushings together and secure with a rubber band. After a while, remove the rubber band.
- Glue the taped cork between the bushings.
- Prepare an elastic band or rope of the required length, make a hole in the side of the bushings and secure the elastic band.
The binoculars are ready!
Paper folding for kids
Modern origami for children carries multiple features of classical art, since the simplest, initial models are taken as the basis. Kids happily do folding; for them it is real magic when a crane, boat or frog suddenly appears from a square sheet of paper. Paper origami for children is an excellent option for a quiet activity that develops fine motor skills and abstract thinking, because when making the next fold, the child must understand how it will look when finished.
Origami classes are suitable for both creative groups in kindergarten and for studying at home. Folding figures with parents is a fun, interesting activity that will appeal to all family members.
Go to the children's crafts section
Variety of origami types
Experts distinguish several types of folding art:
- classic. For it, take one square sheet, and the figures are folded without scissors and glue;
- modular. Several sheets of different shapes and sizes are used, from which modules are assembled according to the origami scheme. Then the individual figures are connected using the nesting method;
- kusudama. A type of modular assembly, as a result of which a large figure in the form of a ball appears. You can put souvenirs or aromatic herbs inside it, using the ball as a sachet;
- Kirigami. This version of origami allows the use of scissors and glue.
Origami materials
The classic, familiar material for folding is paper. However, any sheet is suitable for origami, for example, foil, parchment, starched fabric. Special paper can be bought at the store; it is square in shape, with one white side and one colored side. It feels thinner than the one we buy for the printer, making it easier to fold several times.
But in Japan, classic figures are folded from washi paper. This is a handmade material, dense, heterogeneous, compared to ordinary sheets.
Paper puppy
You will need: colored paper, markers, glue, a simple pencil.
Master Class
- Take a square of colored paper.
- Connect opposite corners by folding the square in half.
- Fold the corners down to form ears.
- Form a chin by bending the central corner in the opposite direction. The puppy's head is ready.
- Take a square of colored paper for the body.
- Connect opposite corners by folding the square in half.
- Expand the triangle so that it becomes rectangular.
- Fold the corner to form a ponytail.
- Cut out the eyes, nose and tongue from colored paper and glue the puppy's face.
- Draw the puppy's paws.
- Glue the head to the body.
The paper puppy is ready! I recommend watching the video master class!
DOG. Easy Origami for Kids with Your Hands. Video
Watch this video on YouTube
Children's books made of paper and cardboard
If your child does not like active games, you can create an interesting folding book with him with his favorite characters from cartoons and fairy tales. A homemade book will consist of pages fastened with a movable joint.
To create an interesting children's book you may need:
- thick sheets of colored cardboard;
- self-adhesive film;
- ruler, glue and scissors;
- fabric for distributing pictures;
- images and narrative text that are pre-printed on a color printer;
- additional details: beads, “live eyes”, rhinestones.
It is important to think through the contents of the book in advance. The book can consist only of pictures - for the little ones and with text for older children.
Paper garlands
Before you start making a paper garland, you need to decide on the shape of the future product. Thin paper is suitable for light garlands that will sway with every gust of wind.
Thick material, such as cardboard, is suitable for heavier decorative items. Such a garland will be many times heavier, so do not forget about a more secure fastening.
A DIY paper garland is a good alternative to New Year's decorations. Figurines in the form of Christmas trees, stars, gifts attached to a thread will create a New Year's mood, and will also help you save money on buying expensive store souvenirs.
Paper garlands are often used on windows in play areas of the house. Such a garland will fill your child’s own corner with a joyful atmosphere. With the help of such crafts made from colored paper, it is possible to change the design of the apartment based on the mood of the household.
A selection of patterns for folding bookmarks
DIY animal bookmarks. Master class with step-by-step photos
DIY corner bookmarks for books made of paper
Description:
This master class is intended for children from 7 years old, additional education teachers, parents and creative people who love to create beautiful and unique things with their own hands.
Purpose:
Bookmark, souvenir, gift.
A bookmark, although small, is a very useful thing when reading books. With its help, it is more convenient to read books and find the right page in them. A bookmark helps children, especially in elementary school, to navigate by lines, and at the same time it helps to foster a culture of handling books. And although there are a great many bookmarks on sale now, a child will be more willing to use and take care of a beautiful, original bookmark made with his own hands, since a piece of his soul is invested in it.
I am a beautiful bookmark. You need me for order. Don’t flip the pages in vain - Where there is a bookmark, read there!
Target:
Making bookmarks with your own hands
Tasks:
- teach how to make bookmarks from paper; - develop interest in artistic creativity; - develop fine motor skills, eye, imagination, aesthetic taste; — improve application skills and abilities; - develop independence and accuracy in work
Manufacturing technique:
- origami - applique
Materials and tools:
Safety rules when working with scissors
1. Work with well-adjusted and sharpened scissors 2. Scissors should have blunt, rounded ends 3. Place the scissors with the rings facing you 4. Watch the movement of the blades while cutting 5. Do not leave the scissors open 6. Pass the scissors with the rings forward 7. Do not play with the scissors , do not bring it to your face 8. Use scissors as intended
Rules for working with PVA glue
1. When working with glue, use a brush, if required 2. Take the amount of glue that is required to complete the work at this stage 3. It is necessary to apply the glue in an even thin layer 4. Remove excess glue with a paper napkin 5. Try not to get any glue on clothes, face and especially in eyes 6. After work, close the glue tightly and put it away 7. Wash your hands and work area with soap
Templates:
Progress:
The basis of all bookmarks is made in the same way, let's look at the example of making a bookmark - a chanterelle
Bookmark - DIY paper fox for children. Master class with photos
We take orange copier paper. We need a square measuring 10 cm by 10 cm
Let's start creating the image
Cut out all the necessary parts from colored paper
Our bookmark - the fox is ready!
I met a fox with curious eyes, hiding behind a stump with a bright red light, and calmly watching: Who is walking in her forest?!
T. Efimova
You can make a huge number of different fun bookmarks from paper. These can be heroes of your favorite fairy tales, or just little animals.
Take colorful paper squares
Bookmark "Puppy"
Little puppy I have a funny puppy. He gnawed everything he could: Shoes and a chair leg, And a little more on the sofa.
Kiskino grief
Applied needlework knows no boundaries; craftsmen are ready to decorate with their own hands literally everyone, even the most insignificant household item. It would seem that you can come up with a simple bookmark for books, which sometimes serve as maps, calendars, ballpoint pens in notebooks, rulers or simple scraps of newspaper? That's right, there is just the most space for imagination here. Let's consider several original options for paper bookmarks with step-by-step instructions that can decorate a volume of your favorite poems or slightly enliven a treasured diary. A video on the topic “how to make a paper bookmark” is at the bottom of the article.


