Techniques and techniques that will be used in a drawing lesson in the senior group
The fairy tale captivates the child with a mysterious plot, immerses him in the world of thoughts and feelings of the heroes, their fates are remembered for a long time, every time the children seem to overcome obstacles anew, experience adventures together with their favorite fairy-tale characters. Almost all topics related to the illustration of fairy tales cannot be done without depicting a human or animal figure, which is part of the plot composition of the drawing. Depicting a living character is not easy for children, since older preschoolers are given more complex tasks, which involve moving away from simplified schematism and reinforce in children the desire to convey their thoughts, observations, and life experiences in the drawing.
Drawing tasks on fairy tale themes:
- continue to introduce students to Russian folk and literary fairy tales;
- teach children to embody their ideas in drawings, convey images of heroes and impressions of a fairy tale they heard;
- develop the ability to draw human and animal figures according to a diagram, learn to convey simple movements (turning and tilting the head, raised and bent arms, step) without violating the proportions;
- develop the skills of independently selecting material for an image, as well as an episode from a fairy tale plot, constructing a composition across an entire sheet of paper, correctly placing characters and objects in space;
- learn to create a pencil sketch that precedes the stage of coloring with pencils or paints;
- teach to convey the characteristic features of characters, their mood;
- improve the ability to draw with pencils, felt-tip pens, watercolors and gouache paints, mix colors to obtain the desired shade.
Children learn to embody an artistic concept in a drawing and convey their impressions of a winter fairy tale.
Types of drawing:
- Subject - a single image of a fairy-tale character or object, for example, Thumbelina, Kolobok, Winnie the Pooh, a hut on chicken legs, a magic castle, etc.
- Plot composition is a visual form of a story about any events or actions, built on the interaction of several characters and objects (“Masha and the Bear”, “Fox and the Hare”, “Geese-Swans”, etc.).
Classic techniques:
- Drawing with a simple pencil.
- Drawing with colored pencils.
- Drawing with wax crayons.
- Drawing with felt-tip pens.
- Drawing with charcoal and sanguine.
- Combined method (colored pencils and watercolors, felt-tip pens or wax crayons).
- Painting with a brush using gouache - the distinctive property of this material is its opacity, which allows you to overlap layers with a new color.
- Painting with a brush using watercolors. Children need to be taught the skills of regulating paint set, selecting colors, and softly conveying shades by mixing primary colors.
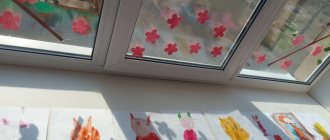
Children's works in classical techniques (photo gallery)
"The Ugly Duckling" (watercolor)
“My phone rang” (crayons and colored pencils)
Drawing “Stolen Sun” (gouache and felt-tip pens)
Drawing “I left my grandmother...” (colored pencils)
“The Fox and the Gingerbread Man” (watercolor)
“Thumbelina” (gouache and felt-tip pens)
“The Snow Queen” (wax crayons and markers)
Drawing “The Little Princess” (colored pencils and markers)
“Winter's Tale” (markers and colored pencils)
“Winter's Tale” (watercolors and markers)
Drawing for the fairy tale “The Little Princess” (wax crayons and felt-tip pens)
Drawing for the fairy tale “The Mouse and the Pencil” (wax crayons and felt-tip pens)
"The Ugly Duckling" (colored pencils)
“Geese-swans” (watercolor and gouache)
“Geese-swans” (watercolor)
“Geese-swans” (watercolor and felt-tip pens)
“Thumbelina” (felt pens)
Drawing “Water” (watercolor)
Drawing “Masha and the Bear” (colored pencils)
Drawing “Under the mushroom” (felt pens)
Drawing “Apple” (colored pencils)
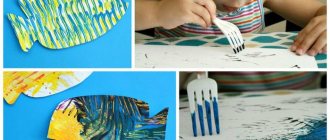
Non-traditional techniques:
- Finger drawing - older preschoolers independently decide on the choice of theme for drawing, using finger techniques in combination with traditional techniques.
- Palm painting - based on children's handprints. Six-year-old children apply paint to their palm with a brush on their own, then complete the contours of the figure and draw in the details.
- Drawing on wet paper is a blurry, hazy image that is applied to a pre-moistened sheet of paper.
- Drawing using rock salt, semolina, colored sand. With the help of colored sand, interesting crafts are created by filling the silhouette, previously smeared with glue.
- Bleeding drawing - an image is drawn with wax crayons or a wax candle on white paper, then painted over with a top layer of watercolor in one or more color shades.
- Drawing with crumpled paper - drawing an image using a paper ball crumpled from a piece of paper.
- Pointillism (dot painting) - drawing with dots, dotted strokes using fingers, cotton swabs, cotton swabs, pencils with an eraser at the end or a brush.
- Stamping is an image of objects or natural phenomena by applying an imprint on paper using a stamp and stencil (foam rubber swab, wooden stamps, from vegetables, fruits, waste material, etc.).
- Vertical poke with gouache using a hard semi-dry brush without using water to obtain a visual texture effect (fluffiness, volume, relief).
- Scratching is scratching the outlines of a design onto a surface primed with wax or paint.
Children's works using non-traditional techniques (photo gallery)
“The Fox and the Gingerbread Man” (poke)
Drawing “Swan Princess” (pointillism)
Design of a blue petal (drawing with cotton swabs), green (poke)
Design of the sun (plastinography), blue petal (drawing) and violet (coming through pattern, drawing with a candle)
Drawing “Swan Princess” (pointillism)
Drawing “Swan Princess” (drawing with salt)
“Firebird” (leaf print and palm painting)
Drawing “Senor Rain” (drawing on wet)
Design of a red petal using a textured pattern technique (place a mesh and shade with a red pencil), an orange starfish (drawing with salt)
Drawing “Winnie the Pooh and his friends” (drawing with colored sand)
How to draw the Little Mermaid - step-by-step illustrations for the fairy tale
This skill will definitely come in handy when you start reading the fairy tale of the same name to your child. To draw the Little Mermaid, use the step-by-step photos provided.
- First draw a rounded head. To then maintain symmetry when drawing facial features, draw a vertical stripe, but not all the way. At this stage draw the neck and body up to the waist. On the next one, using the previously drawn line, draw symmetrical eyes, and below - the nose and mouth. Draw the tail. Then remove the extra features and make your face more expressive. Draw the hair and scales on the tail. Show your child how to color the mermaid so that she turns out so bright.
- How to draw the fairy tale “The Golden Key”?
- This is also easy to do. Draw a round head, in the place where the shoulder will be located - a small circle. Mark the line of the body. This curve will help create the back and the leg that is slightly behind. Draw the second one at a short distance.
- Draw this character's cap. To draw Pinocchio further, draw his eye and ear. Draw hair that looks like shavings. Dress this character in shorts and a jacket. Give him the golden key. All that remains is to add colors, after which the picture is completed.
- The second character in the fairy tale The Golden Key is Karabas Barabas. To draw it, first draw a round head, with a powerful body located just below. We don’t draw a neck, then the figure of Karabas Barabas will appear even more massive.
- Draw a semicircular line in the belly area so that you can see where the shirt ends and the trousers begin.
- Draw the arms, legs, then the beard and face of this negative character. All that remains is to decorate it.
Drawing techniques on the theme “My favorite fairy tale” for older preschoolers
Older preschoolers are actively improving their drawing techniques with pencils, crayons and felt-tip pens, since shading helps strengthen the muscles of the hand, develop fine motor skills and coordination of movements, and therefore helps prepare children for school stress.
- The line is the main method for sketching, which is taught to six-year-old children. A line can be of different lengths and rhythms and helps to depict a contour, conveying the nature of the object’s shape, its size, dynamics and proportions.
- Hatching is a fairly simple, but expressive and effective way of conveying the character of a character (lightness, heaviness, flexibility, plasticity, etc.) and the texture of an object. Drawing with strokes helps not only to reveal the image of an object, but also to develop fine motor skills, which is very important for solving the problem of preparing for writing. Types of shading:
- Chaotic - the strokes are laid in a free direction, then they are formed by additional contour drawing of the outlines of the object.
- Vertical - dense strokes are applied in a vertical direction. Using colored pencils with different pressure levels will allow you to get the effect of a smooth change of various shades.
- Diagonal - most popular in the landscape genre for depicting, for example, rain or silhouettes of mountains.
- Horizontal is a rather difficult technique to perform, since it requires the child to change the usual position of the hand during the drawing process.
- Shape-building is a technically complex and time-consuming way of conveying the shape of an object, for example, a cloud or the crown of a tree.
- Shading helps to achieve different degrees of color saturation depending on the degree of pressure of the pencil. Drawing an outline requires more pressure than painting the silhouette of an object or creating a background pattern.
- Dot, rhythmic stroke, brush stroke using the technique of painting with watercolors and gouache paints.
“The Gray Neck” - illustrations for the fairy tale
Introduce children to this fairy tale. After all, this story awakens the best feelings and instills kindness in children. Drawing a duck is not difficult, especially since this skill will certainly be useful to kids in the future. After all, sometimes they will need to portray this bird.
- Drawing step by step is not difficult. First you need to draw a small circle and a figure that looks like a horizontal drop. Now add a beak to the head, which is shown to the left. The wing almost follows the shape of the body. Draw an openwork edge on it, just like on the tail, to show that these are feathers. Then draw the nostrils, eyes, make the feathers on the chest more ribbed.
- At the next stage, this will allow you to color this part so that you can see that this is a Gray Neck duck. The breast and wing are the same color. Draw the beak and paws in orange, and the head and body of the bird in light brown.
Organization and conduct of classes
The rich theme of “My Favorite Fairy Tale” is revealed in the process of versatile pedagogical work aimed at cognitive, speech, social-communicative, artistic and aesthetic development. Drawing classes can be conducted both in a narrowly focused format and within the framework of short-term and long-term projects on this topic (“Russian folk tales”, “Fairy tales of A. S. Pushkin”, “Tales of the peoples of the world”, “Fairy tales of H. H. Andersen” ", "Tales of Chukovsky", "Tales of V. Suteev", etc.).
Large plot compositions, which consist of several characters and objects, are usually created collectively. The preparatory stage, during which the background is tinted, individual figures are drawn, details are worked out, is carried out in small subgroups of 3-4 people, and then the children together compose a plot picture on whatman paper, gluing the silhouettes they have prepared, simultaneously developing spatial thinking abilities, gaining experience in coordinated actions. In the process of collective creativity, children rely on a condition set by the teacher or a free plan, improving the social skills of mutual understanding and camaraderie.
A Christmas Tale - working with elements of appliqué and plastinography
It is important to develop in children an understanding of the correct sequence of stages of work to create a collective plot composition or collage:
- make a background image divided by a horizon line;
- draw background objects (trees, sun, clouds, flowers, etc.);
- draw or place previously prepared and cut out silhouettes of fairy-tale characters.
Drawing of the Firebird - each child paints his own feather, then everyone collects the fluffy tail of a fairy-tale bird together
Lesson outline
The senior group has one drawing lesson per week. The total duration of continuous activity should not exceed 20–25 minutes; methodological manuals recommend performing physical exercises (finger, breathing, motor exercises) for 5 minutes to neutralize psychological and mental stress, as well as prevent physical fatigue in children.
- Organizational part (3–5 minutes). The practical part of the lesson can be preceded not only by reading a fairy tale or literary work, but also by viewing pictures, a slide show, a fragment of a film or cartoon. The informational and familiarization stage involves awakening children's interest in the fairy tale plot, studying the characters of the main characters and the sequence of events. It is necessary to include surprise moments, elements of theatrical play, stimulating curiosity, causing a positive emotional reaction and activity.
- Practical part - the teacher explains the sequence of creating a composition and drawing the main characters based on the diagram (3-5 minutes). Older preschoolers are given more freedom in the drawing process; showing a picture or sample prepared by the teacher should not be used for copying, but only to form a correct understanding of the task or clarify it. The work is done from life (toy) or based on the free design of children; the basic techniques have already been mastered, so they do not require additional demonstration.
- Independent work of children (15–20 minutes).
- The final part is the analysis and assessment by children of their works and the drawings of their comrades. Children are taught to formulate their point of view with reason and verbally express the aesthetic perception of creative works (3-5 minutes).
Schemes for drawing fairy-tale characters (photo gallery)
Princess
Clown
bear
Witch
Goat
Snow Maiden
The sequence of creating an illustration for the fairy tale about Kolobok
The Hare and the Bun Izbushka
Kolobok Piglet Winnie the Pooh
Lesson summary on the topic “Journey to a Fairy Tale” (author T. A. Sosik)
Goals: Continue to introduce children to oral folk art, consolidate children's knowledge of Russian folk tales. Tasks:
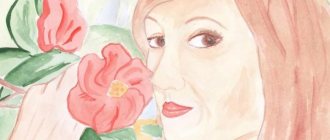
Materials: white paper, gouache, watercolor, brushes, wax crayons, illustrations for Russian folk tales. Didactic games: “Find out by profile”, “Match heroes from fairy tales”. 1. Organizational stage. Educator: At the beginning of the lesson, I want to read you a poem by V.A. Steklovoy There are many different fairy tales in the world, Sad and funny, But we cannot live in the world without them. In a fairy tale, anything can happen, Our fairy tales are ahead, A fairy tale will knock on the door - The guest will say: “Come in.” Today we will go on an unusual journey, to the land of fairy tales. A long time ago, people did not yet know how to read or write, but they were already telling fairy tales. And how they loved to listen to them, and not only small children, but also adults. They will gather in the evening for gatherings: logs are crackling in the stove, the hut is crowded, everyone is busy, some are spinning yarn, some are knitting, some are embroidering, and some are just listening to a fairy tale. The fairy tale has survived to this day, because it was told from generation to generation, passed on from mouth to mouth. Your grandmothers told the story to your mothers and fathers, your mothers told you, and you tell it to your children. This is how a fairy tale came to us from ancient times. What fairy tales do you know? Answers: “Kolobok”, “Teremok”, “Three Bears”, “Geese-Swans”, etc. What kind of fairy tales are these? (Russian folk) Why are they called that? Answers: (Created and written by the people). Didactic games “Find out by profile” and “Match heroes to fairy tales” are held. - Well done! - Guys, do you have any favorite fairy tales? Answers. These are the heroes of these fairy tales that we will draw with you. Selected fairy tale characters (illustrations) are placed on a flannelgraph. 2. Practical part. Look carefully at the heroes of fairy tales and you will see how different they are. The art of portraiture is very ancient. When painting a portrait, artists try to convey the character and inner world of the hero. Fairy-tale heroes can be cunning and gullible, good and evil. But we are all artists in our own way. Let's draw illustrations for our favorite fairy tales. We must try to convey in the portrait the character of the hero, his characteristic features, and moods. Don't forget about your hairstyle, jewelry, and hats. All the little things are important. They also talk about the character of the hero. You have to work very carefully and carefully. What do you think is the ending of the fairy tale? Answers (Always happy, good conquers evil). Right! Well, now let's get to work. 3. Independent work. Children draw. 4. Summing up. After the lesson, the teacher hangs all the drawings in a visible place - the children look at them and tell what fairy-tale character they drew, discuss the characters’ characters, what they are like. |
How to draw an illustration for the fairy tale “The Silver Hoof”?
If you're looking for a winter tale, The Silver Hoof is perfect. See how to draw a scene from this interesting story by Bazhov.
- First draw a house. Draw two parallel vertical lines that will soon become the corners of the house. Draw two lines on top that will turn into the roof.
- Since the fairy tale “The Silver Hoof” is winter, draw a roof and snow on it. Then draw walls and windows. One will have shutters. Explain to the children why these elements are needed.
- To show the presence of snow, draw a wavy line near the bottom of the house.
- Draw in the missing details. Erase the auxiliary lines. Don't forget to draw one of the front hooves so that it is raised. Draw horns, eyes, ears, nose, legs with hooves. Mark several points on the roof of the house. Soon they will turn into precious stones.
- Now you need to draw the Christmas trees. After all, the house is located in the forest. Draw a few lines to show how fluffy the snow is. Draw stars and a month in the sky.
Here's how to draw the fairy tale "The Silver Hoof" with a pencil. If you wish, then color your masterpiece. Draw snowdrifts and snow on the fir trees using white, blue, and gray paint. Then you will see where the shadow is. Behind one of the snowdrifts you can draw a girl who is watching such a miracle. Make the house and characters more colorful and add color to the surroundings. The painting is complete.
How to draw Winnie the Pooh step by step?
Draw an oval. He will repeat the figure of this character. Divide it in half with a horizontal line. Draw a semicircle at the top, and right below it draw two eyes and a nose. Also draw a characteristic pattern here, which you will then use to mark the areas around the eyes. Draw ears and paws.
This is how to draw an illustration for this fairy tale with a pencil step by step. You can see what needs to be highlighted with a simple pencil and what areas should be left white.
It is very interesting to do such creative work. You can add other features to your drawings, draw heroes of magical stories against the backdrop of a forest or palace.
Progress of organizational educational activities
Children stand in a circle.
A new day has come. I will smile at you and you will smile at each other. And think how good it is that we are all here together today. Look at the guests, smile and say hello.
Educator: Guys, today we will talk about fairy tales and learn to draw them . you like fairy tales ? And to find out what fairy tales , we will now play a game.
Game “Name a fairy tale ” (children pass the ball in a circle and name fairy tales )
Educator: Name Russian fairy tales .
(Children sit at the tables. Grandmother enters - Riddle)
Grandmother – Riddle: Hello, guys! You recognized me? I am Grandmother - Riddle. I heard you talking about fairy tales and decided to come visit you. you like fairy tales ?
Grandmother – Riddle: I also love fairy tales , and especially making riddles about fairy tales . Listen to my riddles and name the fairy tale .
Game "Guess the fairy tale "
Grandmother - Riddle: Tell me which fairy tale these words are : “And I don’t have a mustache, but a mustache; not paws, but paws; not teeth, but teeth?”
Grandmother – Riddle: Look at the pictures and tell me which fairy tale ?
Children: “The Frog Princess”
,
"The wolf and the seven Young goats"
.
Grandmother – Riddle: And these words are from which fairy tale ? “I sit high, I look far away!”
Grandmother – Riddle: But you didn’t guess right! This is a fairy tale about a bird .
Educator: Oh, Grandma - Riddle, you've got something wrong. Guys, who said these words and to whom?
Grandmother – Riddle: Oh, I’m getting old , I forget everything. And tomorrow I have to go to another kindergarten. The guys are waiting for me, they want to guess fairy tales . But when I was old, everything was mixed up in my head. Help me, you are smart in kindergarten, you know everything.
Educator: Don’t be sad, Grandma is a Riddle. We’ll rest a little now and think about how to help you.
Physical exercise “Pinocchio stretched”
Pinocchio stretched (rise on tiptoes, arms up)
Bent over once (hands on waist, three bends forward)
He spread his arms to the sides, (arms to the sides)
Apparently I couldn't find the key.
So that we can get the key (hands up, rise to tiptoes)
You need to stand on your toes.
Educator: So we had a rest, and now Grandmother - Riddle, let's sit side by side and talk well. We’ll come up with something... What should we do, guys? How to help Grandma – the Riddle? (you can draw fairy tales )
Yes, a fairy tale can not only be told , it can be drawn . Let's help the Riddle Grandmother draw fairy tales .
Educator: And you, Grandmother - Riddle, sit and watch how the guys draw fairy tales . will draw which .
-Danil, what fairy tale will you draw ? (I ask three children )