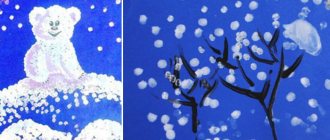
Lesson in non-traditional technology. Drawing with stamps. "Bizarre patterns."
Lesson in non-traditional technology.
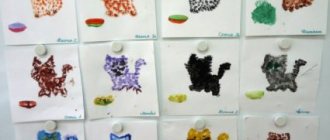
Drawing with stamps.
"Bizarre patterns."
Target:
Acquaintance with a new material -
stamps
;
Tasks:
*teach children to draw with gouache using a stamp, using available material
* clarify and consolidate knowledge of color and shape, be able to navigate on a sheet of paper;
*create interest and a positive attitude towards drawing.
Materials:
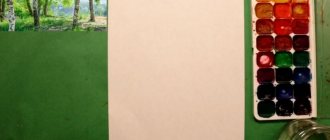
Gouache, brushes, sheets of A4 paper (according to the number of children), stamp, napkins; samples of thread and stamp designs.
Preliminary work.
Poem “I am a simple-looking thread
…»
Reading the fairy tale “School of Unusual Artists”
.
Progress of the lesson.
IN
: Today guests came to our group, these are teachers from other groups of our kindergarten, let's say hello to them and give them our smiles! Guys, you put all the toys in their place, what is this box, who brought it? Maybe they brought us a package? What do you think could be there? (children offer options). Let's open it and take a look.
The teacher opens the box.
Yes, here is a postcard, there is some girl on it. Maybe she sent us a package and riddles? Let's read and guess everything together.
Puzzles
To sew and embroider, you need to take it in your hands.
I have multi-colored coils, a friend has them.
We embroidered cards, we needed them.
(Threads)
I'll get them quickly
I will build a house for the animals, There will be a chair and a table in the house, To make it more comfortable. I’ll build a garage with a bridge for the car... What am I playing with, tell me, friends? (Building cubes)
The teacher takes out stamps.
IN
: And what is it? Some unusual cubes with strings
Guys, remember we read the fairy tale “The School of Unusual Artists”?
There, the girl Tanya was introduced to various objects that could be used to draw - these were unusual artists - flowers, leaves, all sorts of fruits and vegetables, a huge red blot and a Thread. And we drew such wonderful patterns with the help of a thread!
The teacher shows samples.
IN:
Perhaps it was Tanya who sent us these objects so that we could draw with them?
Let's take these unusual cubes and go to the land of Drawing.
Let's stand up, turn around and say the magic words:
“Doo-doo-doo, I’m going to the table.
Ah-ah-ah, I’ll draw
!
Ru-ru-ru, I take a brush,
Squee-pinch-pike, I’ll dip it in paint” and we find ourselves in the land of DRAWING
.
We go to the tables, sit down, put the cube on a plate.
Let me be the first to try to draw using a cube.
Choose the color of paint you want to paint with and also place it on the plate. Take a brush from the cup, dip the brush in paint and paint one side of the cube, carefully place the cube with the painted side on the sheet, press and, without moving, lift it up. This way you can leave prints on the entire sheet, only at the top and bottom of the sheet, on the right and left and in the center (middle) of the sheet.
There is no limit to creativity
For children who have already become acquainted with many interesting techniques and have shown their extraordinary creative abilities, we can offer a rather difficult drawing technique - “scratching”.
You need thick paper, you need to color it with wax crayons, preferably bright colors, then cover it with black gouache or ink using a wide brush. If you intend to use gouache, add a little PVA glue so that the dried paint does not crumble. When the ink (or gouache) has dried, the workpiece is ready for further work. Now we take a thin stack (any sharp, non-writing instrument) and start drawing. But this process can only be called painting conditionally, since the top layer of paint is scraped off. Thus, stroke by stroke, a bright wax layer is revealed and projected into the artist’s idea.
Young artists will enjoy the technique of drawing on glass using plasticine.
Choose the design you like, cover it with glass, and use a black felt-tip pen to draw the outlines of the design onto the glass. Then we proceed to fill the contours with soft plasticine, trying not to protrude beyond the edge. The reverse side does not look so neat, but the front side shows a bright and clear picture. Place your work in a frame, and you can use colored cardboard as a background.
There are also a number of non-traditional drawing techniques in kindergarten that children of the middle and senior preschool groups can easily master. For everyday activities, a combination of applique with a classic pattern may be suitable. Pre-cut elements are glued onto a landscape sheet, after which the image is given a finished look using pencils or paints.
One of the accessible and entertaining techniques is “Frontage”.
This type of fine art has been familiar to us since childhood; remember, they hid a coin under a sheet of paper and shaded it with a simple pencil? In the same way, instead of a coin, you can use dry leaves, and shade not with a pencil, but with colored pastels. The drawing will turn out bright and rich.
We have become acquainted with a large number of drawing techniques and have already learned a lot, so why not put our knowledge into practice? Using both traditional and non-traditional painting techniques, any interior items are decorated. Decorative drawing in kindergarten also has an applied nature; a child can already decorate, for example, a pencil stand or a clay vase, or he can please his mother and create a unique pattern on a cutting board. Just remember that for such work you need to choose waterproof paints: acrylic or oil. To make the result last longer, coat the finished craft with varnish.
For interior decoration, the stained glass technique is used.
The essence of the technique is to apply an adhesive contour and fill it with paint. There are many options for performing this technique, but one of the most interesting is to apply a pattern to oilcloth, and after drying, the pattern can be removed from the oilcloth and glued to any surface, for example, glass - there will be a translucent bright picture.
Let's take a closer look at the technique itself.
The ideal option would be to use specialized stained glass paints, but if you don’t have any, you can be smart and make them yourself. Take ordinary gouache and add PVA glue; after drying, the paints have an elastic structure, which will allow you to remove the picture from the film without difficulty. Choose the design you like and draw its outline onto a transparent oilcloth (you can take a regular file or a transparent plastic folder). It is better to make the outline first with a pencil or felt-tip pen, and then outline it either with a ready-made stained glass outline, or with regular PVA glue from a tube with a dispenser. Wait for the outline to dry, then fill in with bright colors. After complete drying, you can peel the design from the film and decorate the intended surface.
You can decorate not only interior items, but also wardrobe items with special fabric paints. This technique is called “Cold Batik”. Invite your child to make a designer painting of an ordinary white T-shirt, only your child will have one, one and only!
- The T-shirt must first be fixed in an embroidery hoop or in a stretcher for painting on canvas.
- Using a pencil and tracing paper, transfer the image of your favorite cartoon character onto fabric.
One of the most important stages of this method is the application of a reserve composition, in other words, a protective contour that will prevent the paint from spreading over the fabric. The contour must be closed to prevent spreading.
- After drying, according to the scheme known to us, we fill the contours with paint.
- Then the drawing must be fixed. Place one sheet of paper under the design and the other on the design and iron it.
This product can be washed, but it is better to wash it by hand in cool water. The unique product is ready.
Drawing with stamps with preschool children, drawing materials on the topic
Drawing with stamps with preschool children
All-round creative development is useful and necessary for all children. But not all children like to draw, but the technique of drawing with stamps is liked by all children and even adults without exception.
By drawing in this way, children are not afraid of making mistakes, since everything can be easily corrected, and something new can easily be invented from a mistake, and the child gains self-confidence, overcomes the “fear of a blank sheet of paper” and begins to feel like a little artist. He develops an interest, and at the same time a desire to draw.
After all, you can print with anything. This is what real creativity will be.
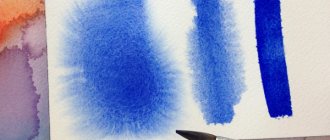
Learning to make prints. To do this, soak a piece of foam rubber with diluted gouache to create something like a stamp pad. Now we dip our mold into the paint, press it onto the paper and carefully remove it. The color print is ready. You can apply paint to the stamp using a brush, or dip it in thick paint.
It doesn’t matter that you won’t get accurate prints right away. Here, as in any business, a certain dexterity and dexterity are needed.
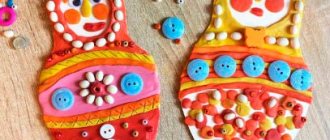
In order for the printing of figures to acquire some meaning, you can, for example, decorate a paper plate, a vase cut out of cardboard, or a painted doll’s dress with an ornament. You can draw rowan berries and scarlet strawberries with foam rubber, beads on the girl’s neck and a bright rooster’s tail. The main thing is that the creative process is enjoyable and evokes an emotional response in children.
Materials for homemade stamps surround us at every step, and the number of design options is almost endless, but first, it’s worth trying to implement a few common ideas.
The following types of stamps can be used:
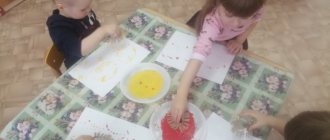
1. The very first typing tool is the children’s own fingers and palms.
You can draw on paper with your palm, or with the edge of your palm, or with your fist. The teacher can set an example - on his piece of paper, children quickly grasp the principle of drawing. Then the paint is wiped off the palms with a cloth.
2. Stamps from vegetables and fruits.
For example, cut a potato in half, apply a design on the side of the cut and carefully remove the excess along the edge.
You can cut out anything, or whatever your skill allows you to do - from a house to a beautiful flower.
You can twist a cabbage leaf, make an even cut - the imprint will be an unusual rose. An interesting print is obtained from a cut of Chinese cabbage.
Halves of onions, apples, pears and other vegetables and fruits make excellent stamps.
Drawing with stamps in kindergarten
Marina Fursova
Drawing with stamps in kindergarten
drawing techniques helps kindergarten turn activities with children into an exciting game, which instills artistic taste and reveals the creative abilities of boys and girls.
The traditional method of drawing in many cases is too difficult for growing young artists, so alternative methods of obtaining paintings are very popular among preschool teachers. Constant self-education is very important for every worker in this field, so we bring to your attention an overview of original drawing for preschool institutions.
The relevance of these techniques lies in the fact that with their help, fine motor skills develop, which directly affects the formation of speech skills.
The methodology of teaching fine arts for the little ones helps children develop attentiveness, perseverance and patience, learn to manage their emotions and take initiative.
Printing ( stamping )
- a technique for producing images on paper using
stamps previously immersed in jars of paint. Stamps are made from pieces of foam rubber, polystyrene foam, chopped fresh vegetables and other similar materials. They also use ready-made factory stamps with images of animals, cartoon characters and alphanumeric symbols.