Drawing
This is the third and final stage. Here the child scratches with any sharp object the design that was originally intended for him. You can select any object as an image tool:
- Sushi sticks. To draw with them, one end must be sharpened. They are light and comfortable for children's hands.
- An ordinary ballpoint pen is a more convenient item for children, so it can be used for drawing. The scratching technique involves using a pen with the paste running out. Then there will be no traces left, and the drawing will have the necessary tones.
- Toothpicks can be used, but for small children's hands they are not a very convenient object for drawings made using the scratchtatting technique.
- Knitting needles are also suitable for older children, as the metal surface of this item can slip in the hands and is not very comfortable to use.
The grattage technique involves two types of image application. You can make the drawing yourself by inventing it and scratching it out. This develops the baby’s imagination very well. He simply draws what he wants and his existing skills allow.
You can also use a ready-made sketch. To do this, a drawing is prepared on a sheet of paper. This can be done by both adults and children.
After preparation, the sheet with the design is placed on the finished base, secured with paper clips, and the image is applied with a pen, lightly pressing along the contours of the sketch. As a result, outlines become visible on the cardboard, along which the child scratches out the drawing.
Thus, the child gets a picture that looks like an engraving and looks very impressive.
For children, the grattage technique is very interesting and useful, so it is worth teaching them this method of depiction.
Did you like our content? Subscribe to the channel in .
Scratch - what is it?
What is the grattage drawing technique? The literal translation of this term is “scratch” (which comes from the French verb gratter, translated “to scratch”). Scratching is essentially a type of engraving. True, the opinions of various artists differ on this matter. If we take as an engraving any image obtained by applying strokes without the presence of paint, then grattage is a typical engraving. Just like any pencil drawing.
If we take as an engraving only what is applied to a special hard surface (such as wood or metal), then drawing using the grattage technique is a kind of imitation of an engraving made on cardboard or very thick paper. Drawings using this technique are made with a slightly sharp object (such as a pen, a special chisel, a pointed stick) on a surface previously prepared for the painting.
Scratching as an unconventional way of drawing
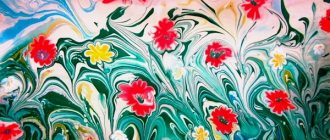
Scratching is a method of making a drawing by scratching a paper base covered with a dark-colored background with a sharp tool. The result is original contrasting compositions.
Drawings using the grattage technique are original due to their contrast.
If we look at the history of fine art, the peak of popularity of grattage was the beginning of the 20th century. In Russia, this technique was called grattography; it was very suitable for the embodiment of fantastic and expressive ideas. A form was needed that would simultaneously express simplicity and originality. This method of drawing made it possible to create the effect of halftones due to contours.
M. Dobuzhinsky was the first in Russia to use grattography
In modern painting, grattage is also used, although not very actively. Thus, the American artist (Romanian by birth) Cristina Penescu creates true masterpieces. Using the scratching method, she depicts animals very realistically (the paintings can be compared to photographs).
American artist Christina Penescu creates very realistic images of animals using the grattage technique
Scratching in stages
The nuances of creating a drawing using the grattage technique should be considered step by step using the example of the composition “Parrot on a Branch”.
First, a sheet of paper is painted over with wax crayons of different colors. Since a parrot will be depicted, the colors chosen are bright and contrasting.
It is advisable to choose bright and contrasting colors according to the color of the parrot
Next, you can use a little trick: take a piece of paper and rub the surface with it. This will ensure a smooth flow of colors. However, sometimes sharp color changes, on the contrary, make the image more original. In any case, there is no need to be afraid of experiments.
Due to rubbing, color transitions will be smoother
After these manipulations, the base is thickly painted over with black gouache or ink. To ensure uniformity and prevent rolling, add a couple of drops of liquid soap to the paint. Next, the sheet of paper must be left until it dries completely.
It is better to add a little liquid soap to the paint to make the coating uniform.
The main outline of the parrot should be outlined with a white pencil (a simple pencil can also be used - it will be noticeable on a black background). Only the main points are indicated; do not go into detail, because erasing the lines from the surface will be problematic.
Only the main outlines are indicated with a pencil, without small details
After this, the key lines of the drawing are scratched with a sharp tool, such as a toothpick. You don’t need to press too hard on the paper, just enough to remove the black gouache layer.
You don’t need to press too hard with a toothpick, because only the black layer should come off
After marking the main outline, you should draw smaller details, paint over individual fragments (that is, remove the black pigment in a fairly large area, for example, this will be the tree branch on which the bird is sitting, as well as its head).
After working out the small details, the drawing is ready
Preparatory stages of drawing
Before you start using the grating technique, you need to prepare your equipment. For the lesson you will need:
- cardboard (preferably white);
- candle or wax;
- brush (preferably thick natural);
- wax crayons;
- ink or gouache;
- a piece of foam rubber;
- sharp object (toothpicks, crochet hook, pen with out of paste).
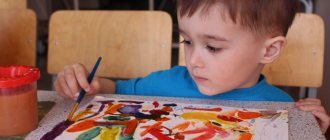
The first stage of drawing is performed by the child. Using colored crayons or paints, the cardboard is painted over. This can be done in one color, or you can decorate it with multi-colored spots. In many ways, the choice of color and the number of spots depends on what kind of pattern will be scratched out.
Therefore, the final option should be considered at the initial stage. It is advisable to choose contrasting and bright colors that will later harmonize with black. If you take colored cardboard at this stage, then this drawing stage can be omitted, since the base already has the required shade.
You can skip this step, and then the result will be a black and white image, which also looks very beautiful.
The next step in the grattage technique is coating the painted cardboard with wax. To do this, take an ordinary candle or a piece of paraffin (wax) and rub the entire surface
It is very important to perform this action carefully, and this must be monitored
The last preparatory stage is applying gouache to the wax layer. There is a little secret here that allows the paint to absorb well and in the future not reach out to the young artist’s hand and stain it.
In a separate bowl, dilute the required amount of gouache with shampoo or soapy water.
Apply the prepared paint with a wide brush in one direction. Gouache may smudge. If this happens, then after the first layer has dried, a second one is applied.
Even if the preparatory processes are carried out by adults, it is very important for children to explain what is being done and why, so that later they themselves can easily and correctly make the basis for a drawing made using the grattage technique
Creating a drawing using the grattage technique
Before you start creating an image using scratch paper, secure the sheet to plywood or a table by gluing it with tape. Next, follow the step-by-step instructions:
- Dry the surface completely before starting work. Place a napkin or a clean sheet of paper on the “non-working” areas.
- Paint over the surface using oil pastels of different colors. For example, for an autumn landscape take red and yellow tones, for an image of the underwater world – purple and blue.
- To make the shades flow smoothly into each other, take a piece of paper and rub the surface with it. The oil surface spreads well, so you get a solid multi-colored stain.
- Paint over the entire surface using black ink or gouache. Don't forget to add a little liquid soap or shampoo to the pigment.
- Outline the main contours with a white pencil or chalk. Indicate only the main outlines, because It will be difficult to erase a pencil from such a surface without damaging it.
- Start scratching the marked outline with a sharp object. Do not press too hard - do it with enough pressure to remove the black layer. Make sure the dark pigment is dry before scratching.
- Having scratched the main contours, work on the details and complete your drawing.
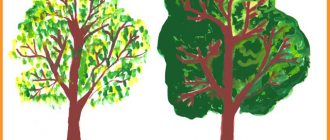
Scratching can be made negative or positive. In the first case, the substrate is made dark and the background is light, and in the second (the most common) a light pattern is scratched onto a dark background. After covering the wax layer using mascara, you will get a semi-matte black surface, which must be handled very carefully - do not splash water or touch it with your hands. Fingerprints immediately remain on it, which cannot be removed later with anything. Helpful Tips:
- If you don't dry the wax cardboard completely, you won't be able to scratch a straight line, because... the material will begin to crumble.
- It is very important to work on a completely flat surface so that the cardboard does not break or bend. It is better to fix the worksheet on the plywood with tape.
- You can choose materials for the grattage technique at your discretion. It can be thick paper, cardboard, plastic, wood, an old calendar and even metal. In the case of metal and wood surfaces, you don’t have to tint the base - just cover it with wax and scratch the image.
- Apply the paint with a flat brush with soft bristles - this will ensure an even layer. If you use hard bristles, it will “injure” the wax layer. It is recommended to brush only once, otherwise the surface will become waterlogged and simply swell.
- The intermediate layer can be made with a paraffin candle, egg yolk or wax crayons.
- The last layer of paint is created using colored gouache or black ink. The finishing color can generally be anything - it all depends on your compositional idea.
- To prevent the gouache from staining your hands when scratching out a design, add a little PVA to the paint.
- To prevent the paint from rolling off on paraffin or wax when applying the finishing layer, cover the surface with chalk.
- If ink or gouache rolls off a layer treated with wax crayons, you can first degrease the base with talc.
A way to depict a drawing for any age
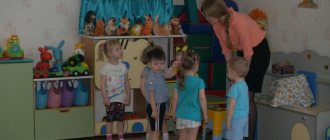
Any child can learn to draw, which depends little on his natural capabilities and abilities. First of all, you need to approach the learning process correctly. This is the task of adults: to develop the child’s creative potential. If you want to interest a novice artist, introduce him to unconventional drawing techniques.
One of these methods is grattage. This drawing technique can be introduced to children of any age, as it is convenient and interesting to perform. For younger children, the basis for drawing is done by adults; older children can do it independently.
The whole process is divided into three main stages. Each of them will be interesting for children
Such activities develop children’s imagination, attention, perseverance, and the ability to finish what they start.
Working on drawings allows children to learn about the world around them and expand their horizons; the child accelerates the development of fine motor skills and attentiveness several times. Scratching is a good way for older children to express themselves and develop intellectual capabilities.