Baby book made from A4 paper
Little baby books are great for learning the basics of reading. They are cheerful and funny, there is nothing superfluous in them, and the child perceives such leisure time as an exciting game. And such pocket books are always convenient to take with you on trips and travels!
Photo: pinterest.ru
You will need:
A4 paper, a stationery knife, glue, colored pencils, markers, pens and crayons.
How to do:
Fold a sheet of A4 paper in half lengthwise, then again crosswise, and again each half. Unfold it and make a cut in the middle with a utility knife. Coat one side with glue along the entire plane and fold the book, fixing the pages.
You can combine several of these paper blocks into one thicker book and even make a cover. All that remains is to draw pictures and write text. They can be used to study the seasons, animals, surrounding objects, numbers - anything!
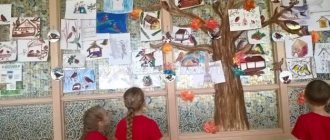
Making a baby book with your child
Sometimes children even get bored with cute felt bunnies and rattles, but they love to create and come up with new ideas themselves. Choose a theme for a baby book together, draw, collect interesting facts, use pictures and stickers!
Photo: connecticum-dou.ru
You will need:
Paper, glue, paints and pencils, old magazines and printouts, stickers, needle and thread.
How to do:
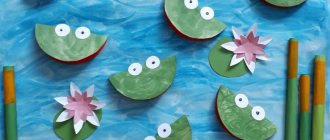
Instead of making fabric pages or printing out backgrounds, design them yourself! For example, to make a book about animals, first draw their habitats. To do this, fold sheets of A4 paper in half and hand them to your child along with the pictures - let the child choose the animals he wants to live there, while you find something interesting about them.
Older children can fill out the text in the baby book themselves - at the same time this will be a short training in their writing skills. All that remains is to stick all the animals onto your pages and sew the book in the middle with regular thick thread.
Did you like the post? Subscribe to our channel in Yandex.Zen, it really helps us in our development!
Baby book made of fabric
Soft baby books with fabric pages are sold in huge numbers in children's stores. But why overpay for something you can easily and quickly do with your own hands? It is enough to master the basic principle - and you will be able to make such toys until your child gets tired of it!
Photo: pinterest.com.au
You will need:
Multi-colored fabric, ribbons, lace, felt, large textured details, threads and needles.
How to do:
Cut out several pieces of multi-colored fabric 20x40 cm (or whatever size pages you want). Decorate them with letters or felt pieces, Velcro figures, zippers, buttons, fur, feathers, tassels, laces, fringes and knitted toys.
To join the pages, place two of them face to face, stitching around the perimeter and leaving only a small hole on one side. Through it, carefully turn the workpiece inside and put a piece of thin padding polyester inside for volume, and then sew up the hole. This will be the cover, first and last pages, respectively.
Simply fold all the inner pages in half, sew them together, turn them inside out and fill them with padding polyester in the same way. The inner pages are simply sewn inside with large stitches or attached to tape. Make ties or fasteners on the cover to make it more interesting for the child and more convenient for you.
Stages of work completion
When thinking through a project, you need to determine the theme, purpose, and decide on the layout, content and materials.
You need to create a soft book with your own hands in the following sequence:
- Formulate the idea of the book and decide on the plot;
- Calculate how many pages there will be and what information will be located on them;
- Think over and draw sketches;
- Decide on templates for each page, draw or copy element templates from other sources;
- Calculate how much basic and auxiliary materials will be needed;
- Perform cutting;
- Connect elements on pages;
- Sew the pages into a book.
Materials and tools for work
To prepare for the process of creating a book, you need to know what will be useful. First of all, these are scissors, a ruler, colored or white paper, PVA glue, cardboard, fabric.
Paper is needed for origami, glue is useful for gluing the necessary parts, scissors for cutting and trimming, cardboard and fabric are useful for creating the binding of a future book. A ruler as an assistant tool, without which any creative work is indispensable.
Book cover design
The last part of the work remains, which includes making the cover.
From decorative paper
Making a cover from decorative paper is very easy and simple. Thick paper, scissors, sketch, book will come in handy.
Process of creation:
- Fold the sheet face down and place the book in the center of the sheet. Fold the edges of the paper over the cover of the book and iron the folds.
- Opposite the spine, form a notch - a trapezoid.
- Determine the folds of the cover of the book, the cover will fold towards the long side, then towards the short side.
- Secure the cover with tape and hold it in place.
- If desired, write the title of the book on the cover.
Leather cover
To make a leather cover you will need leather, paper, cardboard, and cotton wool.
Process of creation:
- Cut the pre-prepared sheet, the height is equal to the pages, the width is 2 times larger.
- Fold in half twice to provide protection. You need 2 pieces of these parts.
- Attach 2 folded sheets of paper to the book on each side. Glue the endpapers to 1 page.
- Glue the fabric onto the spine and smooth it out
- At the end of the spine, glue the fabric, apply glue in the center and glue the thread.
- Cut out 2 cardboard rectangles to form the base for the cover. Place the cardboard over the book, folding it if necessary.
- Lubricate the outside of the cardboard with glue, attach the skin and connect it to the cardboard, do not stretch the skin, only press lightly.
- Trim the skin, leaving 2.5 cm, cut off the corners.
- Glue the cover, fold in the seams, and finish the folds.
- See how well the cover holds up.
We made a wonderful leather cover!
From fabric
To make a fabric cover, you will need scissors, fabric, thread and a needle, a ruler with a pencil, and a button.
Manufacturing process:
- Measure the book. Write your measurements on the wrong side of the fabric. The width will double and the width of the spine will increase. If the cover width is 15 cm, the spine is 2 cm, measure 15 cm + 3 cm + 15 cm = 33 cm. Add 1 cm on the sides. The width will be 35 cm, length L+2 cm.
- Cut out the base of the cover, cut the fabric the same length as the length of the book + 2 cm and the width of the cover. (for example, width 15 cm, length – 15 + 3 cm). Cut a piece of fabric in half - the flaps. Choose the width of the clasp according to your taste, its length is greater than the width of the spine, add seam allowances. Cut out the parts for the fastener.
- Place the fastening pieces right sides together and sew. Place one of the ends to the center of the base of the cover and sew.
- Add a button to side 2, sew the button into the fastener, and secure the magnetic part of the button.
- All that remains is to assemble the cover - sew the flaps to the base. Turn the cover over and sew the flaps to the edges.
This article discussed in detail the main ways to create a book with your own hands. We hope our tips and recommendations will help you create a unique little book with which you will surprise yourself and your loved ones.
Book making methods
You need to choose the optimal and appropriate way to create a book. For example, if you have a lot of colored and white paper at home, try creating a book using the origami technique, which is popular in many countries.
For lovers of small decorative books, you can create a small book that will decorate your shelf and gradually create a large collection of such wonderful books with which you can surprise your friends.
A flip book is a nice, simple option for creating a book that won't take up much time. Before looking at each method in more detail, you need to prepare your tools.