MODELING IN THE SECOND JUNIOR GROUP
Detsky sad.Ru >> Electronic library >> Family and children >> Children's creativity >> Features of the plastic form created by children of the second younger group
Children of the second younger group are more prepared for modeling classes. Some of them are familiar with the material, they know that clay can be sculpted, and they know the simplest methods of producing a cylinder, ball, or disk. The completed figures begin to evoke a feeling of joy and satisfaction in children. However, they still do not have a clear connection between hand movements and the resulting form, there is no stability in the design, and the hygienic rules when working with clay are not sufficiently established. In this regard, in the second junior group, existing visual skills are mainly consolidated.
Learning objectives and program completion
The tasks of teaching modeling in this group are clearly divided into quarters and are solved in classes according to the instructions and plans of the children. These tasks include: encouraging children to sculpt, evoking aesthetic feelings in them, and also teaching them to orient themselves in the shape of objects, their size and quantity while sculpting. Quarter I To accomplish these tasks, a number of exercises are performed that involve rolling a lump of clay between the palms with straight movements. The main goal of these exercises is to teach children to work coordinatedly with both hands, to balance the pressure of their palms on a lump of clay. Children are offered various tasks: to fashion a column or several columns, sticks, pencils. The next stage is changing a familiar object to obtain another, namely a ring, a bagel, a donut. Modeling a ring requires visual control, and in order for the shape to be round, the child needs to connect the two ends of the column and press them tightly against one another. From familiar actions with their palms, children move on to working with their fingers, which is also an important point both for the creation of this object and for all subsequent modeling work: a living, interesting shape is created only with the fingers. Along with fine arts skills, children are taught the rules of working with clay: do not dirty the table and clothes, sculpt on a board, roll up your sleeves before sculpting, and wash your hands when finished. After children have mastered sculpting a column and a ring, they are taught to sculpt round objects, that is, roll a lump of clay between their palms in a circular motion. Here you need coordination of the movements of both hands, visual control of these movements, so that the lump of clay takes on a rounded shape, and not oval or flattened. During the exercises, children are asked to sculpt a ball, a ball, an apple, an orange, and cherries. The depiction of various objects of the same shape maintains interest in modeling and facilitates the completion of visual tasks - children gradually begin to convey some of the features of various round-shaped objects. In one case they will make large apples, and in the other - many small balls, so that they can then attach them to pine needles to get cherries. Children should enjoy the sculpted shapes and learn the actions that form the ball shape. Quarter II In this quarter, children are first taught to depict disc-shaped objects by flattening a spherical shape between their palms. Children quickly master the image of a disk, and different topics provide an opportunity to consolidate this skill. Children can depict a flat cake, cookies, gingerbread and decorate them by making indentations on the surface with a finger or specially prepared sticks - signets, which in cross-section can have different shapes: circle, square. Children should be given independence when decorating. At first, children randomly arrange the elements (circles or squares), but gradually, with appropriate training, they begin to decorate their products with them more rhythmically. In addition to flat decorations, children can also make three-dimensional ones. So, you can make a cake for dolls: the larger balls are located in the middle, and the small ones are on the edge. Children place decorations from pillars on the surface of the cake in rays diverging from the center to the edges, or in the form of a grid. Thus, when depicting cookies or cakes, children consolidate the modeling technique, and also learn to create an image of an object according to their own ideas. III quarter After children have mastered the formation of a ball, cylinder, disk, they can move on to depicting objects consisting of several parts. Children make an airplane, a snowman, a tower of balls, rings or disks, a tumbler bear, a tumbler doll, a tumbler bunny and a bird. It is still difficult for children in this group to create objects from a large number of parts, to place the parts in the required structural order, so it should be suggested to fashion a snowman from only two balls: a large and a small one, and an airplane from three rolls of clay. Depicting these objects, even in such a simplified form, requires children to mentally strain and solve a number of rather complex problems. So, for example, sculpting a snowman involves conveying its structure, and for this you should sculpt two balls of different sizes, put a large one at the base and a small one on top. In addition, you need to press one part tightly to the other without disturbing their shape. Modeling a snowman is a preliminary work before the image of a tumbler doll, which consists of more parts - small spherical hands are added. The Tumbler Bear image is even more challenging, as children must make round ears by pinching them from the top ball representing the head. And if they are making a tumbler hare, then the ears can be made from columns, slightly flattened with your fingers. Modeling any object is the creation of an image that has a certain expressiveness, which consists of shape, correctly conveyed proportions, additional details and texture, therefore, starting from the younger group, children need to be introduced to the use of expressive means. For example, snowmen, tumbler dolls, bears, and hares will be much more expressive if children not only convey the shape and proportions, but also draw on their eyes, nose, and mouth with a stick. Children are familiar with the technique of applying these details, since they have already made decorations on molded gingerbreads and cookies in a similar way. Gradually, finger work is included in the modeling process, and children can be asked to fashion a gingerbread, a cake with decorations made by pinching the edges. IV quarter In the summer, the skills acquired by children over three quarters are consolidated. They can fashion cherries (clay balls held together with pine needles), berries, mushrooms, and some vegetables and fruits. Modeling training is structured so that by the time children enter the middle group they have the necessary techniques and skills to create an expressive image. Children 3-4 years old can, to a greater extent than children of the third year of life, sculpt according to their own plans: their life experience has become greater and they can more consciously use familiar themes and methods of sculpting. However, the children’s idea is still unstable, and when choosing a theme, they often deviate from it during the modeling process. This is explained by the fact that it can be difficult for a child to complete his plans due to ignorance of sculpting methods. Sometimes, during the sculpting process, the resulting figures evoke associations in the children with other familiar objects, and they give their products completely different names. For example, a child decided to portray a snowman, but the sculpted balls reminded him of an apple. As a result, the child sculpted several balls and called them “apples.” Or: a child, having decided to sculpt a rattle, began to connect the ball with a stick-handle, but, while fastening the parts, flattened the ball; the resulting product reminded him of a fungus, and the original idea was changed. At the first stages of training, the teacher can approve this work in order to support the child, but gradually, as they master the methods of modeling, they should direct the children to complete the initially planned topic and offer to remake the figurine. Gradually, under the influence of training, the children’s ideas become more stable, and, despite the fact that the shape of the object is still unclear, they can sculpt one or two figures on a independently conceived theme during one lesson.
Teaching methods and techniques
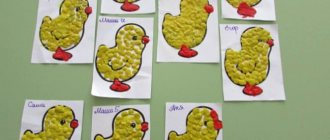
The successful conduct of classes, both as instructed by the teacher and as intended by the children, depends on the entire educational system, on what methods and techniques the teacher chose to teach the children how to depict objects in modeling. In the second younger group, tasks of a visual and technical nature are associated with further teaching children to distinguish and sculpt a ball, cylinder, disk, orientate in their size, and compose simple figures from them. The main place is given to information-receptive and reproductive methods. Children look at balls, balls, fruits, pencils and other familiar objects. It is important that the child holds them in his hands and feels the volume and size. To do this, before class, children are grouped into small groups of 5-6 people. You can suggest rolling the object between your palms, if it’s a ball, in a circular motion, if it’s a cylinder, with longitudinal movements. You can also examine objects consisting of several parts, such as a tumbler doll, in a similar way. In this case, the children’s attention is directed first to the shape of the main parts - the torso, head, and then to smaller ones that complement the image - the arms. Such active acquaintance with the shape of an object will not only lead the child to understand the form, but will also allow him to understand the structure of the doll. At the same time, the proportional relationships between the parts are being clarified: the body is the largest in size, the head is smaller than the body, and the arms are very small. In addition, the doll can be analyzed by the number of parts: one torso, one head and two arms. Almost all of these tasks were set in the first junior group; in the second younger group, children’s acquaintance with basic geometric bodies also includes an initial generalization: having mastered the shape of a ball or cylinder, the child will be able to see it in other objects in the future. For example, a ball - in an apple, orange, berries. On this basis, generalized skills are formed and the ability to act independently develops. For example, a round orange should be sculpted in the same way as an apple. The parts that make up the snowman and tumbler are also round and are molded in the same way. At the first modeling lessons, it is advisable to show image techniques and explain them. The kids sit facing the teacher, and he takes a lump of clay with one hand, places it on his open palm and makes the necessary movements. “I take a piece of clay,” says the teacher, “I put it on my palm and roll it like this: forward, back, forward, back. This is what the column will look like.” All actions of the teacher when demonstrating methods must be clear and understandable. To better consolidate a particular image method, you can suggest making the necessary movements in the air before sculpting. Demonstration and explanation should take no more than 3-4 minutes. Education of children in the second youngest group (also children from 2 to 3 years old) should include the development of children's independence. Therefore, in cases where children are familiar with modeling techniques, they should not be shown them again. A good result from the lesson can only be achieved if the teacher is able to interest the children in the upcoming modeling. To do this, you can play on the theme of the lesson by telling the children that they will make gingerbread cookies for dolls, or invite the sculpted tumbler doll to give a small flag in his hand. If the children sculpted chickens, you can put them all on a green sheet of paper depicting a meadow, or place them near the hen that the teacher sculpted in advance. Playful situations lead to children’s better understanding of the image they are creating, and this is very important, since the main goal is to teach children to create an expressive image in modeling, using different means. Interest in the image evokes positive emotions in the children throughout the entire lesson: they express this through actions, facial expressions, laughter, and after the lesson they remember how they sculpted. Analysis of children's work at the end of the lesson is a very important moment in the learning process, but, as in the first junior group, it is mainly aimed not at the quality of individual images, but at the overall result. However, it is already possible for some children to point out certain shortcomings. For example, children sculpted an object consisting of several parts and had to tightly connect the parts by pressing them together. Some of the children did not succeed, and the work fell into pieces. The teacher can turn to the child or all the children and say that the parts need to be connected firmly, pressing one tightly against the other. You can immediately invite the child to correct his mistake, and if the child finds it difficult, then help him. Consequently, all teaching techniques that the teacher uses are aimed at developing children’s mental activity and independence in using a variety of modeling methods.
“Methodology for teaching visual arts and design,” ed. N.P. Sakulina, T.S. Komarova; M., 1979
OCR Detskiysad.Ru