NOD "Russian folk sundress"
Summary of an open lesson on artistic creativity using children's design technology:
“Russian folk sundress” (senior group).
Target:
introduce children to Russian folk costume.
Tasks:
— To develop in children the desire to draw a pattern, arranging it rhythmically, to combine colors beautifully, to place the pattern on a given shape, to develop visual attention, to teach how to draw a pattern.
— Continue to develop respect for the traditions of the Russian people, introduce children to the history of Russian clothing, the peculiarities of the appearance of Russian folk costume.
— Continue to introduce ornaments in Russian folk costume.
— Practice the technique of working with a brush: the tip of the bristles, cotton swabs.
— Form aesthetic taste, develop creative imagination.
- Foster love and respect for your homeland.
Preliminary work:
1. Examination of illustrations “Russian folk costume”;
2.N NOD “Russian folk costume”;
3. Conversations on the topic “Clothes of our ancestors.”
4. Didactic game “Dress the doll in Russian folk costume.”
Material and equipment:
contours of the image of a sundress, presentation “Russian folk costume”, brushes, cotton swabs, gouache, rags, samples of embroidery patterns of sundresses, a doll in a Russian folk costume.
NNOD move:
Educator:
Educator: - Guys, let's smile at our friends, all the guests, give everyone the warmth of our smiles and hearts, so that everyone can feel joyful, bright, and comfortable here.
Educator
: Guys, I came to the nursery today and they gave me this. (there is also an address written on it) What is this?
Children's answers: (chest).
Educator: That's right guys, this is a chest in which clothes used to be stored. Let's see what's there. Open the chest, see the letter here.
Educator
: People used to dress differently than we do now.
Dear Guys ! Russian beauties write to you. We wanted to go to the fair, where, according to tradition, girls wear the most elegant, beautiful clothes. And when we took out our sundresses we saw that all the patterns on them had disappeared. Guys, we ask you to help us get to the fair. We will be very grateful to you. Guys, we will help Russian beauties get to the fair.
Children's answers.
(yes we will help)
Educator
: How can we help, return the patterns?
Children's answers
(Draw, cut and paste, embroider, sculpt from plasticine.)
Educator:
Guys, do you think girls used to dress the same way as they do now or differently?
Children's answers:
in another way, their clothes were different and they decorated their clothes with other patterns.
Educator
:I want to show you how Russian beauties used to dress. (presentation) The clothes were loose, long and unusually beautiful. It was sewn from linen fabric.
Aspects of drawing on the topic “Doll in Russian folk costume” in the senior group of preschool educational institutions
Preschoolers try to depict anthropomorphic objects from an early age. At first these are primitive works according to the principle “Stick, stick, cucumber, here comes the little man!” However, for development to go further, systematic work by the teacher in this direction is necessary. Learning the art of drawing a portrait is inextricably linked with the development of perception and imagination. The teacher must find techniques that will awaken children's interest in the image of a person.
Of course, preschoolers are frightened by the task of drawing a person because they are afraid that they will not succeed. The teacher’s task is to overcome this fear and replace it with a pleasant creative process. It is ideal to start the image not with a human figure, but with something similar to it. So, in the middle level, the guys are happy to draw a matryoshka doll and a snowman. They know well what parts these objects are made of and learn to depict a face. Next, we suggest drawing the Snow Maiden in a wide fur coat and with her hands.
In the older group, a detailed acquaintance with the portrait takes place; children learn the proportions of the face, ways of conveying the character and mood of a person. They draw themselves, parents, friends, fairy-tale characters.
In the preparatory group, children improve their ability to depict anthropomorphic creatures from life and from memory. Children aged 6–7 years are already good at noticing the characteristic features of objects and objects and conveying them in artistic images. At this age, during a drawing lesson, preschoolers are offered such a complex but interesting topic as “A doll in a national costume.” As a rule, this is drawing from life or based on illustrations. Note that the guys are not portraying a person, but a doll. This makes the work a little easier, since the proportions of the body and face structure here will not be so strict: for example, the head can be large, as well as the eyes, mouth, and palms.
When conducting this lesson, the teacher should focus on examining the doll in appropriate clothing. The shape of the sundress (if it is a Russian national costume), shirt, headdress, and shoes is discussed in detail. The teacher also focuses on the location of the arms, legs, and head shape. The doll's head in the picture can be oval or round. To depict a face, children must visually (or with a simple pencil) divide it into three parts: forehead, eyes and nose, lips and chin. The teacher can remind the children how eyes are drawn (draw them on the board), remind them that the nose can only be indicated by its tip (nostrils or a short line).
Sometimes children are offered a schematic drawing of a doll: using a circle (head) and several lines (body parts). This diagram is then outlined with missing elements, including clothing. Another option is to draw with ovals or arcs.
Step-by-step image
In the preparatory group, it is especially important to give children the opportunity to show creative initiative, creative imagination, and encourage their independent choice of color schemes for drawings. So, for example, the guys independently choose the color and pattern of the Russian beauty’s sundress, as well as her kokoshnik. Note that at this age, preschoolers already know a lot of shades, such as lemon, sand, light green, etc.
An important aspect of the preparatory group lesson is the analysis of finished work. By looking at their drawings, children learn to see their strengths and weaknesses. Together with the teacher, the children discuss what can be done better than adding to the composition.
Materials used and base
In the preparatory group, the range of materials with which children can work in the process of visual arts is expanding. Their combination in one drawing helps to create an expressive image. Since the image of a doll in a national costume requires detailed drawing, it is advisable to additionally use felt-tip pens or gel pens when working primarily with paints (watercolor or gouache) or colored pencils. Using these tools, you can designate facial features or intricate patterns on a sundress and kokoshnik.
An image object such as a doll requires a preliminary sketch in pencil. This is especially true when working with paints. As for the eraser, which is sometimes offered to preschoolers in the preparatory group, it is better not to give it, since children often use it irrationally and spoil the drawing.
As a basis for drawing a doll in a national costume, the teacher offers the children sheets of standard size paper. When painting with paints, they are pre-tinted in pastel colors. By working with colored pencils, children can complete the composition with a suitable background.
Techniques and drawing techniques that should be used when drawing a doll in a national costume in the preparatory group
In the preparatory group, imaging techniques are further improved. Hand movements become more free and accurate, smooth and rhythmic.
A simple pencil sketch is made with fairly quick hand movements, using a light, unbroken line (to make it easy to correct inaccuracies). By the way, it will be useful if the child completes several test sketches on the draft.
When drawing with a pencil, children practice smoothly turning their hand - this is necessary to depict rounded lines. Preschoolers learn to draw long lines without breaking them and also to depict large shapes. Small details (facial features, patterns on a sundress) are drawn using short lines and strokes.
Similarly, different ways of working with a brush (all bristles and tip) are improved when painting with gouache or watercolor. Preschoolers develop technical skills - they learn to mix paints to create interesting shades.
Additional types of visual activities used when drawing a doll in a national costume in the preparatory group, the relevance of an individual approach
In the preparatory group, the developmental characteristics of children are already clearly visible; some preschoolers have clearly expressed abilities and interest in visual arts. Such children, without a doubt, need to be encouraged, to further stimulate their desire for artistic creativity. One way is to invite them to diversify the composition with additional applicative or plasticine elements.
For example, a sundress or kokoshnik of a Russian beauty can be decorated with plasticine elements (thin ornate flagella or small balls) or shiny sequins can be glued on.
Drawing can be combined with applique, especially if we are talking about a collective composition: the drawn figures of young ladies are painted, cut out, supplemented with applique details and pasted onto the general background.
Drawing with applique elements
Text of the book “Drawing with children 5-6 years old. Class notes"
Lesson 14. Autumn trees (Drawing with gouache)
Program content.
Continue to introduce different types of trees. Continue learning to draw two large trees of different shapes from memory. Learn to draw a trunk with diverging branches, write the drawing on a sheet of paper. Learn to draw tree leaves in different ways: by dipping, poking with a hard semi-dry brush, using spots. Practice mixing paints to get the desired color. Continue to learn to understand and analyze the content of the poem.
Demonstration material.
Subject pictures of different trees (oak, maple, aspen, rowan bush).
Handout.
Sheets of yellow paper, simple pencils, brushes, gouache, palettes, jars of water, rags.
Progress of the lesson
Beforehand, while walking with your children, look at the autumn trees.
Read M. Sadovsky’s poem “Autumn” to the children:
The birches unbraided their braids, the maples clapped their hands, the cold winds came, and the poplars were trampled. The willows by the pond drooped, the aspen trees began to tremble, the oak trees, always huge, seemed to have become smaller. Everything became quiet, shrank, drooped, turned yellow. Only the beautiful Christmas tree has become prettier for winter.
Ask the children:
– What time of year is described in the poem? (Autumn.)
- Why do you think so?
– What trees are listed in the poem?
Look at images of some trees with your children, pay attention to the different shapes of the trunks - they can be thin and thick, straight and curved, low and high; on the crown of trees - spreading or raised up; on the color of the leaves - some trees remain green for a long time, on others the leaves are bright red, on others the foliage is yellow or orange, etc.
Invite the children to draw on a sheet of paper with a simple pencil the trunks of two trees, different in structure. You need to paint over the tree trunks with gouache and draw the branches with the tip of the brush. And on the branches in different ways - by dipping, poking with a hard semi-dry brush or with spots (with the tip of the brush) - draw a multi-colored crown (green, red, yellow, orange).
Encourage the children to add the sky, clouds, and grass to the picture.
Topic of the week: “Our little brothers”
Lesson 15. Hedgehog (Imprint with crumpled paper)
Program content.
Learn to display the texture features of the depicted object. Develop imaginative thinking when solving riddles.
Handout.
Sheets of white cardboard, saucers with gray gouache diluted with water, crumpling paper, gouache, thin brushes, rags, jars of water.
Progress of the lesson
Give the guys a riddle:
Here are the needles and pins crawling out from under the bench. They look at me, they want milk. (Hedgehog)
Invite the children to draw a hedgehog in an unusual way - with a lump of crumpled paper.
Show how to crumple up a piece of paper, place the resulting lump in a saucer of gray paint and apply it several times in the center of the cardboard, creating a large “spiky” circle. When the paint dries, you need to finish painting a triangle-shaped muzzle and oval paws with a brush. You can “attach” mushrooms, apples, and autumn leaves to the back of the hedgehog. Draw the sky, grass, bushes, stumps, mushrooms, etc. around. Lesson 16. Squirrel (Drawing with sanguine)
Program content.
Introduce children to a new material - sanguine (a brown stick made from clay). Develop light, continuous movements when drawing with sanguine, shading (smearing) the contours to convey the animal’s fur. Teach children to depict animals using graphic techniques. Develop imaginative thinking when solving riddles.
Handout.
Half sheets of watercolor paper, sanguine, cotton swabs (for shading), napkins (place under your right hand).
Progress of the lesson
Introduce the children to a new material - a brown stick - sanguine. Tell the children that this crayon breaks easily, so they need to draw easily, without pressing. Give the children sheets of watercolor paper and encourage them to draw a few light lines with sanguine and then shade them with a cotton swab.
Give the children a riddle: Who deftly jumps through the Christmas trees and flies up into the oak trees? Who hides nuts in a hollow and dries mushrooms for the winter? (Squirrel)
Offer to draw the outline of a squirrel in sanguine (in profile). It is advisable to place a napkin under the right hand. Show the children how to draw a round head with a pointed muzzle, an oval body, front and hind legs, and a curved tail using smooth lines. To convey a fluffy fur coat, shade the contours with a cotton swab. There is no need to paint over the squirrel; the white background should show through.
At the bottom, you can draw grass with strokes, if there is space left - the silhouette of a tree.
To prevent the image from being erased or smeared, it must be sprayed with hairspray.
Ask if the children liked drawing with sanguine.
Topic of the week: “In the kitchen”
Lesson 17. Gzhel cup (Gouache painting)
Program content.
Introduce children to Gzhel. Learn to highlight the characteristic features of Gzhel painting, decorate the border of a cup with simple elements of painting (straight and wavy lines of varying thickness, dots). Continue learning how to mix blue and white paint to create a blue color.
Demonstration material.
Ceramic dishes of Gzhel masters (cups, saucers, jugs, vases, teapots, trays), samples of elements of Gzhel painting. Handout. Cardboard cup templates, white and blue gouache, thin brushes, palettes, jars of water, rags.
Progress of the lesson
Tell your children about Gzhel: for a long time in the village of Gzhel near Moscow they have been creating pottery and toys from clay, which are painted with blue paint on a white background.
Examine the patterns on the Gzhel cup with your children. Pay attention to the border: it can consist of repeating combinations of lines, dots, strokes, etc. The border is located at the top and bottom of the product. The central part usually depicts the simplest flowers from “droplets”, “strokes” and “curls”.
Show children an example of the rim patterns on a separate cup template. Please pay attention to the children that Gzhel painting is painted directly with a brush, without a preliminary pencil sketch.
Remember with your children how to get the color blue.
Give the kids cup templates and suggest, based on the sample, to decorate the borders with Gzhel painting. Lesson 18. Tea set (Drawing with gouache)
Program content.
Learn to draw dishes, come up with patterns yourself and decorate dishes in the same style. Strengthen the ability to place pattern elements on the surface of an object. Develop aesthetic perception, fantasy, imagination and sense of color. Cultivate compassion and kindness.
Demonstration material.
Porcelain set of cup and saucer, decorated in the same style.
Handout.
Landscape sheets, gouache, brushes, palettes, jars of water, rags.
Progress of the lesson
Read the poem “Advice” by R. Sefa to the children:
Cup and saucer quarreled. Now They will break, Soon In the kitchen, on the shelf, There will be fragments. And don’t quarrel in vain - It’s Very Dangerous.
Ask the children:
– Why do you think the cup and saucer quarreled? (Perhaps they began to argue about which of them was more necessary and beautiful.)
Together with your children, look at an identically designed porcelain cup and saucer. Please pay attention to the children that all the dishes in the service should have the same pattern and the same colors. Invite the children to draw their own cup and saucer and, so that they do not quarrel, decorate them the same way. Then the cup and saucer will not argue.
Children need to draw the silhouette of a cup and a round saucer and decorate it in the same style.
Topic of the week: “In the room”
Lesson 19. Carpet (Decorative drawing with felt-tip pens)
Program content.
Learn to draw patterns on the carpet in the form of long, non-touching lines. To develop children's aesthetic perception, fantasy and imagination. Cultivate a love for Russian songs. Practice combining colors. Develop artistic taste.
Handout.
Halves of album sheets, simple pencils, felt-tip pens.
Progress of the lesson
Read the Russian song to the children:
Our Katya embroidered three carpets, three patterned ones. I embroidered and embroidered, thought and thought. “Who should I give carpets to, Who should I please? I will give the first carpet to my dear father. And the second carpet is for my dear mother. And I’ll give the third one to my dear, beloved Brother.”
Ask the children who they would like to “embroider” a rug for. Offer to make a beautiful carpet.
On a landscape sheet, children draw a rectangular or square carpet with a simple pencil and draw different colored lines on it with felt-tip pens: wavy, zigzag, looping, etc. The edges of the carpet can be decorated with a fringe of short or wavy lines. It is advisable to use markers of different colors that match each other.
You can invite children to paint a blanket of multi-colored scraps with gouache paints.
Lesson 20. Patterns on a towel (Decorative drawing with colored pencils)
Program content.
Introduce children to the history of decorating clothes and linen with embroidery. Show the beauty of embroidered items made from geometric elements. Learn to compose and arrange a symmetrical geometric pattern.
Demonstration material.
Images of Russian folk clothing and embroidery on towels, tablecloths, napkins, sheets; samples of decoration with geometric embroidery elements.
Handout.
Paper rectangles 22x8 cm, colored pencils.
Progress of the lesson
With your children, look at illustrations of embroidery on Russian folk clothing, towels, tablecloths, napkins, and sheets. Tell the kids that before they didn’t know how to make such colorful towels as they do now. The fabric was mostly white. Therefore, women decorated their clothes and underwear with embroidery (show the children examples of decoration with geometric elements). Together with the children, determine what patterns could be embroidered: straight and wavy lines, crosses, squares, triangles, circles. Mostly red colors were used, less often yellow, green and blue. Consider the towel - symmetrical embroidery on it is placed at the ends, on both sides.
Give the children rectangles and encourage them to come up with their own symmetrical patterns and place them on the edges of the towel. Samples of geometric embroidery should be in front of children's eyes.
Theme of the week: “My wardrobe”
Lesson 21. Hat and mittens (Decorative painting with gouache)
Program content.
Learn to draw items of clothing. Continue to teach yourself how to come up with patterns and decorate clothes in the same style and color. Develop a sense of composition and rhythm.
Demonstration material.
Soft toys (fox, wolf, hare).
Handout.
Landscape sheets, simple pencils, gouache, brushes, palettes, jars of water, rags.
Progress of the lesson
Play out the situation that animals have come to you. They are always in the cold, and their paws and heads are cold. Invite the children to draw two mittens and a hat for them and decorate them so that it is clear that this is a set. Now the animals will not freeze.
The children draw their own hats and mittens, come up with patterns in the same style and use them to decorate clothes for forest guests.
Lesson 22. Alyonushka in a sundress (Decorative drawing with colored pencils)
Program content.
Continue to introduce children to the history of decorating clothes and linen with embroidery. Show the beauty of embroidered products. Learn to convey the characteristic features of Russian folk clothing - sundress and shirt. Develop respect for folk culture.
Demonstration material.
Colorfully illustrated book “Sister Alyonushka and Brother Ivanushka” (“The Frog Princess”, reproduction of V. Vasnetsov’s painting “Alyonushka”), Images of Russian folk clothing.
Handout.
Album sheets with a drawn girl in a shirt and sundress, with a wide ribbon on her head; colour pencils.
Progress of the lesson
Look at illustrations for fairy tales with your children. Pay attention to how the girls used to dress: in white shirts and long sleeveless sundresses that widened at the bottom. The collars and bottom of the sleeves of the shirts were decorated with embroidery. Sundresses in the center and at the bottom - with a pattern, buttons, ribbons, beads. A red ribbon decorated with geometric patterns was tied around the head. Usually girls wore blue sundresses, and red ones only on holidays.
Give the children album sheets with a drawing of a girl and ask them to come up with and place a red pattern on the sleeves and collar of the shirt.
Suggest placing an ornament in the center and along the hem of the sundress. Ask the sundress itself to be painted red, and the ribbon on the head to also be decorated with a geometric pattern.
Theme of the week: “Professions”
Lesson 23. Color spectrum (Drawing with gouache)
Program content.
Form an idea of how you can get orange, green, purple and brown colors. Learn to mix basic paints and create new colors. Actively use the words: artist, landscape, palette. Develop an interest in working with paints.
Demonstration material.
A doll dressed as an artist, a sketch of a landscape drawn in pencil.
Handout.
Palettes-ovals made of thick cardboard according to the number of children with the outlines of seven circles drawn on them; red, yellow and blue gouache, brushes, jars of water, rags.
Progress of the lesson
To find out who is coming to visit, ask the children a riddle:
The colorful sisters are bored without water. Uncle is long and thin. He carries water with his beard. And the sisters together with him will draw a house and smoke. (Brush and paints)
Ask the children:
– Who paints pictures with brushes and paints? (Children, artists.)
Play up the situation that an artist (a doll in disguise) comes to you. He brought an unfinished landscape.
“Guess,” says the guest, “where I painted this picture?” (Depending on the content of the landscape, children say - in the forest (or at sea, in the mountains, etc.).)
– Is my painting beautiful? - asks the artist. (Beautiful, but underdrawn.)
“That’s right,” says the artist. “I’m almost all out of paint.” Only red, yellow and blue gouache remained. But I need other colors too. Help me get other colors.
The teacher distributes palettes and gouache paints of three primary colors to the children. Children paint the first three circles with the available colors. And the fourth circle is painted with blue paint, and yellow on top - it turns out green. Ask the children how the color green turned out. The fifth circle is red, and yellow paint on top - it will turn out orange. Ask the children how the color orange came about. On the sixth circle, children mix red and blue gouache to create a purple color. Find out how the purple color turned out.
Present the children with a problem situation: how to get brown to depict tree trunks? (You need to mix all three primary colors on the seventh circle.)
In parting, the artist thanks the children:
– Thank you guys, now I can finish my picture.
In their free time, children can help the artist finish his landscape.
Lesson 24. Warm and cold tones (Drawing with gouache)
Program content.
Form an idea of cold and warm tones, teach them to distinguish between them. Practice mixing paints and creating new colors. Learn to draw a picture using a cold or warm range of colors. Continue to use the words: “artist”, “landscape”, “palette”, “cold and warm tones”.
Demonstration material.
A doll dressed as an artist.
Handout.
One and a half album sheets, gouache, brushes, palettes, jars of water, rags.
Progress of the lesson
Play up the situation that an artist has come to your class again.
Give the children half of the album sheets and let the artist conduct this activity.
The guest invites the children to draw three yellow, orange and red circles on the left half of the sheet, and blue, indigo and purple circles on the right half. The artist asks the children what the colors on one side remind them of (sun, fire, summer, trees, berries, etc.). That's right, these colors are summer, which means they are warm.
The doll asks the children what they can draw using the colors on the right side (snow, ice, puddles, rain, etc.). These colors resemble cold and are therefore called cold.
The artist invites children to draw two green circles between the circles with cold and warm tones. Asks the guys to think about whether they are cold or warm. To solve the problem, you need to add warm yellow paint to the first green circle, then the green color will turn into light green (this is the color of grass and leaves on trees), which means it is warm.
Add blue paint to the second green circle to create a dark green color reminiscent of a cold sea. This means dark green is a cool color.
The guest reads a poem by G. Sapgir to the children:
The grass has green words, And they are barely audible. And the wind has blue words, And they make your head spin. And the sun has so many clear words, Red songs, Golden poems! Today I call all my friends to listen to the sun, wind and grass.
The artist hands out album sheets to the children and invites them to draw a picture using either warm or cool tones. Or you can divide the sheet in half and draw a warm pattern on one side and a cold one on the other.
Theme of the week: “Zoo”
Lesson 25. Elephant (Palm drawing)
Program content.
Continue to introduce the technique of palm printing: dip your entire palm in gouache and make an imprint. Develop imagination, teach to see a new image in a familiar object. Strengthen the ability to complement the image with details using a brush.
Handout.
Half album sheets, wide bowls with blue gouache diluted with water, gouache, brushes, jars of water, palettes, rags.
Progress of the lesson
Read B. Zakhoder’s poem “Elephant” to the children:
More than anyone else on land, he is a very, very kind elephant. Apparently, even among animals, the one who is kindest is greater.
Offer to look at your palm and say if it looks like an elephant. (The palm will be the body, the thumb will be the trunk, and the remaining fingers will be the paws.)
Children need to dip the inside of their palm into a bowl of gouache and place their palm with outstretched fingers looking down on a landscape sheet (for convenience, you can temporarily place the sheet “upside down”).
When the palm print dries, you need to paint a thin tail and a long trunk with a brush with blue paint, and highlight the ears and eyes with blue paint. You can give the elephant a carrot or banana in its trunk. Lesson 26. Children in a cage (Drawing with wax crayons and watercolors)
Program content.
Learn to draw animals with a simple pencil, conveying their characteristic features, practice conveying shape and proportions. Practice coloring an image with wax crayons, making strokes in one direction, without gaps, using different pressure on the chalk. Continue to strengthen the ability to tint a sheet of paper with watercolors.
Demonstration material.
Pictures of animals (giraffe, tiger cub, zebra, etc.).
Handout.
Landscape sheets, simple pencils, wax crayons, watercolor paints, brushes, jars of water, palettes, rags.
Progress of the lesson
Read to the children several poems by S. Marshak from the “Children in a Cage” series, while simultaneously posting pictures of these animals:
Giraffe
Picking flowers is easy and simple for small children, but for those who are so tall, it is not easy to pick a flower!
Tiger cub
Hey, don't stand too close - I'm a tiger cub, not a pussy!
Zebras
Striped horses, African horses, It’s good for you to play hide and seek in the meadow among the grass!
With your children, look again at the pictures of a giraffe, zebra, tiger and other animals. Note that all animals have a body, which can be depicted as an oval. Head with an elongated muzzle. The giraffe has a long, thin neck, the zebra has a smaller and wider neck, and the tiger has a short neck. All animals have four legs. The giraffe has long paws, the zebra has shorter paws, and the tiger has powerful, wide paws. Highlight the features of the tails: the giraffe and zebra have a tassel at the end, the tiger has a thick rope. Talk with children about the colors of animals. Pay attention to the children that the zebra has a mane.
Show the children the sequence of one of these animals on a separate sheet of paper. You should start with an oval body, then draw in the head, neck, legs and tail. Offer to draw one or two animals as desired with a simple pencil, following the same sequence, and then paint over them with wax crayons.
It is better to make the background with watercolors, drawing a horizon line and painting the lower part with green (grass), and the upper part with blue (sky).
Of course, if a child wants to draw other zoo inhabitants, they should under no circumstances be prohibited from doing so.
Theme of the week: “Theater”
Lesson 27. Three bears (Drawing with sanguine)
Program content.
Continue to introduce children to sanguine. Learn to draw sanguine in chalk and shade lines. Continue practicing graphically depicting animals standing on their hind legs. Strengthen the ability to write an image on a sheet of paper and arrange animals in the desired sequence.
Handout.
Watercolor paper, sanguine, cotton swabs (for shading), napkins (place under your right hand).
Progress of the lesson
Read V. Stepanov’s riddle to the children and ask them to guess what kind of fairy tale it is:
Cups three and three beds. There are also three chairs, look, and there are actually exactly three residents living here. As you see, it’s immediately clear: It’s dangerous to visit them. Run away quickly, little sister. Fly out the window like a bird. Tale by L.H. Tolstoy's "Three Bears"
Remember that Papa Bear was the biggest, Mama Bear was smaller, and their son was the smallest.
Offer to draw with sanguine the contours of three bears standing on their hind legs. Remind the children that sanguine breaks easily, so they need to draw with it easily, without pressure. It is advisable to place a napkin under the fist of your right hand. Show the children how to first draw a big bear with smooth lines - a round head, an oval body, elongated paws. To convey the bear's fluffy fur coat, shade the contours with a cotton swab. There is no need to paint over the bear; the paper should be transparent.
Children first need to think about where and what kind of bear will be drawn.
Below, you can draw grass with strokes, if there is space left - silhouettes of trees.
To prevent the image from being erased, you need to spray it with hairspray.
Topic: Getting to know Dunyasha's costume. (2nd junior group)
Topic: Getting to know Dunyasha's costume. (2nd junior group)
Goal: to introduce children to Russian folk costume. Continue getting to know the doll Dunyasha. Teach children to choose from a variety of clothes what belongs to Russian folk costume. Through names, bring children to the understanding that people of different nationalities live nearby. Each nation has its own poems, fairy tales, songs, and costumes. Clarify with your children that the best gift to each other is a smile. Develop emotional responsiveness. Continue to teach children to alternate geometric shapes to create a pattern on a strip. Cultivate a friendly attitude towards each other, a desire to help.
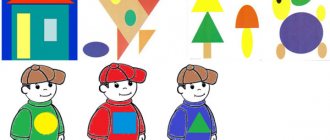
Material: Dunyasha doll, set (Russian folk costume) for flannelgraph, box with slots, illustrations for fairy tales, sundress, decorations for the sundress in the form of geometric shapes (red - circle, yellow - square) for each child, game “Assemble a suit” ", audio cassette with Russian folk music.
Preliminary work: excursion to the museum of folk antiquities of the preschool educational institution, acquaintance with Russian folk nursery rhymes, memorizing the nursery rhyme “Grow your braid to the waist.”
Progress of the lesson:
Educator: - Guys, I see from your eyes and smiles that you are in a good mood today. Do you want me to guess why? Because you came to kindergarten and your friends met you here. Did you guess right? Children: - Yes. Educator: - Who are friends? How many friends can there be? Are you guys friendly? -Well done! Look what I have in my hands? (he shows a box with slots in which the picture is visible) - This is a box. Some friend, do you know whose box this is? - That’s right, this is Dunyasha’s box, and a fairy tale is hidden in it. What kind of fairy tale do you think this is? (children look at the picture through the slits) - Well done! This is the fairy tale "Spikelet". This is a Ukrainian folk tale. What Russian folk tales do you know? Why is the fairy tale called a folk tale? -That's right, because it was invented by the people. Tell me, who told us the fairy tale “Spikelet”? Whose favorite fairy tale is this? -Yes, Dunyasha told us this fairy tale when she came to visit us. What do you think, if Dunyasha’s box is here, then where is Dunyasha herself? Should we call her? (knock on the door, the teacher brings the doll to Dunyasha) - Hello Dunyasha. We are very glad to see you. -Guys, Dunya is also very happy to see us all. She liked it so much that she decided to come and visit us today. So that Dunya remembers our names, we will all play the game “What is your name?” (children stand in a circle, but do not hold hands) - I, Olga Pavlovna. I'm Russian. (he takes the hand of the child standing next to him. The children take turns saying their name and nationality, join hands, the last one takes Dunyashi, it turns out to be a circle) - We each have different names and they are all very beautiful. We also differ from each other in that we are of different nationalities, but we are all friends together. We hold hands and the warmth from our hands is transferred to each other, warming us. Now look at each other, smile. Our group became warm, light and joyful. -Sit down on the chairs. Dunyasha brought us something interesting. This is a book, maybe it contains fairy tales? (voice shows the book “Russian folk costume”) - This book tells about Dunyasha’s clothes (voice shows the book to the children) Dunya, since she is Russian, has a Russian folk costume. This is a shirt, it is wide, decorated with a pattern along the edges of the sleeves and at the collar. (show) - Let’s repeat it all together - this is a shirt. -This is a sundress. (show) It is decorated with beautiful braid. Let's repeat the sundress together. -Dunyasha wears a kokoshnik (display) on her head, it is decorated with beautiful beads. Let's repeat - kokoshnik. -On the feet - bast shoes (show) (each time the teacher attaches to the flannelgraph: shirt, sundress, kokoshnik, bast shoes) -All together this is a Russian folk costume. Are you and I now dressing like Dunyasha? We don't dress like that. This is how they dressed before. People of different nationalities live nearby, each nation has its own songs, poems, games, costumes, and fairy tales. -And what a long braid Dunyasha has. Our girls also have braids, and when we comb them, we remember the nursery rhyme “Grow your braids to your waist.” -Dunyasha, do you want to listen to a nursery rhyme? (child reads a nursery rhyme) Grow your braid, don’t lose a hair to your waist. Grow the scarf to the toes, all the hairs in a row. Grow your braid, don’t get confused, listen to Mom Dunya. -Well done! This is the nursery rhyme about the braid that our children know. Did you like it? Our children really want to play with you. Do you want? Then stand in a circle.
Physical education minute. This is such a wonderful house, there are many neighbors in it. Here is a Kazakh, and here is an Avarka, here is a Russian and an Armenian. In this glorious house you need to live very friendly with everyone. Do not offend anyone, respect all neighbors. - Guys, did Dunyasha bring us something else, let’s see what it is? (he shows the bag and takes out a real sundress from it) Dunyasha has a request for us. She was invited to visit, but here’s the problem. She asked to sew a sundress for her, the dressmaker sewed it, but she got sick and did not have time to decorate it. Dunyasha really asks you to help her. Shall we help? -Here is the sundress, the dressmaker only managed to sew on a white ribbon, which is called the prince’s ribbon, it needs to be decorated. Here in the box are the decorations. (shows the children a red circle, a yellow square) Now you and I will decorate the sundress. (he puts the sundress on the girl) -I’ll attach the square first, and then we’ll attach the circle, which shape will I attach next? (square) (children alternately attach a circle, a square, which are attached to the white tape with Velcro) - Now you and I will sit on the chairs and see how great we are, how we decorated the sundress. (the teacher asks the girl in a sundress: spin around, show us how beautiful and elegant the sundress has become). Do you think Dunyasha can go visit now? (he takes off the sundress from the girl and gives it to Dunyasha) - How did you and I help Dunyasha? Dunya says “Thank you” to us. We are so great! We are real friends, we helped together so much. -Are you glad that you helped Dunya? -For our help, Dunya brought us a gift (he shows the children the box) This is the game “Assemble Dunyasha’s costume.” -Today we got acquainted with Russian folk costume. So we can play this game. -This concludes our lesson. I am very pleased with you, you are great!
Get text
MAGAZINE Preschooler.RF
Municipal budgetary preschool educational institution kindergarten No. 3 “Snezhinka” Pushkinsky municipal districtSummary of direct organizational activities, educational field “Artistic Creativity”.
Painting of planar images in the second junior group on the topic: “Russian folk toy - matryoshka.”
Compiled by teacher: Dyeva Olesya Valerievna March 2014.
TASKS
Educational:
- develop interest in folk toys;
- develop creative and cognitive abilities, imagination, and the ability to decorate a matryoshka doll.
Educational:
— to implement the idea of active education of a citizen of Russia, patriotism of the small homeland;
— instill interest in the culture of the Russian people through familiarity with folk art.
Educational:
- introduce the folk toy - matryoshka;
- form a concept of what it is made of, how it is decorated;
-Expand words knowledge ;
- strengthen technical skills and abilities.
MATERIAL: painted nesting dolls - Semyonovsky, Zagorsk; illustrations from the “Collection of nesting dolls”; a flat image for each child, paints, brushes, water, a blank of an unpainted nesting doll (you can use finger paints).
PROGRESS OF DIRECTLY ORGANIZED EDUCATIONAL ACTIVITIES
Educator.
Guys, look at my chest! My grandmother gave it to me. What do you think could be there? (CHILDREN'S SUGGESTIONS) Do you want to take a look? -Oh, these nesting dolls are so beautiful!
Blow the pipes, beat the spoons!
The nesting dolls came to visit us.
Wooden nesting dolls,
The matryoshkas are rosy!
He takes out a large nesting doll, everyone looks at it carefully. The matryoshka greets the children and reveals to them his secret (the teacher speaks on behalf of the nesting doll).
Matryoshka dolls on the window
Under a bright sundress,
And the whole family is in a nesting doll,
Like in a wooden house.
Each child receives one nesting doll.
-Why do you think these nesting dolls were made?
- It’s right that children can play, have fun, and gain intelligence.
-What do you think these doll toys were made of?
- Of course, made of wood. The master took a wooden block and cut off the excess with a knife, rounding it off. The matryoshka was decorated with paints, painting a sundress, a dress, a scarf on it.
-Tell me why you liked the nesting dolls? (They are beautiful, elegant, bright, cheerful).
-What is the pattern on the sundress? (Leaves and flowers.)
The teacher takes out a blank matryoshka doll, not decorated with a pattern.
- Look at this nesting doll, they probably forgot to decorate it. What do you think its mood is?
-Let’s, guys, decorate her outfit, and she will also be cheerful. Each of you will come up with your own pattern and decorate the sundress for your matryoshka friend. (Hands out a flat image of a matryoshka doll on paper.)
Children can draw to the music “The moon is shining”, “Like under an apple tree”.
The guys begin to paint the image of the nesting doll. During the drawing, the teacher, if necessary or at the request of the child, guides and suggests technical issues.
Educator:
-What beautiful patterns they turned out! You all tried very hard. (Hides the little ones in a large nesting doll, says).
The mouse was met by girlfriends
And they hid in each other,
And which remains
I was scared the most.
They say goodbye to the nesting doll and the teacher puts the nesting doll in grandma’s chest.
Children look at each other's work and share their impressions.
The works are hung on display.
| Next > |