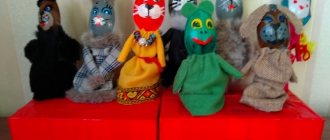
Felt doll
Will need
- Sketch of a puppet toy.
- Two sheets of felt, A4 size.
- Small pieces of colored felt.
- Thread and needle.
- Glue gun.
- A sheet of thin cardboard.
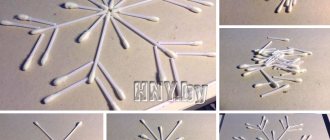
We start work by creating a pattern. To do this, draw the sketch onto a sheet of cardboard and cut it out. You will get the main pattern of the figure and individual small details: eyes, muzzle, palms, tummy, ears. The number of details depends on the choice of sketch of the puppet hero.
Then we transfer all the details onto felt. We select the color scheme according to our taste or the content of the fairy tale. The hare can be white, gray or pink, and the fox yellow or orange. If you are doing a craft with your child, let him choose what color the characters in your play will be.
We cut out the parts and pre-assemble the toy, placing all the parts in the places where they should be. If the result is satisfactory, we begin the final assembly. First, we make one main piece out of felt. We sew on all the parts that can be sewn. We sew with a buttonhole stitch. We glue small parts with a glue gun. We put all the parts together in accordance with the sketch.
If the toy has ears, we attach them last. To do this, we fold the two main parts with the right sides facing inward. We apply the ears in such a way that the edges of the part coincide with the edges of other parts, and the tips of the ears look inward. We sew all the details along the edge with a buttonhole stitch and turn the toy inside out. The glove puppet is ready, and the ears will stick out funny on the top of the head.
Materials for working with crafts
If you have disposable spoons, forks or any other plastic utensils lying around, you should not keep them until a future picnic or throw them away because they may not be useful. It’s better to sit and think about what you can do with disposable tableware. Simple crafts for kindergarten can become your child’s first masterpiece. And family members certainly won’t be bored with such an activity. In addition, you can keep the product with your own hands and use it as some additional element to the interior or give such a creation to your loved ones on their holiday. All you need is:
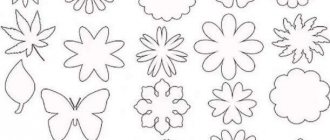
In addition to the above examples, you can make other crafts using your imagination. The easiest way is to make flowers from plastic spoons, but if you decide to make your own invented masterpiece, then you won’t have to look for a photo of a sample, and this is already harder. You can make it using ready-made templates, for example, a lake with one swan or a whole family of these wonderful birds. By the way, your imagination can be completely unpredictable, so turn your ideas into reality!
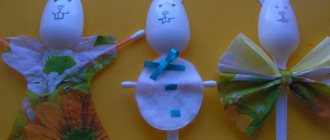
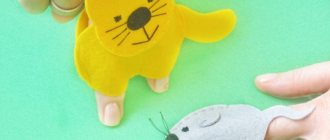
All the characters you see in the photo have one thing in common - they were created using plastic spoons. This one for creativity allows you to work wonders!
Tulips
The easiest way to make tulips. Especially if you are new to such experiments.
You will need:
- Plastic spoons (5 spoons for 1 product);
- Colored paper (corrugated);
- Glue, scissors;
- Green electrical tape;
- Cocktail tube.
Cut equal, even squares of colored paper. Wrap spoons in them and seal them so that they resemble tulip petals. Pre-cut the legs of the spoons.
Even a child can do what is described. Save all children's crafts (even unsuccessful ones) from plastic spoons: over time, you will be curious to track the progress of the little inventor.
What to stock up on and where to go next
There are a lot of ideas for making various crafts from plastic spoons. As a rule, most of these products will require basic elements: the spoons themselves, cardboard, glue, sometimes paints or colored paper, scissors.
You can start making crafts without worrying about where to “attach” the craft later - thanks to the convenience of the material itself, any product will be so cute and original that acquaintances, friends and relatives will be happy to receive such a gift.
In addition, such crafts are often used in everyday life, to decorate a house or a summer cottage. On a well-kept lawn or vegetable garden, crafts made as flowers are most often used - this way you can give the plantings a beautiful accent. And for the New Year holidays, plastic spoons will provide limitless scope for creativity.
Separately, it is worth noting those types of crafts that can be functional in nature and useful in the household. Perhaps this is a significant advantage for any craft, because usually the result of creative success does not find a place in the house and is safely forgotten or thrown away.
Interior decoration
To make these decorations look better, you need to purchase colored devices or paint them only with spray paint. This way there won’t be streaks left on the spoons from the brush. Below are described in detail 2 options that are easy to implement.
Sunflower mirror
This craft is suitable for decorating a kitchen, bathroom or nursery.
What materials and tools are needed:
- small round mirror (10-15 cm in diameter);
- thick cardboard (a box from under household appliances will do);
- pencil;
- scissors;
- glue gun;
- glue Moment;
- yellow and black spray paint;
- 80 white spoons or 16 black and 64 yellow;
- screwdriver.
Crafts from plastic spoons, forks - a mirror in the shape of a sunflower
Step-by-step instruction:
- Draw 2 circles on cardboard: 25-30 cm in diameter and 5-7 cm in diameter. Cut circles with scissors. Determine the center of the large circle and glue the small one to this place, then find the center of the small circle and glue the mirror evenly.
- Paint 16 spoons black and the rest yellow. If the dishes are already painted, then simply cut off all the handles under the base.
- With the concave side up, the black petals need to be glued to the cardboard with a glue gun so that the bases of the spoons fit into the gap under the mirror, which was formed due to the small cardboard circle.
- Glue all the yellow spoons in a circle in a checkerboard pattern so that they cover the gaps between the petals in the previous rows. The bases of each of them should not be visible.
To hang a mirror on the wall, you need to make a hole on the back side with a screwdriver, closer to the center. The cardboard is thicker in this area due to the small circle. Now you can “stick” the mirror onto the nail.
Clock for the kitchen or cafe
For this craft, disposable utensils do not need to be cut or deformed. It is the original shapes that will help you create a kitchen-themed watch.
Crafts from plastic spoons, forks - watches
What you will need:
- a small round watch with a flat frame around the dial;
- A4 office paper;
- compass;
- pencil;
- scissors;
- 10 disposable forks, 10 knives and 10 spoons;
- glue gun;
- a handful of small pasta in the shape of a wheel;
- spray paint.
How to design a watch:
- First of all, you need to protect the dial glass from glue and paint. Using a compass on paper, draw a circle equal to the diameter of the glass. Cut out and apply to the dial.
- Glue cutlery to the frame in a circle, alternating them (fork, knife, spoon).
- Glue the pasta in a circle, separating the handles of the cutlery from the glass.
- Hold a piece of paper and spray paint onto the clock.
It is important that all parts are well coated with paint, so 2 cans may be required
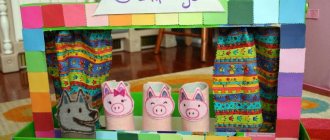
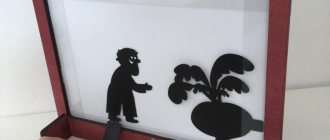
The first do-it-yourself puppet theater - printable templates
Traditional fabric dolls are more difficult to care for and are not suitable for all children. But any child can handle paper products. Place a cone with a picture on the finger, suitable for each child.
It is advisable to introduce the little ones to simpler fairy tales:
- Teremok.
- Kolobok.
- Chicken Ryaba.
- Turnip.
We will need:
- scissors;
- Printer;
- PVA glue.
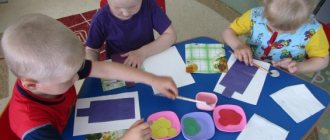
All templates must be printed, cut out and connected together. Fairy tale “Teremok”.
An audio tale will make the task of voicing paper characters easier. You will only need to carry out what you hear.
Flowerbed: how to make a basis for growing flowers
The simplest option for making a garden flower bed is to use a tire from a wheel. The result is a large flower bed in which you can plant flowering plants. To work, you will need a large number of small bottles of the same type, glue for plastic, and a tire from a wheel. Paint can also be useful if you want to change the color of the bottles.
The prepared wheel is installed in the desired location of the future flower bed or in the garden. The tire can be painted any color, or left black. Bottles are gradually glued to the top of the wheel, row by row. Toward the top, the throat of the flowerbed will be a little narrow, so you will need to properly pour the soil for future plants. If you don’t want to leave the bottles transparent, you can paint them in the chosen shade before work.