- What is an application?
- How is the application useful for a child?
- A little about the types of applications
- Applications made from colored paper for children. What paper is needed for work?
- Circle applique ideas
- A few more volumetric applications
- Applications made from colored paper using templates
- A few more themes for colored paper applique
In this article you will get acquainted with applique, its types and find tips on creating children's crafts and ideas for them.
What is an application?
Applique is one of the types of arts and crafts designed to decorate the objects around us. We first encounter it in childhood, when an ordinary sheet of paper falls into our hands. That’s when miracles begin, because applique for a child is a kind of exciting game, magic, where he can create images by cutting, tearing, applying or combining materials on a base - a background.
Star
A luxurious eight-pointed Christmas star can be made even without blanks and patterns. You will need squares of thick paper, a ruler, a pencil and scissors. You will only have to mark the diagonals and transverse folds; for density, you can press them with the tips of scissors so that the folds are expressive. Having made four cuts, we fold the rays.
After gluing, you need to squeeze the corners so that the star acquires volume. After this, we glue the two blanks at an angle so that the craft takes on its final form.
How is the application useful for a child?
Children in early childhood (from about 1 year old) begin to be interested in this type of activity. This is precisely one of the opportunities to develop a child’s fantasy and imagination, study colors and their combinations, as well as the shapes of objects, and develop fine motor skills. Applique classes encourage the development of a child’s thinking processes; he creates a whole from several parts and learns to divide the whole into elements. And, of course, such creativity contributes to the development of speech and spending time together.
By doing appliqué, a child masters the skills of working with paper, scissors and glue, becomes familiar with the properties of paper, learns to work with simple drawings and diagrams, reads symbols and creates a complete image.
Methodology for using templates
By working step by step with templates for paper crafts, children aged 6-8 years can accurately reproduce an exemplary composition.
With another approach, the child himself makes a choice among a large number of modules, cut out in the form of stripes, circles and other elements, creating unique color combinations.
Saving time is another factor that speaks in favor of using drawing or carved templates.
Elements that are difficult to perform independently (silhouette and perforated parts, drawings with polygons or strict requirements for sizes and proportions) allow you to create beautiful aesthetic works, which creates additional motivation for doing manual labor.
A little about the types of applications
By topic, the following types of applications can be distinguished:
- Subject - a simple type of application for children. An element is cut out of the material and glued to the base.
- Subject - the image no longer consists of one, but several links that make up an event or action in the background.
- Decorative - forms a repeating pattern that is used to decorate albums, frames and household items.
Paper is the main material for applique. However, in addition to it, you can use other materials, whatever your imagination allows: fabric, leather, multi-colored beads, seed beads, woolen threads, leaves, seeds, cereals and much more.
By color, the applique can be colored, black and white or single color.
Depending on the volume, flat and volumetric applications are distinguished.
Overhead, cut-off, silhouette, modular, ribbon... and this is not all types of applique!
And to understand how diverse this art technique is, it is enough to get acquainted with the most popular and interesting types of children's applications, examples of which are given below.
Fairy lights
Children can be involved in making a New Year's garland to decorate the classroom or school Christmas tree. What is difficult to do alone, children will do together. The main thing is that the sizes and general appearance of the segments that schoolchildren make are the same. This is the only way a set of crafts will look like a single whole. Colors and design details may vary. You can divide children into groups, each offering its own type of segment.
There are many options:
- Simple balls made from stapled circles or paper strips.
- Chains assembled from strips.
- Ornaments cut from a single sheet folded into an accordion.
- Stars, Christmas trees, snowflakes strung on threads, symbols of the coming year.
- Boxes folded using origami technique.
- Segments made of paper strips are ornaments using the quilling technique.
In kindergarten and elementary grades, it is important that the work be signed, even if the child has made at least one snowflake. From middle school, work can become a collective endeavor.
Applications made from colored paper for children
If you want to do any work, take into account that the proposed examples of applications have different levels of complexity and require different amounts of time.
For most crafts you will need:
- Colored paper
- Cardboard
- Glue
- Scissors
- Markers
What paper is needed for work
The beauty of the applique depends not only on carefully cutting out the parts and carefully gluing them to the background, but also on the materials used. Here are some tips for choosing paper for crafting:
- It is better to choose medium density sheets.
- Unlike gloss, fingerprints and glue marks will not be visible on matte paper.
- You can use thick matte paper made for printers.
- Textured paper focuses attention on the details of the craft.
- Foil sheets will make the applique or its details close to reality.
- When using self-adhesive, no glue is needed.
- Drawing paper is suitable for creating a template.
- Cardboard is best used as a background for applications.
Circle applique ideas
If the work is made entirely of circles, it will turn out unusual and interesting. For example, in order to create a fish, you will need a large circle of paper.
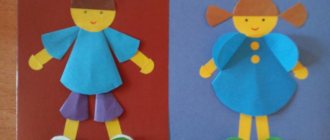
Two smaller circles, bent in half, form a tail at the edge. Many circles of the same size, also folded in half, will create the illusion of scales and fins.
When the elements are glued to the base, they form a three-dimensional appliqué. From such circles you can create many other animals or many plants.
A few more volumetric applications
Ladybug is easy to make. Cut out two circles from red paper and two half-ovals from black. We bend the circles in half and glue one half onto the base. We attach the semi-oval head in the middle above the circles. All that remains is to draw black dots on them and add eyes and antennae to everything.
In this way, you can make voluminous “fruit” and “berry” applique – apples, cherries.
Applications made from colored paper using templates
A template is a device for marking one or several parts of a drawing, repeating their shape.
Applications “Summer”, “Autumn”, “Winter”, “Spring” open up enormous scope for the development of imagination.
In a plot applique, you can take any fairy tale plot and break it down into small elements. Birds, butterflies, animals, clouds, flowers are possible templates for children when creating a summer applique.
You can make a beautiful basket with flowers. You need to prepare a basket template that will serve as the background for the craft. We glue the basket onto cardboard so that it holds well. Using a template, cut out circles of bright colors from a sheet of paper: yellow, red, blue. The middle of the circle needs to be pressed with a pencil and glued in place. To get more voluminous flowers, glue a smaller circle in the middle in the same way.
A few more themes for colored paper applique
The broken applique of lilac flowers turns out to be so lush that it looks quite realistic.
It is worth using white, pink or purple napkins. You need to cut out a silhouette of a pre-designed shape and size of the inflorescence from a colored napkin. Then glue it onto the base. Next, cut the napkins into small squares. We crumple some of them right away, others we also crumple, but first we tear them into pieces. We glue the lumps to the silhouette so that there is no gap between them. The flower is ready!
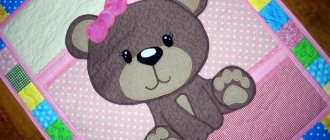
By drawing an outline in advance and choosing the necessary colors, you can create a masterpiece from pieces. For example, for a bear cub you will need paper in brown, black, yellow, white and red. The broken pieces should be approximately the same size and fit together like a puzzle.
For the next application, you need to place the child’s palm on a sheet of paper and circle it. We cut it along the contour and glue it onto the base, except for the fingers that will hold the bouquet (as shown in the photo).
Next, cut out multi-colored flowers and glue them with the centers onto the bouquet. We bend our fingers and... the craft is ready!
Applications made from colored paper are a creative process through which children learn about the world around them and acquire a lot of skills. There are many varieties of applications, the main thing is that it brings genuine joy and interest to the person who creates them. Create, fantasize, experiment, it's so simple!
Palms
It’s easier for kids to work using ready-made stencils. At the same time, even accurately tracing a cardboard template causes difficulties for many. To make work easier, children are given three-dimensional shapes - cubes, cups. Your own palms will also do, especially since you can make a lot of original crafts from the latter.
Principle of operation:
- On paper, the child traces his own palm, trying to carefully outline all the fingers.
- Independently or with the help of a teacher, the child cuts out the paper according to the shape.
- A craft is glued together from ready-made parts, the diagram of which was suggested by the teacher. Options can be given to choose from.
To glue the palms, you can use a glue stick or plasticine. The proposal to create one Christmas tree or a snowman from the palms of the whole class will also be an educational moment - a clear demonstration of what children can do together.
Herringbone
The simplest Christmas tree, which even children of the younger group can handle, is a pyramid glued together from triangles. After fixing the main shape on a cardboard base, you can invite children to decorate the Christmas tree with buttons or confetti that will imitate balls. Older children can cope with more complex options - an embossed and voluminous Christmas tree.
To make a Christmas tree from cut ribbons, you need to prepare 5-6 strips of paper. In this case, long ribbons will be required for the lower tier, and short ones for the upper tier. You can cut the workpieces to length in advance or during assembly. The basis of the craft is a cone glued together from cardboard or thick paper. The Christmas tree can be made traditional green and then decorated, or creative.
Simple small Christmas trees can be assembled into a garland or placed in a frame. In the first case, the paper must be double-sided. You can corrugate a cut out isosceles triangle manually, pressing the folds with a ruler or pencil. Children from 5 years old can handle making such an accordion.
Other ideas for creating a Christmas tree out of paper:
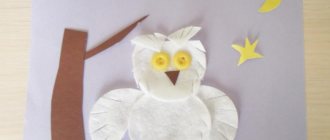
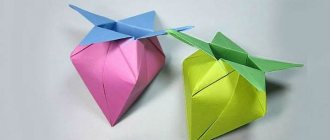
Photo ideas for interesting children's applications made from colored paper
leave a comment
Rainbow in the clouds
You will need: colored cardboard, scissors, glue stick, cotton wool, stapler.
Master Class
- Cut 7 strips of paper of different colors so that each piece is shorter than the previous one. The red stripe should be the largest and the purple stripe the smallest.
- Arrange the stripes in the following order: red, orange, yellow, green, blue, indigo and violet.
- Fasten the strips of paper together using a stapler.
- Roll 6 cotton balls.
- Glue 3 cotton balls at the base of the rainbow as clouds.
Rainbow in the clouds is ready!
