Preparatory stage
Even in the younger group, the teacher involved the kids in preparing the classes. Then these were tasks at the “Take and bring” level. In the middle group, children gradually become “participants” in creating the necessary conditions for work. That is, their participation should concern not only organizational issues, but also the direct preparation of materials and blanks for application.
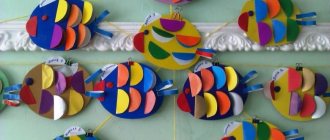
Application is one of the favorite activities for children in kindergarten.
What appliqué techniques can be used?
Before deciding on the scope of children’s responsibilities for preparing an appliqué lesson, let’s get a clear idea of what crafts techniques they are already familiar with. So, at 4–5 years old, children can perform 6 types of applications:
- invoice - parts are cut out of colored paper and glued to the background;
- torn - colored paper is torn into small pieces, which fill the space of the template on the base;
- mosaic - the contours of the figures on the base are filled with confetti, cereal or pasta, as well as plasticine, cotton wool;
- ribbon - the figures are cut out according to the principle of a round dance: all the parts are the same and are connected to each other by some elements;
- silhouette - shapes are cut out along the contour on the base, then a backing is applied to highlight the silhouettes. This type of applique is not often used in kindergarten, because the participation of children, due to the complexity of the technology, is limited only to connecting the base with the substrate;
- collage - cut out pictures are pasted onto the base. Despite the apparent simplicity, it is not easy for kids to master the technology of carefully cutting out parts, as well as harmoniously creating the overall composition of the collage
If you come up with an original background and material, then even a simple applied applique, which kids are familiar with from the younger group, will turn into a new and interesting task
What can children 4–5 years old do?
Based on the list of techniques for performing applications, it is clear what actions children in the middle group can perform independently:
- cut out large and medium-sized elements with scissors, and also do it symmetrically;
- create simple figures from plasticine based on “balls”, “pancakes” and “sausages”;
- tear up pieces of paper;
- work with glue (liquid PVA or in a stick), dose its amount on the surfaces that need to be joined;
- handle different materials for applique (cut dry leaves, bend and unbend thin cardboard, lay out cereals within the contour, etc.).
The more elements in the application, the simpler they should be in execution
Materials
Having chosen the technique, the teacher selects materials to complete the application. For the “Home” craft it could be:
- colored paper (of different densities, since kids already have an idea of working with thin cardboard and regular colored paper);
- pieces of fabric (the teacher prepares such parts, but the kids will already be able to glue large pieces of fabric correctly and evenly);
- plasticine (windows can be made from plasticine, showing the window frames with lines);
- natural materials (leaves, chestnuts, etc. for decorating the front garden);
- pasta, cereals, cotton wool - materials for filling large application spaces;
- pencils, felt-tip pens, paints (if you need to complement the background with other elements, for example, clouds, sun).
Additional tools and accessories
In addition to the necessary paper, glue and brushes, you need to prepare:
- wet wipes to remove excess glue from the base and to clean your fingers;
- small work tablecloths to keep your work area clean;
- scissors.
In order for the work to be a pleasure, the baby must have all the necessary accessories to complete the applique.
To make the craft look original, think about how to use elements such as:
- corrugated paper (to show the relief of a tiled roof, you only need a triangle of this material);
- cotton wool or cotton pads (looks beautiful when decorating a roof or garden plot during the snowy season);
- sequins (to imitate snow, if we are depicting a house in winter), braid (to show a fence), candy wrappers, for example, for the front door, etc. Please note that these details are used only if children no longer have problems identifying , which figure symbolizes which element of the building, i.e. the main goal of the lesson has been fulfilled.
How to motivate to work during an applique class on the topic “Home”
Another important stage in preparing an application lesson is motivation. Kids, like a car engine, need to be started so that they do the job smoothly and efficiently. To do this, the teacher’s arsenal must include different types of work that fit the theme of a particular lesson, which can be used one at a time or in different combinations.
How to Organize a Conversation
This is interesting. The famous teacher, philosopher, author of an original method of child development, Maria Montessori, spoke about the importance of talking with a child like this: “Talk with your child as much as possible about everything and everywhere - at home, on the street, on the road. Your conversations, stories and discussions are more important than any teaching aid.”
Not a single type of activity can do without this, especially since it works on the development of speech - a key competence of a preschooler. The most convenient form of conversation is short questions that require as brief answers as possible. For example, if the location of the kindergarten allows: “If you look into the yard, what do you see? That’s right, home!” Or: “Where does the mouse live? And the bear? Birdie? Where do you guys live?” You need to lead the conversation so that the answer is the word “house”.
A short dramatization, for example, of the fairy tale “Teremok” can be an excellent motivation.
Images
This is the next stage, logically following from the previous one. There are different types of houses, so you can see their types in the pictures.
Looking at the drawings will give the child an understanding of what houses look like and who they are intended for.
Poems and songs
The guys are happy to get involved in working with rhyming lines and a memorable motive - they repeat, perform the simplest movements to them. One classic “Cat House” is worth it! Kids enjoy watching who comes to visit the cat's new home, saying words for almost all the characters.
- The house we live in is located around the corner. It is large, multi-story, with a new elevator, very important! He wears a dashing hat, taller than all the neighboring houses! On top is a round antenna In a web of wires, A hundred people and a hundred cats live in it at the same time! - Hey hello! - I meet the house, raising my head up, He shakes the roof in response: - Good morning, Yaroslav!
- Here is a square, a triangle, it turns out to be a whole house! We'll put a cat in it, he'll have fun! Here is a flower on the windowsill, a tea table on the balcony. Next to the house there is a garage, a booth and our dog;
- The deer has a big house, He looks out of his window. A bunny runs across the field and knocks on his door! Knock-knock open the door, there’s an evil hunter in the forest, bunny-bunny, run your paw over to me
The deer quickly opened the door, let the bunny into his house, bunny, bunny, run your paw over to me. oh, oh, I’m scared, something doesn’t feel right, my heart sank into my heels and didn’t go awayDon’t tremble, my little bunny, I looked out my window, an angry hunter ran away, sit for a while. Yes, let me sit, I’m not trembling anymore, my fear has passed, you’re a good friend.
Fairy tales
This method of motivating children can be considered universal, since fairy tales can be told both at the beginning of the lesson and during the process of completing the application (to keep the kids interested in the results of the work).
Tale of Iris Review “Smile at Home” with questions for conversation - table
| Text of the story “Smile at Home” | Questions and tasks for the fairy tale about the House |
| A bear has a den, a swallow has a nest, Baba Yaga has a hut on chicken legs, and a man has a house. Once upon a time there lived a House. Four corners. A house is like a house. With a reliable roof and a good stove. With warm floors and beautiful walls. A little fabulous, a little magical. The house was nice, but he never smiled. Because there were no residents in it. But one day people settled in it. The hostess began to restore order in the House. And the owner made sure that everything in it was in good order. And the House seemed to perk up. But he was still missing something... What do you think the House was missing? I think like this: children’s laughter, children’s games, children’s smiles... When children finally appeared in the House: boys and girls, he was very happy. He winked at the Sun, and this made the House brighter and warmer. And one day Sunny saw Dom finally smile. Naughty. Wide. Charming. Dom’s sincere smile made everything around him smile. After all, children are happiness. This is the world. This is a million smiles... |
|
Scheme for drawing up lesson notes
It is important to clearly formulate the goals and objectives of the application lesson. To complete the “Home” craft, the following educational areas can be identified as goal-setting areas:
- continued work on consolidating knowledge about the simplest geometric figures, as well as the first steps to transform them into each other;
- creating conditions for teaching children to see a three-dimensional image behind a picture or oral story;
- developing the ability to recreate a figurative representation of a specific object on a reduced scale;
- nurturing a sense of proportion and aesthetic taste.
Lesson objectives:
- learning to put together a whole image from parts - geometric shapes;
- strengthening the skills of cutting paper into strips in a straight line;
- continuing to work on neatly cutting corners;
- repetition of the rules for gluing parts onto the base;
- nurturing a sense of proportion when working with different materials within one application.
In order for children to enjoy the application, the teacher must carefully plan every minute of the lesson. An approximate timing can be represented as follows:
- Introduction (implementation of the motivating component - 5–7 minutes).
- The main part (work on the application - about 18 minutes, including a break for finger exercises and physical education).
- Summing up (5-6 minutes for self-assessment of work and praise from the teacher).
The first and last stages are given at intervals so that, depending on the level of preparation of the children, the teacher can correctly combine other types of activities. So, for children with weak abilities, more time needs to be devoted to motivation than to summing up the results, and for children who immediately get involved in the work, on the contrary, the final stage is the most important in the entire lesson.
For variety, the house can be made for a specific character from popular cartoons or games
Example of a lesson summary for the middle group: Panchekhina Svetlana “Big House” – table
| Progress of the lesson |
|
| Final questions |
|
| Quote from: https://www.maam.ru/detskijsad/konspekt-nod-po-aplikaci-na-temu-bolshoi-dom.html | |
Examples of work on applications on the theme “Big House” in the middle group
If you come up with an original background and material, then even a simple applied applique, which kids are familiar with from the younger group, will turn into a new and interesting task.
"The house I live in"
This applique is an example of a classic overlay craft.
This is a variant of a simple appliqué application, the work on which does not require much time.
Instructions:
- Glue a large orange rectangle onto the base.
- Fold a sheet of white paper 8 times and, cutting out 8 small rectangles, glue them onto the desired area of the orange rectangle.
- From a green leaf we make two rectangles: narrow and wide.
- From the wide one we cut off the corners on the long side.
- Glue it above the base for the house.
- Glue a slightly longer rectangle (house door) at the bottom center.
"Multi-storey buildings"
For this application, the teacher prepares blanks of snowflakes and a tree trunk.
This application can be done several times a year to see how the world around you changes in different seasons of the year.
Instructions:
- Children cut out 2 rectangle houses and place them vertically on both sides with the base sheet oriented horizontally.
- Kids make blank squares (rectangles) for windows and glue them onto the “houses”.
- By cutting 2 cotton pads in half, they make a snow-covered roof and a snowdrift near the house.
- Glue 3 cotton pads, placing 1 at the top, and 2 on the left and right.
- Glue the wood blank.
- They cut a few more cotton pads and use them to decorate the snowdrifts in the foreground. To develop motor skills, you can complicate the task by asking the children to separate one piece into two.
- Finally, glue is dripped randomly and snowflakes are glued on.
"The best house"
In this application, the main task is to learn how to glue the parts evenly. Therefore, the teacher himself cuts the fabric blanks.
Working with soft felt helps develop fine motor skills
Instructions:
- Children receive 4 rectangles (2 blue for windows, 1 orange for house, 1 blue for chimney) and 1 yellow triangle.
- Kids place the orange rectangle in the center of the base sheet.
- There are 2 windows on it.
- Glue the roof.
- Place a chimney.
- As a complicating element (if the children are able to do it and have time), kids can add a snow edging to the roof from plasticine.
"Our street"
This is a collective application. But the children do not work on its elements in a group, but combine ready-made crafts into one. This is how we get our own street model, which we can come up with a name (for example, what is the name of the group - “Yagodnaya Street” or “Cherry Street”).
To complete this application, it is better to use a group form of work, when everyone makes a separate house, and then they are combined on one substrate
Instructions:
- Kids receive a prepared rectangle of white paper.
- Then cut out squares from a sheet of colored paper YOURSELF. The difficulty is that toddlers only have dotted outlines of parts. This way they learn to cut without relying on drawn lines.
- Children place windows on houses.
- If desired, kids can also cut out the roof of their house. It can be either rectangular or triangular.
- Everyone glues their house onto a common substrate. Important: the teacher shows everyone the location, otherwise the street will turn into chaos.
"House for Friends"
First, the teacher prints out a picture with a little man - a symbol of a friend.
This application is made on a blank picture
Instructions:
- Children receive sheets with drawn outlines of geometric shapes (a square, 2 rectangles of different sizes, a triangle and 3 ovals).
- The teacher and the kids determine which figure corresponds to which part of the house. The teacher suggests that ovals are balloons - a symbol of friendship and joy. If the ovals are made blue, they can “play the role” of clouds.
- Kids place a large rectangle on the left, pointing it vertically.
- Then they glue the window, the front garden below and the roof above. This craft can also be used in the older group, and the triangle is cut in half - this is how children get an idea of another geometric figure - a trapezoid.
- Glue clouds (or balloons).
- If you have time left, you can draw the grass in the front garden with a dark green pencil.
Photo gallery: ready-made applications on the theme: “Home”
If the application is carried out in the winter season, then the roofs can be made “snowy”, that is, from halves of cotton pads
The “Home” applique can be made from felt parts (prepared by an adult), which will further emphasize the comfort and warmth of the hearth
The task for the application can be complicated by decorating the house with snow, for example, if the lesson falls on New Year's Eve
If the application is supposed to be made independently of the background, then these should be elements from the simplest geometric shapes
Photo gallery: template options for work
All details of the application can be signed so that kids get used to tasks in written form.
The type of applique when children must cut out the details and stick them on a template is called an invoice. The simpler the details of the house itself, the more varied the additional elements can be.
How to make a paper house applique.
All you need to do is download and print the applique templates, cut them out and paste them onto the background image. The background can be anything you want.