Applique city
The “City” applique made of colored paper will be a worthy decoration for any classroom and any room in the apartment. Even the smallest child can cope with its production,
if you help him overcome some difficulties.
Applique city
It is better to take cardboard in a light blue shade as the basis for the application. Against this background, the “City” application will look most organic. At the first stage of work, we glue a fairly wide black stripe to the bottom of this sheet (folded lengthwise).
In the center of this strip we glue a narrow (distributive) strip of white color. It turns out to be a road.
Road
Above it we glue an uneven strip of light green color. This will be the lawn. Cut out four rectangles from beige, light orange or brown paper. We make four square slits in each of them. The result is multi-storey houses, which we glue to the main background - on the “lawn”.
Lawn with houses
We cut out silhouettes of Christmas trees from green corrugated paper, and stems from brown paper. We glue Christmas trees between the houses.
Christmas trees
We cut out trapezoidal roofs for houses from pale yellow corrugated cardboard. Glue them. We cut out a traffic light from black paper and glue it next to the road. Opposite it, we lay out a pedestrian crossing with pieces of a white stripe.
Traffic light and pedestrian crossing
Cut out two cars from paper of different colors. We send them along the road in different directions.
Cars
All that remains is to decorate our urban landscape: cut out flowers from colored paper and plant them on the lawn. We make small clouds from white paper, napkins or cotton pads and stick them on the sky.
Flowers and clouds
Between the clouds we place in the sky a bright, radiant sun cut out from a sheet of yellow paper.
Application favorite city
Our application on the theme “City” is ready! In front of us on the table lies a simple, but clearly recognizable landscape. If desired, you can make various variations of this picture - for example, evening and night views. To do this, you will only need to change the main background and the design of the sky.
Source: https://montessoriself.ru/applikatsiya-gorod/
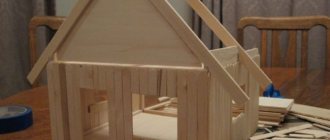
DIY “Cardboard City” craft
To create a themed gift for loved ones, you can make “City” paper and cardboard crafts. To create such a city, the following tools are needed:
- glue;
- scissors;
- thick cardboard;
- thick marker;
- a simple pencil;
- acrylic paints;
- brush;
- glass of water.
- You need to take thick cardboard and cut out the silhouette of a building from it. Thus, it is necessary to create several houses.
- Draw the resulting template in the middle with a simple pencil.
- Draw a small line with a pencil next to the main one to the middle of the house. Cut out the resulting strip of cardboard.
- On some houses it is necessary to cut out the middle from the top or bottom of the house, since in the future the two parts will be connected to each other.
- We connect the two halves of the house.
- We draw out the location of windows and doors on the house with a simple pencil.
- We paint both parts of the house with acrylic paints.
- Let's connect them together.
- In a similar way, we produce several houses of varying thickness, height, and width.
- We take a sheet of Whatman paper and draw the markings of the lawn and paths with a simple pencil.
- We paint whatman paper with acrylic paints.
- We place the resulting houses on a sheet of Whatman paper.
You and your child can make paper crafts and create a city in the same way: first we draw and paint the houses with paints, then we cut out and glue the bottom part of the houses to a sheet of white paper.
Thus, in the process of creative activity, the child will develop the importance and significance of such a festive event as City Day.
Source: https://womanadvice.ru/podelki-na-temu-moy-gorod
Application
The best works of participants and winners of the competition “My Home, My Garden, My City”
Happy birthday, Saratov region!
Authors: students of the senior group “Smile”, teacher Andreeva Yulia Sergeevna. MBDOU “Kindergarten No. 11 “Nest”, Yoshkar-Ola.
Our kindergarten is designed for two groups. The entire building is divided into two wings. You can go upstairs using the purple or blue elevator, which makes three stops. The first stop is a walking balcony-greenhouse. The second stop is corners of solitude, where calm music is always playing, there are shelves with books, soft sofas, a lot of soft toys... The third and last stop is the green and orange playrooms, connected by a green corridor. Three rooms upstairs are a dining room, a study area and a common area bedroom... You can travel from one wing to another by mini-train. He makes three stops: near two children's play stations, blue and purple, and in front of the educational complex located on the right. On the ground floor of the complex there is an orange music room, on the second there is a sports hall, on the third there is an art studio, and even higher there is a mini-zoo.. The last floor is a swimming pool. Above and to the left of the play station there is a center for experimentation and children's research (pink), and even higher – mini planetarium (yellow). It can be accessed via a ladder. On the roof of the planetarium is a launching pad for young balloonists. In good weather, excursions are organized
on the air balloon.
Authors: pupils of MBDOU “Kindergarten No. 6 “Fairy Tale”, city of Tsivilsk.
Kudryashova Arina, Zemtsova Sofia, 6 years old
Authors: Batura Timofey, 5 years old, Derakch Vladimir, 4 years old, teacher Korotkova Tatyana Aleksandrovna. MBDOU "Golden Fish", Noyabrsk.
We built a kindergarten out of geometric shapes. In the central building with a large gate, teachers meet children in the morning. When it's time for breakfast, lunch or dinner, children go to the mushroom-shaped building. The next building, with diamond-shaped windows, is for relaxation: there are comfortable beds on which children sleep. The unusual building on the right side is a place for games and activities. There are many games and toys for children to play and do interesting things.