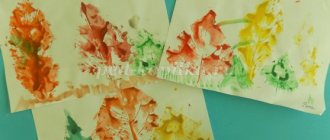
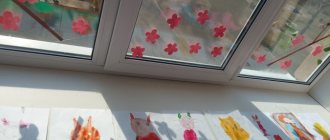
The importance of classes using non-traditional drawing techniques
The meaning of alternative drawing techniques:
- help overcome fears and insecurities;
- develop spatial thinking and a sense of color, shape, texture;
- create conditions for the free expression of children's individuality;
- introduce children to the properties of various materials;
- instill a taste for unconventional thinking and creative exploration;
- improve fine motor skills;
- allow you to experience a feeling of joy and emotional satisfaction.
Alternative drawing techniques allow you to discover the creative potential in every child
Unconventional techniques create a special atmosphere; they inspire and inspire. In addition, in combination with traditional techniques, which are extremely important, they give a sense of novelty and are an impetus for the development of initiative, independence, stimulate ingenuity and interest in visual activity.
Scheme and example of lesson notes
In the senior group, standard long-term planning provides for one drawing lesson per week. The total duration of continuous activity should not exceed 20–25 minutes; methodological manuals recommend performing physical exercises (finger, breathing, motor exercises) for 5 minutes for relaxation and prevention of mental and physical fatigue in children.
Lesson outline:
1. Organizational part - includes an educational story, a developing conversation or a game situation of a motivating nature, which is accompanied by a demonstration of visual material, reading poetry and riddles, listening to a fragment of a musical or literary work. The introductory part of the lesson stimulates the creative activity of children and sets them up for conscious work (approximately 3– 5 minutes).
An example of the organizational part of a lesson on the topic “Russian folk toy” (author Tatyana Izyurova)
| Various nesting dolls are placed on the table. - Children, do you know what these toys are called? That's right, these are nesting dolls. — These wooden toys also originate from ancient times and were made by Russian folk craftsmen. — We, too, have already become acquainted with some clay toys that have their own name. - Name what kind of clay toys you know (Dymkovo, Filimonov). — Each nesting doll also has its own name. Some nesting dolls are Semyonovsky and they are made near the city of Semenov, other nesting dolls are made in Sergiev Posad and are called Sergievsky nesting dolls. Another type of nesting dolls is made in Polkh-Maidan and is called Polkh-Maidan dolls. - Guys, look what amazing toys these are. The dolls have aprons, kerchiefs, and beautiful patterns on them. - Now let’s compare two folk toys - the Dymkovo toy and the matryoshka doll. Are the patterns on them the same? (No) - How are they different? (Children find differences: on the Dymkovo toy there are rings, circles, dots, circles, lines, dashes; on the nesting doll there are flowers, leaves, curls, berries.) - But still, all nesting dolls are different. They are painted with large, bright colors with a distinct black outline. — Artists painted with pink, red, yellow, purple, blue and green paints. — Matryoshka dolls are covered with transparent varnish. These colorful patterns make them very elegant. - And now I suggest you become master artists for a while and decorate these nesting dolls (silhouettes) with your patterns. |
2. Practical part - the teacher explains and shows how to technically perform the task (3-5 minutes). The peculiarity of classes using non-traditional techniques is that older preschoolers are given more freedom in the drawing process than in classes based on studying classical methods of creating an image; each child will get their own unique result. Thus, the demonstration of a sample prepared by the teacher should not be used for copying, but only for the formation of a correct understanding of the task or its clarification.
An example of the practical part of the lesson using the technique of drawing on a wet sheet “Magic Land - Underwater Kingdom” (author Timoshina R. N.)
| – What is this drawing “on a wet sheet”? Let's remember with you. The main tool today will be a sponge - a small one made of foam rubber. We will wet our sheet with it. A sheet of paper is wetted with a quick movement (teacher demonstration). The work must be done quickly, with a light movement, the hand moves freely. And then paint is applied “on a wet sheet”. The brush does not touch the sheet, the paint lays down beautifully, forming magical shimmers. Do you guys remember? So, if you and I wanted to feel the magic, then let our drawing today be magical, amazing, fabulous. - Look how I will draw the sea. I wet the sheet with a sponge from left to right with quick movements. Using a wide brush, I draw a line on top of the sheet, and the paint flows down. You will also draw a strip and lift the leaf vertically so that the paint also drips off. Let the paint dry a little, and we will paint the inhabitants of the underwater kingdom with a thin brush. We draw algae, sandy bottom and all the inhabitants of the magical sea country. If you want, you can depict the fairy-tale palace of the “golden” fish in your drawing. |
3. Independent work of children (15–20 minutes).
4. Final part - the results are summed up, the works are examined, children share their impressions and learn to express their opinions about the works of their comrades, as well as about the artistic experience gained (3 minutes).
Summary of the lesson “Primitive Drawings” as part of the short-term project “Chalk Pencils” (Author Tatyana Semenyako)
Problem: Who came up with the idea of drawing with charcoal? What can you draw with a charcoal pencil? Game motivation: Traveling in a time machine Purpose: Experiment: making a charcoal drawing and determining its visual and expressive capabilities. Tasks:
Materials: Sheets of paper white and tinted in pastel colors, A4 format, charcoal. The teacher has photos of cave paintings of primitive people, a laptop for showing photos. 1. Organizational part. Teacher: In the last lesson, we learned what coal is and why it is needed. But tell me, what else can you draw with a charcoal pencil? (Children's assumptions) To answer this question, we will go on a journey on... the Time Machine! Do you agree? Then let's go. Let's sit back, close our eyes, say the magic words that you know. (Children offer options) The teacher opens the laptop, talks and shows the photo.
Educational story. It was a long time ago. On our green planet, where various animals and birds already lived, man appeared. Where did he come from? Whether it originated from monkeys or flew from outer space, we don’t know. But he still appeared. And this is how he was, our distant ancestor. (Showing a picture of a primitive man.) The man had neither sharp teeth nor claws, but what can I say - he had neither telephones nor televisions. There wasn't even a house or dishes. And clothes! Look what the ancient man was wearing? (Children: in the skin.) Why did the person dress like that? (Children reflect) Yes, then there were no factories or factories, and people had to do everything with their own hands. And who can guess why he needs the skin? What are your clothes for? (Children: protection from the cold.) We guessed how primitive man saved himself from the cold. Maybe you can guess what else a person needed to survive? (Guiding questions from the teacher. Children's answers.) Of course, he needed water, food and shelter. He could drink from a river or stream. What did he eat? (Children: berries, grass, meat). Game situation. Well done! Now you and I will turn into primitive people and go to a forest clearing to pick berries. On command, we start picking berries; whoever collects the most will become the most dexterous berry picker. Bring your “prey” and put it in a bowl. Developmental conversation. Where could primitive man live? (Children: in the cave) But the man ate. I lay down in the cave on a soft skin and slept. What to do then? You can’t listen to music, you can’t watch TV, you can’t read a book. What to do? (Children’s reflections) - The man began... to draw! On what? On the wall of the cave. With what? There are no pencils or paints. But the ember from a burnt fire leaves a nice black mark! (Showing photos of rock paintings). What and who is not here! What did you see? Children list: trees, people, animals. Well, the time machine is running out of fuel, it's time to go back! Guys, let us tell you about our journey the way a primitive man would have done it - let’s draw what we saw. Do you agree? 2. Practical part. Then get to work! (Children approach the tables). We will make the paper “old” - we will crumple it. Like this (shows) let’s unfold it and smooth it out. Now the paper looked like the walls of a cave. And here comes coal - just like in ancient times. Draw for them everything you saw, if desired.
3. Independent work of children. Children draw. The teacher guides the children’s activities using advice, directions, and praise.
4. Final part. Result: Exhibition of children's works. Teacher: What new did you learn while traveling in the time machine? Guys, is it possible, looking at your drawings, to guess where we traveled? Did you enjoy the trip? We will arrange the drawings as the album “Travel in a Time Machine.”
|
Video: Drawing on fabric in the senior group
The combined use of traditional and non-traditional drawing techniques in kindergarten classes will help the child master methods of creative self-expression, open a new joyful world of unusual artistic techniques, instill a taste for research, and enrich his vocabulary. In such classes, the teacher demonstrates only a method of action, the model is not an indisputable standard for imitation, which creates favorable conditions for the development of independence, initiative, imagination, and helps to reveal the individuality of each child.
Drawing birds
Drawing a bird in the older group follows the same plan as the lesson on depicting animals. First, all details are compared with geometric shapes, attention is focused on movement, head tilt, and location on the landscape sheet. Here is an example (drawing a peacock):
- draw an oval body;
- a round head on top;
- the neck goes from the head along an oval;
- draw triangular wings on the body;
- add paws with three fingers to the oval;
- on the head you draw round eyes and a triangular beak;
- from one wing to the other, outline a loose tail, similar to daisy petals;
- color the bird with paints.
Drawing in the older group allows you to depict birds from different sides, in action. This is what the profile of a rooster looks like. You start working from the head. Draw a circle, mark the eye, a triangular beak with a transverse line, an oval beard and a comb of three petals.
From the head, draw a neck with a collar similar to the shape of a flared skirt. From it you continue the concave body, which together with the neck resembles a crescent. Next, draw a tail of eight feathers: the first long, raised up, four feathers starting from the end of the body, the last short, extending to a third of the body and hanging down.
On the body, a wing is drawn with a line, legs with four fingers and spurs. On the wing, sharp horizontal arcs indicate feathers, and vertical lines indicate long feathers. The claws are drawn on the fingers in small arcs.