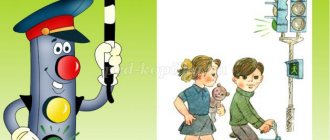
Features of crafts
The main goal of such crafts is for children to understand the need for correct behavior on the roads and master the rules of the road (traffic rules). They can be done in kindergarten under the guidance of a teacher or at home with parents. Such crafts can be taken to school during thematic classes or used in games. The best creations are submitted to the competition.
There are 2 main categories of crafts according to traffic rules:
- Subject and individual products: traffic light, road sign, figurine of a traffic controller, etc.
- Compositions or plot-based crafts: city, crossroads, moving, moving along the street, etc.
The following technique is used in the work:
- drawing using colored pencils, felt-tip pens, gouache, watercolors, paints, crayons;
- applique made of colored paper, fabric, plastic and other materials:
- collage - a combination of appliqué with drawing, modeling, origami and other techniques using photos, illustration elements, natural and improvised materials;
- volumetric prototyping – gluing three-dimensional figures, modeling, cutting, etc.
- sewing, knitting and embroidery - crafts made from felt, fabric, threads.
Crafts according to traffic rules can be made from almost any material (paper, cardboard, plywood, plastic, fabric, etc.). Available materials are widely used (plastic bottles and cups, disposable tableware, old things and toys, wood elements and plant fruits). It is important to select creative material taking into account the child’s age and abilities. For example, paper and plasticine are suitable for children 2-4 years old. The first crafts should be very simple and accessible to the baby.
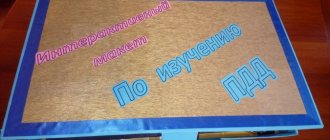
DIY crossroads for younger schoolchildren. Master class with step-by-step photos
Simulation "Crossroads".
Master class Author: Prudnikova Olga Efimovna, teacher of additional education MBOU DO "GCD (Yu) TT of the city of Kemerovo" Description: this master class is intended for children of primary school age, senior preschoolers, educators, primary school teachers, parents. Purpose: a manual, a model for studying the Rules of the Road
Modeling “Crossroads” for primary schoolchildren.
Master class Purpose: Propaganda of the Rules of the Road Objectives: • introduce the concept of “intersection”; • consolidate the idea of road elements, road markings, traffic lights, pedestrian crossings; • exercise children in modeling an intersection and orienting themselves on a piece of paper; • give children the concept and definition of road markings (zebra crossing, stop line, solid line, dashed line). • develop safe behavior skills on the road network; • develop eye, fine motor skills, memory, logical thinking, interest, intelligence, observation, creativity; • cultivate accuracy, discipline, and a culture of behavior on the road. Relevance. The relevance and practical significance of training and education and, in general, the prevention of child road traffic injuries is emphasized by high statistical indicators. Modeling the layout with your own hands, solving traffic situations in practice, helps to master concepts, terms, and develop skills for safe behavior on the road. Travel dictionary. road – a strip of land or a surface of an artificial structure equipped or adapted and used for the movement of vehicles. The road includes one or more carriageways, as well as tram tracks, sidewalks, shoulders and dividing strips, if any. pedestrian - a person who is outside the vehicle on the road and does not perform work on it; pedestrian crossing – a section of the roadway marked with “Pedestrian Crossing” signs and (or) zebra markings and allocated for the movement of pedestrians across the road; roadway – a road element intended for the movement of trackless vehicles; dividing strip - a road element, allocated structurally, separating adjacent roadways and not intended for the movement and stopping of vehicles; sidewalk - an element of the road located above the level of its roadway, separated from it by a curb, has a road surface and is intended for pedestrian traffic; curb - a barrier made of stones separating the roadway from the sidewalks; “zebra” is a road marking line and indicates a pedestrian crossing; stop line - the marking line indicates the place where the driver must stop and let pedestrians pass; solid line - indicates the edge of the roadway; separates traffic flows in opposite directions on the roads; dotted line is a marking line (short strokes) and indicates traffic lanes within the intersection; traffic light - an electrical device for regulating the movement of vehicles and pedestrians; intersection - a place where roads cross, join or branch at the same level. controlled intersection - an intersection that is regulated by traffic lights or a traffic controller. Crossroads, crossroads, How can I cross you? Buses, cars, trams on the way. They go to the right, they go to the left, their eyes run wild. You have to cross the road: It’s time for me to go to school!
This layout can be completed in 3 stages.
Stage 1 Materials required for work: - 2 sheets of white A3 paper; - self-adhesive film (very easy to use), or paper (white, brown, any shade), green; - scissors, - ruler; - a simple pencil, a felt-tip pen Step-by-step process of doing the work: On a sheet of A3 paper we designate the elements of the road: sidewalk, roadway. Here at this very place the Crossroads, like a cross,
cut out the stencils. We take black paper, cut it out using a stencil, a cross of the same size and glue it on. This is a roadway. Cut out brown rectangles and glue. This is the sidewalk. Cut thin strips from brown paper of a different shade. This is a curb. We glue and separate the sidewalk from the roadway. Stepping 4 cm to the side from right angles, we glue short green strips of paper 2 cm wide; this dividing strip (in this case, a lawn) separates the opposite directions of traffic (one way and the other). This is the road and its elements (roadway, sidewalk, curb, dividing strip). We apply road markings to the roadway. Cut strips of white paper measuring: 5 x 1 cm (3) – stop line; 14 x 0.5 cm (2) – solid line; 0.5 x 1 cm (12) - broken line
We take the widest and most identical strips, lay out the zebra road markings and glue them on.
Everyone knows the stripes, Children know, adults know, It leads to the other side - Pedestrian crossing!
We glue a 5x1cm strip on the right side closer to the sidewalk. It is called a “stop line” and indicates to the driver to stop before the intersection and let pedestrians pass.
There will be 3 of them on our layout. Stop, car!
Stop, motor! Brake quickly, driver! Don't rush any further, stop before the stop line! We glue the longest and narrowest strips in the middle of the roadway.
This is a solid line (double solid). It marks the edge of the roadway. You cannot go beyond this line. A solid line separates opposing traffic flows. Transport goes one way and the other. Look to the left, my friend, get to the solid line, then look to the right, and then move on!
Glue the narrowest and shortest strips. A broken line (with short strokes and equal intervals) - indicates traffic lanes within the intersection. There may be one, two or more lanes. Each vehicle travels in its own lane. It turned out to be a cross-shaped intersection.
Stage 2 of work.
A traffic light regulates traffic. In order for the intersection to be controlled and traffic at the intersection to be safe for drivers and pedestrians, traffic lights need to be installed. Materials needed for work:
- cocktail straws or straws from baby juice boxes; — caps from plastic bottles (with an awl we make holes with the diameter of the tubes); - pieces of bright multi-colored self-adhesive paper (red, yellow, green), gray or black.
Cut rectangles of different sizes from dark paper. For transport traffic lights, 3 x 2 cm in size, pedestrian ones - 2 x 1.5 cm. Cut out small multi-colored circles, 1 cm in diameter. We place circles on rectangles in different ways. On some the green will be at the bottom, on others the red will be at the top. Large rectangles have a yellow circle in the middle. We cut the tubes into 8 cm pieces. Glue rectangles with the same signals (red) to the top of the tube on both sides. Perpendicular to them, below, we glue rectangles with pedestrian traffic light signals, also on both sides (green).
We insert the tubes into the holes of the lids. This is how the traffic lights turned out.
We install traffic lights at the intersection so that the movement of vehicles and pedestrians is allowed in one direction and prohibited in the other.
Controlled intersection. We approach the intersection and don’t take our eyes off the traffic light. He gives commands to who to stand and who to go forward.
Stage 3 of work The pedestrian crossing is indicated by the road markings "zebra" and the road sign "Pedestrian crossing". Materials needed for work: - lids, - cocktail straws, - ready-made printed road signs “Pedestrian crossing”, where little men are walking in different directions, 3x3 cm in size,
We make stands for road signs in the same way.
We cut out road signs and glue them to the posts (tubes) so that on one side and the other the little people walk in the same direction. They show the direction of pedestrian movement. We install road signs at the intersection, in front of the zebra crossing. This sign is not at all complicated, but it is so reliable.
A “Pedestrian Crossing” leads to the other side! You can arrange figures of pedestrians and transport toys, and role-play traffic situations. — the traffic light prohibits pedestrian movement (red); — green allows traffic to move; — movement of pedestrians and vehicles through the intersection.
Where there is a green light for cars, there is no way for pedestrians.
Cars leave the garages. Pedestrians move along the sidewalks. The movement of cars and pedestrians through the intersection, in accordance with traffic lights.
The traffic light changed signal And now think for yourself. To whom the green light is lit, it means that the path is open
.
Pedestrian, pedestrian, Remember, you are talking about the crossing!
We recommend watching:
Texts with answers for conversations on traffic rules in 1st grade Didactic manual on traffic rules for kindergarten with your own hands Do-it-yourself paper traffic light model for children with step-by-step photos Do-it-yourself “Crossroads” craft from matchboxes. Master class with step-by-step photos
Similar articles:
Class hour "Rules of behavior on the street", 1st grade
Traffic rules in elementary school
Traffic rules quiz for elementary school with answers
Sketch on traffic rules for students in grades 3 - 4
Drama on traffic rules for elementary school
Road signs
One of the most important areas is developing children’s ability to navigate road signs. They help to assess the situation on the street, and making such crafts allows the child to understand their meaning.
Simple crafts:
- Stand. Ready-made road signs cut out from printed publications (for example, colored inserts for traffic rules) are glued onto a sheet of whatman paper. It is important that the child attaches the pictures himself and learns the names of the signs. Subsequently, the stand is used to test knowledge.
- Drawn signs. For kids, you need to choose simple images (for example, “No passage”). In more complex drawings, the contours of areas of different colors and shapes are first drawn. If the child cannot yet do this on his own, then an adult helps him. Children independently paint the elements in the desired color with pencils or watercolors (gouache). You can use colored crayons.
- Application. For such crafts, cut out the base of the desired shape (circle, triangle or rectangle) from white, yellow or blue cardboard. The elements of the sign are made of colored paper and glued to the base. For example, a sign prohibiting crossing the road is important for a child. A circle is cut out of white cardboard for it. A figure of a pedestrian cut out of black paper is glued in the center. A red paper rim is glued around the circumference, a red paper strip is attached, crossing out the black figure of a person.
To learn an important rule, it is important to captivate the child. The child must know where to cross the road. For the “Transition” sign, a rectangular base is prepared from white cardboard. In a sheet of blue paper the same size as the base, a triangle is cut out in the middle. The blank without the middle part is glued to the cardboard, forming a white triangular window in the center. It contains a figurine of a pedestrian and stripes of a “pedestrian zebra” made of black paper.
Complex crafts
Work on the “Underground pedestrian crossing” sign can be divided into the following steps:
- A rectangle is cut out of plastic.
- You should find an image of the sign on the Internet and then print it to the required scale.
- After printing, the design is copied onto self-adhesive paper.
- The areas that need painting are cut out in it, and then it is glued onto a plastic base.
- The cut out areas are painted with acrylic paint of the desired color.
- After drying, the self-adhesive paper is removed.
- A plastic profile is attached to the outer border of the sign.
- A wooden or plastic strip is attached to the sign. A cross should be installed at the bottom.
Photos of crafts dedicated to road safety posted on the world wide web can be of great help in your work.
Sophisticated crafts of road signs
More complex crafts can be used for games in the yard. The “Pedestrian Crossing” road sign can be made as follows:
- As a base, a rectangle is cut out of a white plastic panel.
- An image of the sign is downloaded from the Internet and printed on a printer (possibly in black and white) in the required size.
- The printed picture is transferred to self-adhesive paper, from which a stencil is made. To do this, all areas that require painting are cut out, and the remaining part is glued to the plastic.
- Acrylic paint is applied to the cut out areas of the stencil (blue for the edging and black for the central elements).
- The stencil is removed after the paint has dried.
- A plastic profile is fixed around the entire perimeter of the sign. It masks the cut of the panel and forms an even white border.
- The workpiece is fixed vertically on a wooden strip or plastic pipe. For stability, a base (cross) is made at the bottom.
Crafts with a reflective element look impressive. This material can be purchased in the form of stickers, iron-on transfers, and tape. For the manufacture of road signs, the latter option with an adhesive layer is best suited. The tape is cut into pieces of the required length and glued as the border of the sign. After removing the protective film, such a craft will glow in the dark.
Application
A children's craft in the shape of a "Pedestrian Crossing" sign will help your child learn the rules of the road, including learning how to cross the street correctly.
The geometric figure required for the road sign (in this case, a rectangle) is cut out of cardboard of the desired color. Then the strips and the human figure are glued on.
The “Pedestrian traffic is prohibited” sign is made from a round blank, which is glued to the base, and then the figure of a pedestrian is fixed in its center with glue.
Note!
- DIY feeder - step-by-step instructions for creating a feeder + detailed diagrams with photo reviews
Do-it-yourself rugs - TOP 120 simple patterns with master classes on how to make them yourself + photo reviews of finished rugs
Do-it-yourself dolls: a master class on making a beautiful doll. Simple instructions with photo examples of ready-made options
To better assimilate the Rules of the Road, the child must get carried away with working on the craft, and then bring it to school and show it to classmates.
Crosswalk
One of the main tasks of traffic rules is to teach a child to cross the roadway correctly. In this direction, crafts on the theme “Transition” play an important role. They include a pedestrian zebra crossing, a traffic light, and a corresponding road sign.
In a private home, country house, kindergarten or school, such a craft for children can be made in the yard. It is necessary to highlight the place where the child most often crosses the main, concrete or asphalt path. Here, markings in the form of white stripes (“zebra”) are applied directly to its surface with acrylic paint.
Traffic lights are installed on both sides of the crossing. They can be made in different ways. A simple option is to use plastic bottles with a capacity of 1.5-2 liters. You should choose a darker container (brown or black). The transparent bottle will have to be coated with black paint (varnish). 2 or 3 circles are cut out in the eggplant. In a pedestrian traffic light, 2 holes are enough, and in a car - 3. Opposite each hole, a light bulb from a flashlight is fixed, connected to a battery and equipped with a separate button to turn it on. The holes are covered with colored glass or other transparent material of the desired shade (for pedestrian traffic lights, red and green are chosen, and for automobile traffic lights, yellow is added). Using a button, the child lights the desired light bulb, allowing or prohibiting passage. The craft is decorated from the neck side and installed on the pipe. It can be dug into the ground or made portable.
Using reflective elements in crafts
Reflective self-adhesive tape, which can be purchased in specialized stores, is best suited for these purposes. This tape is used for edging signs, and in the dark it will glow brightly.
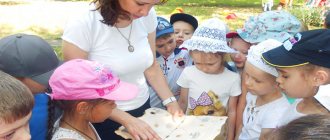
If you bring such a craft dedicated to the topic of traffic to a kindergarten, the kids will be very happy.
Miniature city
A small city can even be assembled in the lid of a cardboard box. This composition includes several roads and sidewalks, houses, a school or kindergarten, and shops. It is imperative to create intersections and pedestrian crossings.
Master class on creating one of the districts of the mini-city:
- A diagram of the neighborhood is drawn up on the lid of the box. The basis is 2 wide roads intersecting in the center of the composition.
- The roads are formed from wide strips of black paper in the shape of a cross. Narrow black stripes are fixed parallel to them - sidewalks.
- Three-dimensional houses are made from paper. Windows, doors, decor, and signs are glued to them. The most important facilities for the child are highlighted: kindergarten, school, store, playrooms, etc. The houses are fixed to the bottom of the box, forming neighborhoods.
- Trees are made from twigs, toothpicks and plasticine and installed along the street and in courtyards.
- It is advisable to allocate one of the areas for a park. Here you need to install trees, glue the surface of a small lake, and make attractions out of paper.
- The road is being marked. A dividing strip is made from a thin white strip in the center. Near the intersection, “pedestrian zebras” are marked with small white stripes.
- Crosswalks and intersections are equipped with traffic lights and the necessary road signs.
- Cars are made from plasticine or paper. You can use small toy cars.
You can make several such crafts. They are put together to create a town. The roads must be connected to ensure the “passage” of cars throughout the mini-city.
Permitted street crossing locations
If a child knows the rules for crossing streets, the risk of an accident involving him will be significantly reduced. To master these rules, crafts that include markings, traffic lights, and road signs are of great importance.
Note!
- DIY satin ribbon bows - step-by-step instructions for creating unusual bows + detailed diagrams with photos
- Do-it-yourself furniture restoration: step-by-step master classes on restoration at home (120 photo ideas)
Do-it-yourself rack: step-by-step instructions with photos and descriptions on how to make an unusual rack
In preschool institutions, schools, and suburban areas, you can build crafts that help you learn the rules for crossing the roadway.
The asphalt path is painted with white stripes representing a crossing sign (“zebra”). Stylized traffic lights are installed at the beginning and end of the crossing.
To make them, two (pedestrian) or three (car traffic lights) holes are cut out in dark-colored plastic bottles into which LEDs are placed. They are powered by a battery and are turned on with a special button.
The holes are covered with transparent colored material of the desired color. The buttons for turning on prohibiting or allowing signals are controlled by the child. A traffic light can be either stationary or portable.
Wall newspaper
A wonderful craft for visual propaganda – a wall newspaper for school. It should be completely dedicated to traffic rules. Photo 6 shows an example of a poster. It colorfully displays road signs and the most common situations on the road. To do this, a bright name is made on a sheet of Whatman paper, colorful comics and outlines of road signs are placed. It is important that the drawings consist of cheerful characters that can attract children's attention.
Crafts on the theme “Traffic Rules” perform an important task in ensuring the safety of children. When making them, the child receives maximum information about a specific episode. Ready-made crafts should become an element of a game that will allow you to learn the basic rules of behavior on the road. When creating them, not only kindergarten teachers and teachers, but also parents should take an active part.
Techniques used in work
- Images created using various paints, pencils, pens, felt-tip pens.
- Applications made of cardboard, woven materials, plastics, paper.
- A collage using applications with hand-drawn, molded elements, origami, surrounding everyday details, photographs and other things.
- Layout, that is, the creation of volumetric elements.
- The use of fabrics, threads, embroidery, knitting and other techniques.
To make crafts dedicated to traffic rules, almost all available materials are used: plastic, plywood, cardboard, textiles, old toys, branches, fruits and things intended to be thrown away. The choice of material mainly depends on the age of the child, and should correspond to his interests.
DIY flat traffic lights
Such traffic lights can be made in the form of an application that is hung on the wall. Or stick colored circles on cardboard or a box that is placed on the podium.
Younger children need help drawing the circles for the traffic lights and cutting them out evenly. School-age children can do this on their own.
Made from cardboard and colored paper
- Cut out a strip from dark cardboard.
- We glue it between two black rectangular cardboard blanks.
- On both sides of the rectangles we glue three circles of red, yellow and green.
The visual teaching aid is ready and can be taken to kindergarten or school.
From disks
In every home there are three disks that are not used for their intended purpose because they are scratched or have lost their relevance. They can be used to create a traffic light. Moreover, the shape of the disk is round and there is no need to cut such a shape from other materials.
Progress:
- Place a disk on colored paper and trace its outline.
- Cut out colorful circles.
- Stick them on disks.
- On each disc with a certain color you can draw a funny face. For example, on a red disc it will be sad because movement is prohibited. And on the yellow disk, the face takes on a serious expression, which means to prepare for the transition. On the green disk the image is smiling because movement can be made.
- The finished discs are glued in the correct order onto cardboard, plastic and wooden surfaces. You can create the most unusual designs, but the order of colors in a traffic light remains unchanged.
- You don’t have to completely cover the disk, but glue multi-colored bottle caps to the middle to create a traffic light. Or you can stick strips on the disk in the form of sun rays of different colors.
There are many options for making crafts from disks, and the main thing is to show your imagination. If you make pompoms from yarn, then they are glued on a disk instead of a nose in the middle, and eyes and a mouth are glued from paper. The result will be multi-colored clowns, each with its own facial expression corresponding to the color of the traffic light.
From colored bags
To create a traffic light from packages, you need to stock up on packages of the colors present in the traffic light.
Progress:
- Cut off the handles and bottom.
- Lay out the bag in the form of a rectangle.
- Bend it in half.
- Cut into centimeter strips up to the fold line.
- Connect the resulting parts with tape to form a ball.
- The balls can be attached in a hollow box or connected together like a snowman.
- Decorate with a cap cut out of cardboard and glue on the hands. Place the wand in one hand.
This traffic light is pleasant to the touch and looks very interesting.