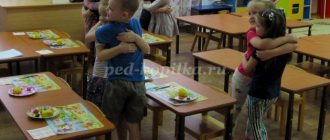
Plasticineography project in the junior group “We sculpt, we create, we draw.”
Plasticineography project in the junior group “We sculpt, we create, we draw.”
Project type:
creative-cognitive, informational
By composition of participants:
frontal
Duration:
long-term
The project is intended
for children from three years old.
Relevance of the topic:
The target guidelines of the Federal State Educational Standard for Preschool Education indicate that a child at a young age should confidently use a spoon, pencil, and comb. In our group, some children with poorly developed manual motor skills awkwardly hold a spoon and cannot fasten buttons on their own. During classes, they find it difficult to roll out a piece of plasticine, they do not hold a brush and a pencil skillfully, so they do not like to draw and sculpt, assuming a negative result in advance - this greatly affects the child’s emotional state and self-esteem.
In connection with the existing problem, I decided to create a set of classes on plasticineography and combine them into a long-term project to develop fine motor skills in children’s hands.
Plasticineography:
“graphy” - create, depict.
“plasticine” is a material with the help of which the plan is carried out.
Plasticineography refers to non-traditional artistic techniques; it involves drawing with plasticine on cardboard or any other dense base. The background and characters are depicted not by drawing, but by sculpting, while objects can be more or less convex, in relief.
Modeling always attracts kids. And plasticineography is doubly interesting, because the child does not even suspect that plasticine can be drawn.
Working with plasticine, the process of modeling itself, helps the child express emotions, his vision of the world around him and his attitude towards it, form aesthetic taste, develop flexibility, coordination, fine motor skills of the fingers (which in turn contributes to speech development). The baby gradually and imperceptibly masters the art of planning and learns to always complete the work.
Plasticine also enriches the sensory experience of the child, who vividly perceives plasticity, shape and weight. When creating an image using plasticineography, the child covers the surface of the sheet with plasticine, rolls and rolls out various shapes, which makes the hand more obedient. It’s safe to say that plasticineography prepares a child’s hand for school writing.
Plasticineography also develops children's creativity (primarily visual) - after all, with the help of this technique you can create an original, unique image with vivid expressiveness.
Children in early preschool age are already quite familiar with plasticine: they roll out sausages and balls, flatten them into “pancakes,” pull out plasticine, and mold the details of the image with each other. When getting acquainted with plasticineography for children 3-4 years old, it is extremely important to master new skills, namely: spreading plasticine in a thin layer over the base and “smear”.
Thus, plasticineography is a universal method for developing aesthetic taste, fine motor skills of the fingers, and creative abilities of preschoolers of any age.
The main material is plasticine, and the main tool in plasticineography is the hand (or rather, both hands), therefore, the level of skill depends on the mastery of one’s own hands. This technique is good because it is accessible to children of primary preschool age, it allows you to quickly achieve the desired result and introduces a certain novelty into children’s creativity, making it more exciting and interesting, which is very important for working with children.
One of the undoubted advantages of plasticineography classes with children of primary preschool age is the integration of subject areas of knowledge. The activity of plasticineography allows you to integrate various educational spheres. The topics of the classes are closely intertwined with the lives of children, with the activities that they carry out in other classes (to become familiar with the surrounding world and nature, develop speech, etc.).
Modern developmental technologies and educational programs focus on building a special type of interaction between adults and children, where the problem of creating conditions for the development of each child, taking into account his characteristics, abilities and individual interests, comes to the fore. In order to devote more time to the developed project, I decided to teach plasticineography classes in my group in the afternoon, which provide an opportunity for the comprehensive development of the child.
Objective of the project :
Development of fine motor skills of hands and fingers in children of primary preschool age using artistic and creative activities in plasticineography.
Project objectives:
- To teach to convey the simplest image of objects, phenomena of the surrounding world through plasticineography, to develop the visual activity of children;
- Master the basic techniques of plasticineography (pressing, smearing, pinching, indentation);
- Develop fine motor skills.
- To develop the ability to accept a task, listen and hear the teacher’s speech, act according to the model, and then according to verbal instructions;
- Strengthen the ability to examine various objects (objects) using visual and tactile sensations to enrich and clarify the perception of their shape, proportion, color;
- Cultivate perseverance, accuracy, and the desire to finish what you start.
Project structure.
Several stages of developing plasticineography skills and tasks for each of them.
| № | STAGE | The task before the child. |
| 1. | Preparatory | – Master the technique of pressing. – Master the pressing technique. – Master the technique of smearing plasticine with your fingertip. – Learn the correct finger placement. – Master the technique of pinching off a small piece of plasticine and rolling a ball between two fingers. – Learn to work in confined spaces |
| 2. | Basic | – Learn not to go beyond the outline of the image – Learn to use your finger to smear plasticine all over the drawing, as if painting it. – Use several colors of plasticine – Learn to use a special stack. – Learn to get things done – Learn to do your work carefully – Learn to perform collective compositions together with other children – Learn to restore the sequence of actions performed – Learn to act like a teacher – Learn to act according to the teacher’s verbal instructions |
| 3. | Final | – Solve creative problems independently. – Choose a drawing to work on yourself. – Form a personal attitude towards the results of your activities |
The expected result in the development of integrative qualities is that by the end of the project children:
* Implement cognitive activity.
All selected material for classes with children has a practical orientation, relies as much as possible on their life experience, helps to highlight the essence of the characteristics of the objects and phenomena being studied, and activates images and ideas stored in long-term memory. They allow him to clarify the knowledge he has already acquired, expand it, and apply the first versions of generalization.
* Enrich your vocabulary in an interesting playful way.
In the process of playing out the plot and performing practical actions with plasticine, there is a continuous conversation with the children. Such a playful organization of children’s activities stimulates their speech activity, causes speech imitation, the formation and activation of a vocabulary, and the child’s understanding of the speech of others.
* Get acquainted with works of art -
poems, nursery rhymes, finger games.
* Children develop their first elementary mathematical concepts
about the account, size, value.
* Develop sensory standards.
Sensory development occupies one of the central places in working with children in plasticineography. In the younger group, general sensory abilities develop: color, shape, size.
* But the main importance of plasticineography classes is that at the end of the training -
The child develops manual skill, strengthens hand strength, movements of both hands become more coordinated, and finger movements are differentiated. This is facilitated by good muscle load on the fingers. Children develop pincer grasping, i.e., grasping a small object with two fingers or a pinch; they are also able to independently carry out movements in all its qualities: strength, duration, direction, etc.
Project implementation:
First of all, a series of trial classes “Magic Plasticine” were conducted, in which children became acquainted with plasticine, with some techniques for its use: rolling, bending, pinching, flattening, pulling parts from the general shape through playful interaction with the material and the fairy-tale hero.
Based on these results, a project has been compiled in which the learning of the material is carried out in stages, from simple to complex.
At the first lessons, children were introduced to plasticineography as a method of drawing with plasticine, its features, tools, and simple technological techniques. They were given the opportunity to play with plasticine: touch, smell, mash, and express their impressions of the plasticine.
Calendar-thematic lesson plan
on plasticineography with
children of the younger group
(2017 – 2022 academic year)
| A week | Subject | Goals |
| September | ||
| 1st | "Shine the sun, Shine a clear light.” | Introduce children to some techniques for using plasticine: rolling out thin sausages, bending, pinching, flattening, pressing onto cardboard. |
| 2nd | “Let’s decorate the doll’s dress” | Teach children to independently pinch off small pieces of plasticine from a piece and roll them into balls with a diameter of 5-7 mm. Continue to teach children to use several colors of plasticine in their work. Continue teaching how to attach “peas” at a distance from each other. Develop fine motor skills of fingers. |
| 3rd | "Autumn Leaves" | learn to smear plasticine over the image of a leaf, strengthen the ability not to go beyond the contours, develop finger strength when pressing. Nurture creative imagination. |
| October | ||
| 1st | “The chicken went out for a walk and nibbled some fresh grass.” | Learn to create the image of green grass from thin columns, strengthen the ability to roll out columns and attach them to cardboard. Develop finger strength and coordination of movements. |
| 2nd | "Leaf Fall" | Continue learning to tear off small pieces of plasticine, attach them to the base and smear them with your finger. Strengthen the skills of tearing off pieces. Develop an eye. Cultivate the ability to see beauty. |
| 3rd | "Autumn Tree" | Learn to create the image of an autumn tree. Strengthen the ability to sculpt colorful leaves and attach them to cardboard. Foster a love for the beauty of nature. |
| November | ||
| 1st | "Pourable apple" | Develop the ability to find connections between the shapes of real and depicted fruits, to convey their natural features and color. Remind children about the properties of plasticine: soft, pliable, continue to introduce children to the technique of plasticineography - pouring one color into another. |
| 2nd | “The prickly hedgehog has no head or legs. » | To develop children’s practical skills in creating a given image through plasticineography. Develop fine motor skills when performing techniques for working with plasticine (pinching, rolling). |
| 3rd | “Like a cat’s mustache of amazing beauty” | Strengthen the technique - smearing (in different directions). We continue to teach children to pinch off small pieces of plasticine on their own. Develop fine motor skills of fingers. |
| 4th | "Herringbone"" | Develop the ability to create an expressive and interesting image of familiar objects (herringbone), while continuing to introduce children to the technique of rolling. Improve technical and visual skills, consolidate the ability to work along a contour. Develop children's creativity. |
| December | ||
| 1st | "Snow, snow, white blizzard" | Reinforce techniques for working with plasticine - pinching, rolling, flattening. Development of fine motor skills of the hands. Development of aesthetic taste. |
| 2nd | "Snowflakes - Chillers" | Conversation with children about winter. Formation of emotional perception of the surrounding world. Reinforcing the technique of rolling out sausages and flagella of different lengths. Encouraging independence and originality in creating snowflakes from plasticine. |
| 3rd | "New Year's balls" (team work) | Teach children to create compositions based on the integration of drawing and plasticineography. Continue teaching children to smear plasticine all over the base without going beyond the outline. Develop consistency in the work of both hands. |
| 4th | "New Year card" | Create a molded picture with a convex image. Developing children's creative imagination when decorating a Christmas tree or snowman. Development of fine motor skills of the hands. |
| January | ||
| 1st | “There is snowfall on the site (trees under the snow)” | Expanding ideas about winter, consolidating winter signs. Forming children's interest in winter phenomena (snowfall), examining the trees in the area after a snowfall, depicting them using plasticineography techniques. |
| 2nd | "Snowman " | To consolidate children's practical skills when creating a given image through plasticineography. Continue to learn to distinguish objects by size. Develop fine motor skills when performing techniques for working with plasticine (rolling and flattening). Encouraging children's initiative to decorate a familiar image. |
| 3rd | "Bullfinch" | Strengthen the ability to smear plasticine over an image without going beyond the outline. Develop finger strength and the ability to combine colors. Expand children's understanding of wintering birds. Cultivate love for native nature. |
| February | ||
| 1st | "Titmouse" | Continue to consolidate children's knowledge about wintering birds, help distinguish between bullfinch and titmouse. Continue learning how to paint the bird using the smearing technique. Formation of independent work skills. |
| 2nd | "Cloud" | To develop children's practical skills in creating a given image (cloud) through plasticineography. Develop fine motor skills when performing techniques for working with plasticine (pinching, rolling), continue to introduce the phenomena of inanimate nature. |
| 3rd | "Planes are flying high" | To form an interest in the surrounding world, realistic ideas about surrounding household items. Continue to master the skills of working with plasticine: pinch off, roll sausages of different lengths (long and short), and try to convey the structure of an airplane in your work. Independence in choosing the color of the material. |
| 4th | "Bunny" | Generalization of ideas about the life of wild animals in winter. Examination of a painting depicting a hare, features of appearance. Improve technical and visual skills, consolidate the ability to work along a contour. Develop children's creativity, encourage children to independently select the desired color, compare sizes (long ears), and develop fine motor skills. |
| March | ||
| 1st | "Flowers for Mom" | A conversation about our mothers, about the holiday of March 8. To consolidate the ability to create crafts using various techniques. Development of fine motor skills, creative imagination. |
| 2nd | "Underwater Kingdom" | Teach children to smear a plasticine ball in two directions, creating a fish tail. Strengthen children's ability to create vertical lines from top to bottom by smearing, creating algae in the aquarium. Strengthen children's ability to create pebbles in an aquarium using pressure. Development of fine motor skills of the hands. Learn to finish things. |
| 3rd | “The buds swell and the leaves bloom” | To develop interest in the world around us, realistic ideas about nature and plants, and to introduce children to the signs of spring. Continue to master the skills of working with plasticine: pinch off, roll sausages of different lengths (long and short - tree branches), in your work try to convey the characteristic features, structure (trunk, thick and thin branches), roll up lumps (buds), place them on all over the tree. Encourage independence in choosing the right color for the material. |
| 4th | "Merry Umbrella" | Conversation about spring. Forming interest in spring phenomena - raindrops, melting snow. Continue to develop in children the ability to create a familiar image through familiar plasticineography techniques. |
| April | ||
| 1st | "Curly Lamb" | Remind children about the properties of plasticine: soft, pliable, introduce children to the technique of sculpting a given image - folding (twisting) a sausage, developing initiative, creative manifestations when designing work. |
| 2nd | "Easter Egg" | To develop children’s practical skills in creating a given image through plasticineography, to develop fine motor skills when performing techniques for working with plasticine (pinching, smearing, working inside a contour), and to develop aesthetic taste when designing work. |
| 3rd | "Beautiful horse" | Generate interest in the world around you. Continue to master the skills of working with plasticine: pinch off, roll sausages of different lengths (long and short - legs), the technique of smearing inside the contour. Development of children's creativity. |
| May | ||
| 1st | "Balls for a kitten" | Remind children about the properties of plasticine: soft, pliable, continue to introduce children to the technique of plasticineography - pouring one color into another. Develop imagination and creativity. |
| 2nd | "Victory Salute" | Continue to teach how to create a three-dimensional picture, consolidate plasticineography techniques, and develop color perception. Cultivate love for your country. |
| 3rd | "Yellow dandelions." | Consolidation of skills and methods of working with plasticine using the plasticineography technique. Diagnostics by iso-activity (sculpting). |
Drawing with plasticine: basic techniques
A number of techniques are already known to children, because drawing with plasticine is preceded by learning to sculpt.
Kids already know how to:
- roll up;
- roll out;
- flatten;
- pull out;
- give the desired shape to a piece of plasticine.
What skills do children acquire when learning plasticineography?
To draw with plasticine, children will have to learn:
- pinch off;
- smear;
- press in;
- smooth;
- mix colors;
- add texture using stacks.
There are many ways to create an image:
1. Direct . Different colors of plasticine are used. The most popular patterns are vegetables, leaves, mushrooms, and fish. Direct plasticineography is the first acquaintance with unusual drawing. Large and simple shapes are used, which are easy for even kids to work with.
2. Stained glass (reverse) . A drawing is applied to the plexiglass plate with a marker. The resulting contour is filled with plasticine. Reverse plasticineography is very effective. Very often, sour cream lids are used as a base.
3. Mosaic. The figure or design is created with multi-colored plasticine balls. Mosaic plasticineography is very simple. The secret to beautiful drawings is a good selection of colors and accuracy. An example of such a technique is the master class “Cockerel Fish”, the body of which is lined with mosaics.
4. Contour. This method is practiced by older children. The contour is filled with plasticine flagella, which are squeezed out using a syringe. The material must be heated. For this purpose, use either a microwave or hot water. A plasticine sausage is placed in a syringe without a needle and heated along with it.
5. Multi-layered. The material is applied with multi-colored strokes. The painting is created by layering. The result is a three-dimensional image. Like, for example, in a plasticine Easter card.
6. Textured. The convexity of the image varies. Children learn to create high reliefs, bas-reliefs and counter-reliefs. Textured plasticineography is one of the most difficult types, which is why it is taught to children in preparatory groups. Look how we made a fairy tale character - the Gruffalo.
7. Modular. They perform the elements separately using different techniques, and then build a single composition from them. For example, you can create a relief image from flagella, balls and sausages.
Using this technique you can create a wonderful underwater world.
The description is just an example; everyone will have their own fantasy underwater kingdom. See detailed instructions on how to make an underwater world from plasticine here.
To make corals and algae, you can mix colors to achieve beautiful tints. For example, blue, violet, blue, light green and dark green shades are suitable for making underwater plants. Corals and shells are sculpted from pink, yellow, and white plasticine.
When all the parts are ready, they are attached to a painted sheet of paper.
The craft helps you remember what the inhabitants of the underwater world look like and gives you an idea of scale. It uses figures of different shapes, so children will have to remember all the plasticineography techniques they have learned.
When creating a three-dimensional image, children are faced with the concept of measure. If you overload the picture with details, the whole effect will disappear. Instead of a bright and mysterious underwater world penetrated by the sun's rays, you will get a pile of plasticine figures.
The image contains many small and large details, so it will take a lot of patience and perseverance to reproduce all the inhabitants of the seabed.
This work is great for group work in a kindergarten group. Children learn the skills of teamwork, distribution of responsibilities, mutual assistance, and they will achieve excellent results!
Templates for plasticineography
Templates must be appropriate for the age of the students. If in the younger group preference is given to simple forms, then in the older groups complex images are created, with many elements, with different relief.
The templates are great for kids to get creative with. At the first stage, the contour is simply filled with plasticine. You can build the work differently and use a template on a sheet already covered with plasticine. A butterfly with a flower is made using this technique.
For this craft, leftover plasticine or old crafts are suitable, because you will need beautiful multi-colored tints.
Small pieces of plasticine need to be smeared on paper, trying to make as thin a layer as possible. Print a template that includes the butterfly outline, stem, three leaves, flower core and petals.
Cut out the printed parts from a plasticine-coated sheet. On white paper, use colored felt-tip pens or wax crayons to draw the earth with strokes. Glue the cut out colorful parts. Sculpt the body of a butterfly from plasticine and create a texture on it using a stack. Using a felt-tip pen, draw antennae for the butterfly and make plasticine eyes.
Pupils of the younger group can also cope with this craft. She teaches how to work with a template and trains the skill of smearing plasticine in an even, thin layer. Cutting out parts from a sheet covered with a layer of plasticine requires care and should not be rushed.
The “recycled” use of plasticine shows that opportunities for creativity can be found in already used objects and seemingly unnecessary items.