New Year's yarn applique
A child, with the help of adults, can make any simple picture. Many children like the “New Year Tree” applique. An interesting option is a craft made from yarn. An adult and a child draw a sketch of a Christmas tree on cardboard using a simple pencil. You need to choose the color of the yarn: green, white, pink, black. Cut the threads into small strips. Larger green yarn - these will be needles. Mark where on the sketch you will hang the Christmas tree balls, and apply glue to this place. Apply pink threads to it using tweezers, this will make the shavings more even. There should be a tree trunk at the bottom of the sketch; glue should be applied to this place and sprinkled with black shavings. Spread the free space of paper with glue and sprinkle with green thread. This will be the “Christmas tree with needles” applique. It’s beautiful if there’s snow on the green beauty, isn’t it? To do this, sprinkle these places with white thread. The final stage is to place something heavy on the applique so that the material sticks better. After an hour, remove and shake off excess threads.
You can make white needles instead of green ones, then you don’t have to invent snow. The yarn Christmas tree is completely ready.
Application “Christmas tree made of circles” step by step
For the Christmas tree you need to cut out 8 circles, two of the same size, that is:
- Two circles with a radius of 1 cm;
- Two circles with a radius of 2 cm;
- Two more with a radius of 3 cm;
- And also two with a radius of 4 cm.
Each circle should be folded in half and the fold smoothed.
Next, you need to glue identical circles together so that a corner is formed on top. As a result, one circle will be inside the second. You will get these branches-sections of the Christmas tree.
All of them are perfectly arranged in a herringbone pattern if they are glued to cardboard, starting with the small two and ending with the large ones, with all the corners of the subsequent pairs being inside the previous ones.
Now all that remains is to cut out a trunk from brown paper, glue it and the three-dimensional applique “Christmas tree made of circles” is ready.
It’s very easy to turn such a tree into a New Year’s tree by decorating it with multi-colored paper balls and a yellow star. The applique is beautiful on any background; even at the beginning of work, children can choose the cardboard of the desired color themselves, and begin their work on it.
The Christmas tree can also be used as a craft, but in this case it is advisable to make it entirely from cardboard for greater durability. That is, all double circles and the barrel are attached together with glue, without subsequent gluing to the cardboard base.
Another great alternative to a simple craft for kids is the palm tree applique.
How to model a paper Christmas tree:
1) Use all the tools listed in the list to create an elegant craft. It would be better to immediately take a square sheet; such sets are available on sale and are called “Origami Paper”. If you only have A4 sheets, then they will also work, it will just increase the working time by exactly 1 step.
2) Fold one corner of the paper and align it with the adjacent side. Press down on the fold with your fingernail.
3) Trim the excess part of the sheet that protrudes.
4) Leave the square folded into a triangle. Place the ruler parallel to the fold line. Step back from the fold about 0.8 cm and draw a straight line with a pencil.
5) Place the ruler parallel to one of the legs of the triangle. Draw lines at equal distances from each other.
6) The distance between the lines can be 1 cm. You can first place points by measuring with a ruler.
7) Start making slits on the paper along the lines you drew. Keep the square folded and cut 2 layers of paper at once.
 Cut all the lines on the workpiece.
9) Expand the square. Two parts of the sheet will be cut symmetrically in the form of a fringe.
10) Turn the workpiece towards you with the side on which you drew the lines with a pencil. Start forming the crown of the Christmas tree with the longest strip. Bend it into a loop and glue it to the bottom corner of the square, clearly aligning the edge of the strip with the edge of the paper.
11) Glue the second strip symmetrically, overlapping the end.
12) Next, move up, gluing the second pair of strips. Connect the end to the strip of the first layer.
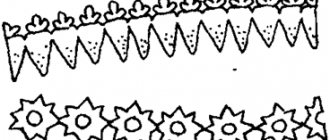
Herringbone applique made of fabric
You can do crafts with young children starting at the age of 2. The younger the child, the simpler the tasks should be given. And before that, the baby needs to explain what an applique is. The Christmas tree is a simple craft. Children as young as 6 years old and as young as 3 years old can handle it. It is better to take fleece fabric. It is easy to cut and glue. You need to take several colors: for toys, Christmas tree, snow and trunk. With his mother's help, the baby cuts strips from green fabric that resemble needles.
Making a three-dimensional Christmas tree out of paper
Fine art is one of children's favorite activities. Applications of varying complexity are also exciting for them. Children need to be provided with colored paper, scissors, glue, a brush and some kind of base in the form of whatman paper or cardboard.
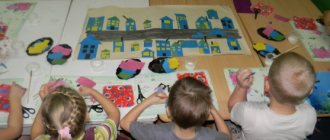
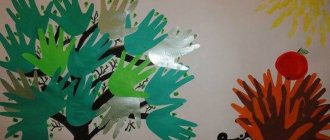
At any age, applique is tempting and interesting. A voluminous Christmas tree is easy to make. To do this, the child can trace his hand and fingers many times with a pencil on green paper. Prepare whatman paper in advance and attach it to the wall. Glue the cut out palms onto it, fingers down, thus creating the shape of a Christmas tree. When the base is ready, you should glue the forms until you get a large volume. From other bright flowers you need to cut out balls, garlands, and more. etc. It all depends on the imagination of the mother and child. So we got a light application “Volume Christmas tree”.
Advice for parents
Not every child finds it easy to make crafts by gluing different parts together. For example, it is still difficult for a 2-3 year old child to cut out individual triangles for a Christmas tree. For this, a child needs an adult nearby. Let the mother draw a solid tree for the baby and ask him to cut it out.
If it doesn't work out, you can help him. The same applies to various details. First, let him learn how to cut out a circle, and then you can create more complex shapes: ducks, bears, etc. When the baby is going to glue, it is better to exclude long sleeves - they will interfere with his work. The child should have his own table for crafts - it’s easier to clean one place than the whole apartment. It is important to comment on colors and geometric shapes during lessons, so your child will quickly learn their names. You need to remember: you can never go from complex to simple, it’s better the other way around. Only then will parents see their child’s achievements and be proud of him.
Sources:
https://tratatuk.ru/prazdniki/novyj-god/novogodnyaya-applikatsiya-elka-iz-bumagi.html https://signorina.ru/2922-elochka.html https://www.syl.ru/article/ 167871/new_applikatsiya-elochka-iz-bumagi-svoimi-rukami-delaem-s-detmi-obyemnuyu-applikatsiyu-elochka